This post may contain affiliate links. For more information, read my disclosure policy.
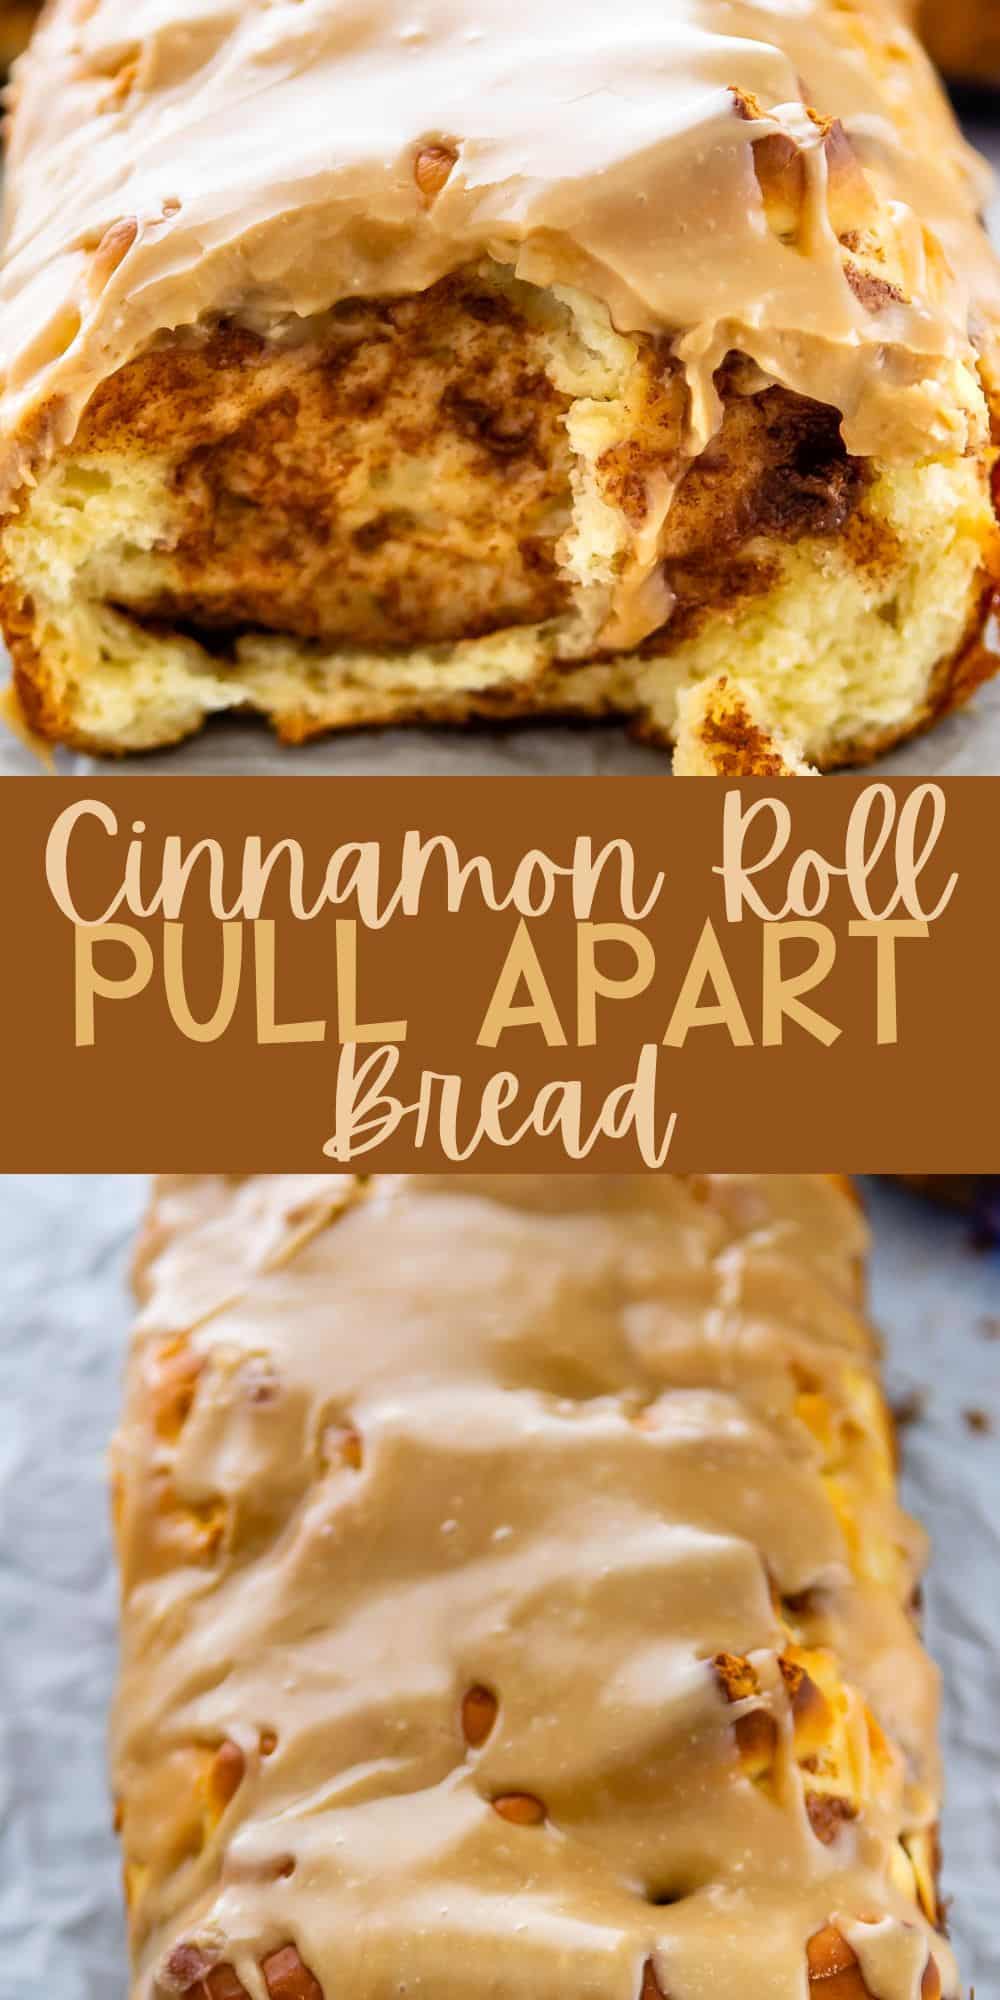
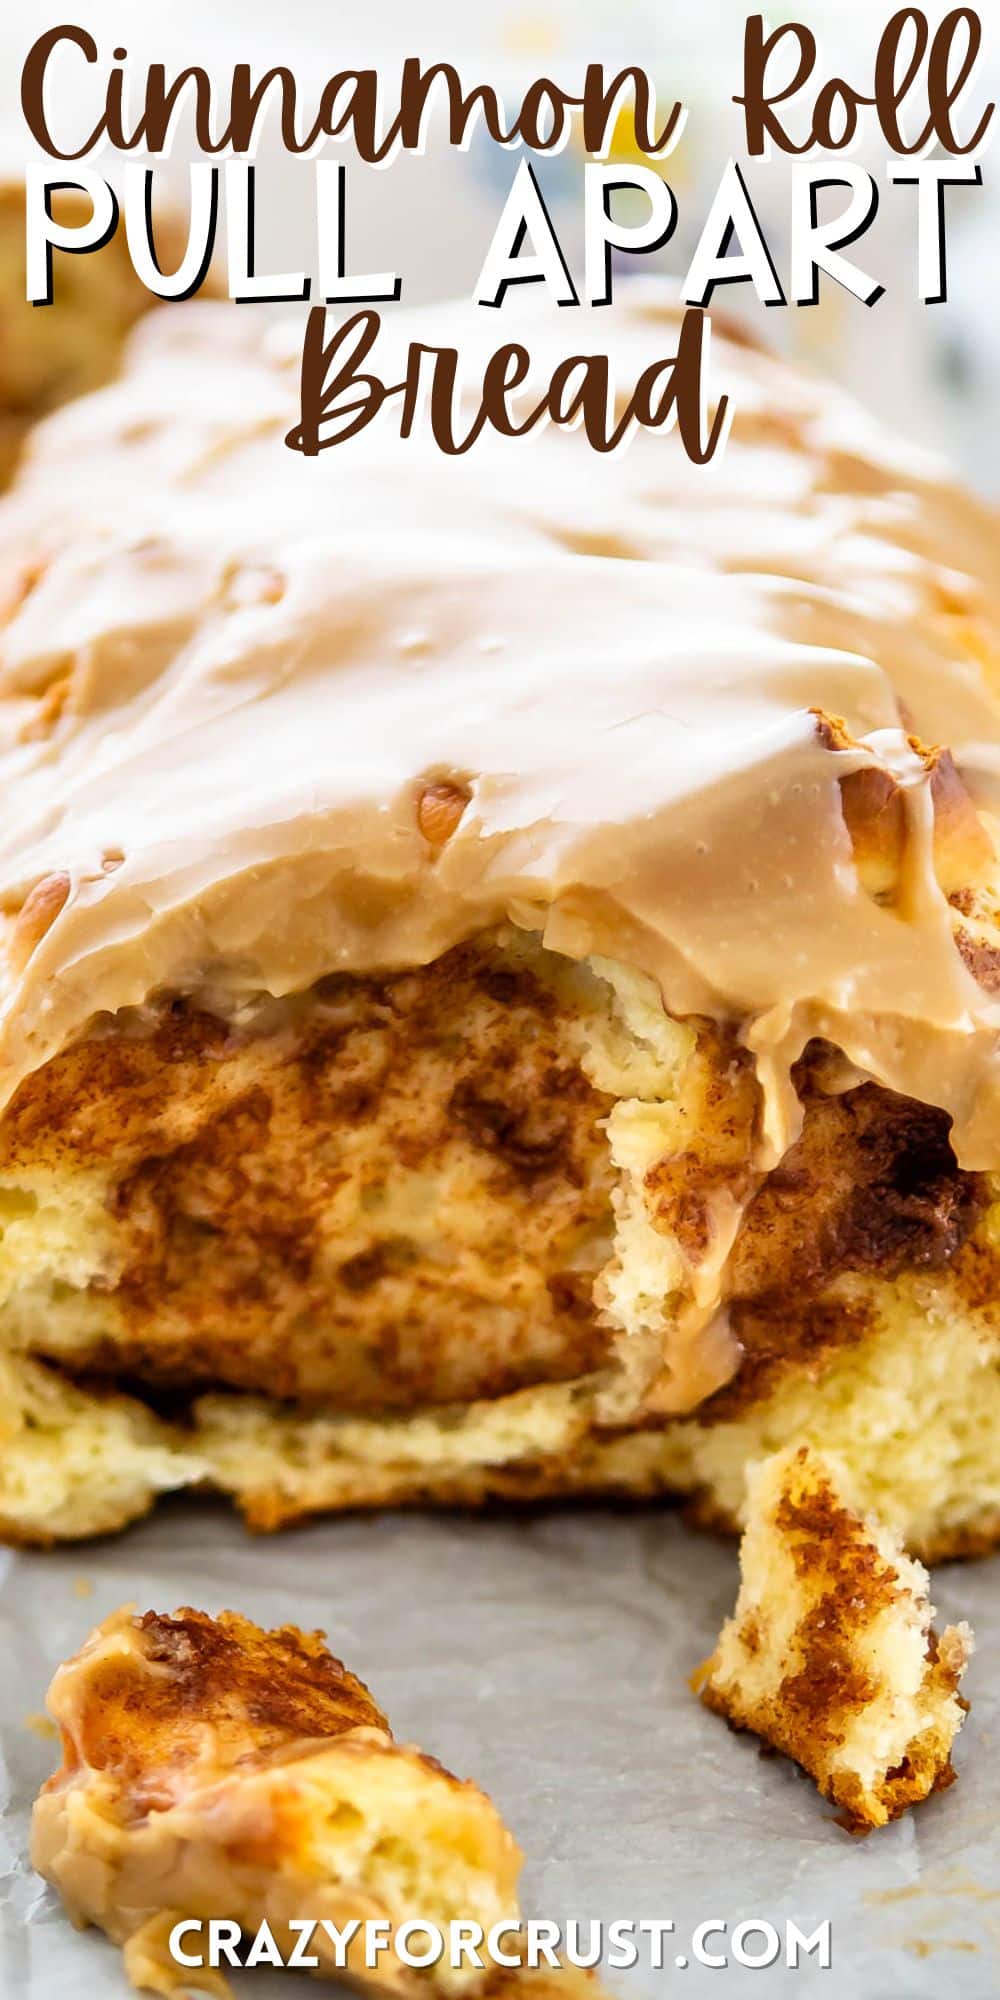
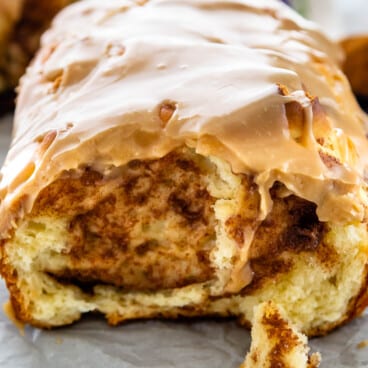
This cinnamon pull apart bread recipe is basically your classic cinnamon roll but in bread form: it’s insanely delicious. Learn how to make this cinnamon bread recipe completely from scratch for a special breakfast.
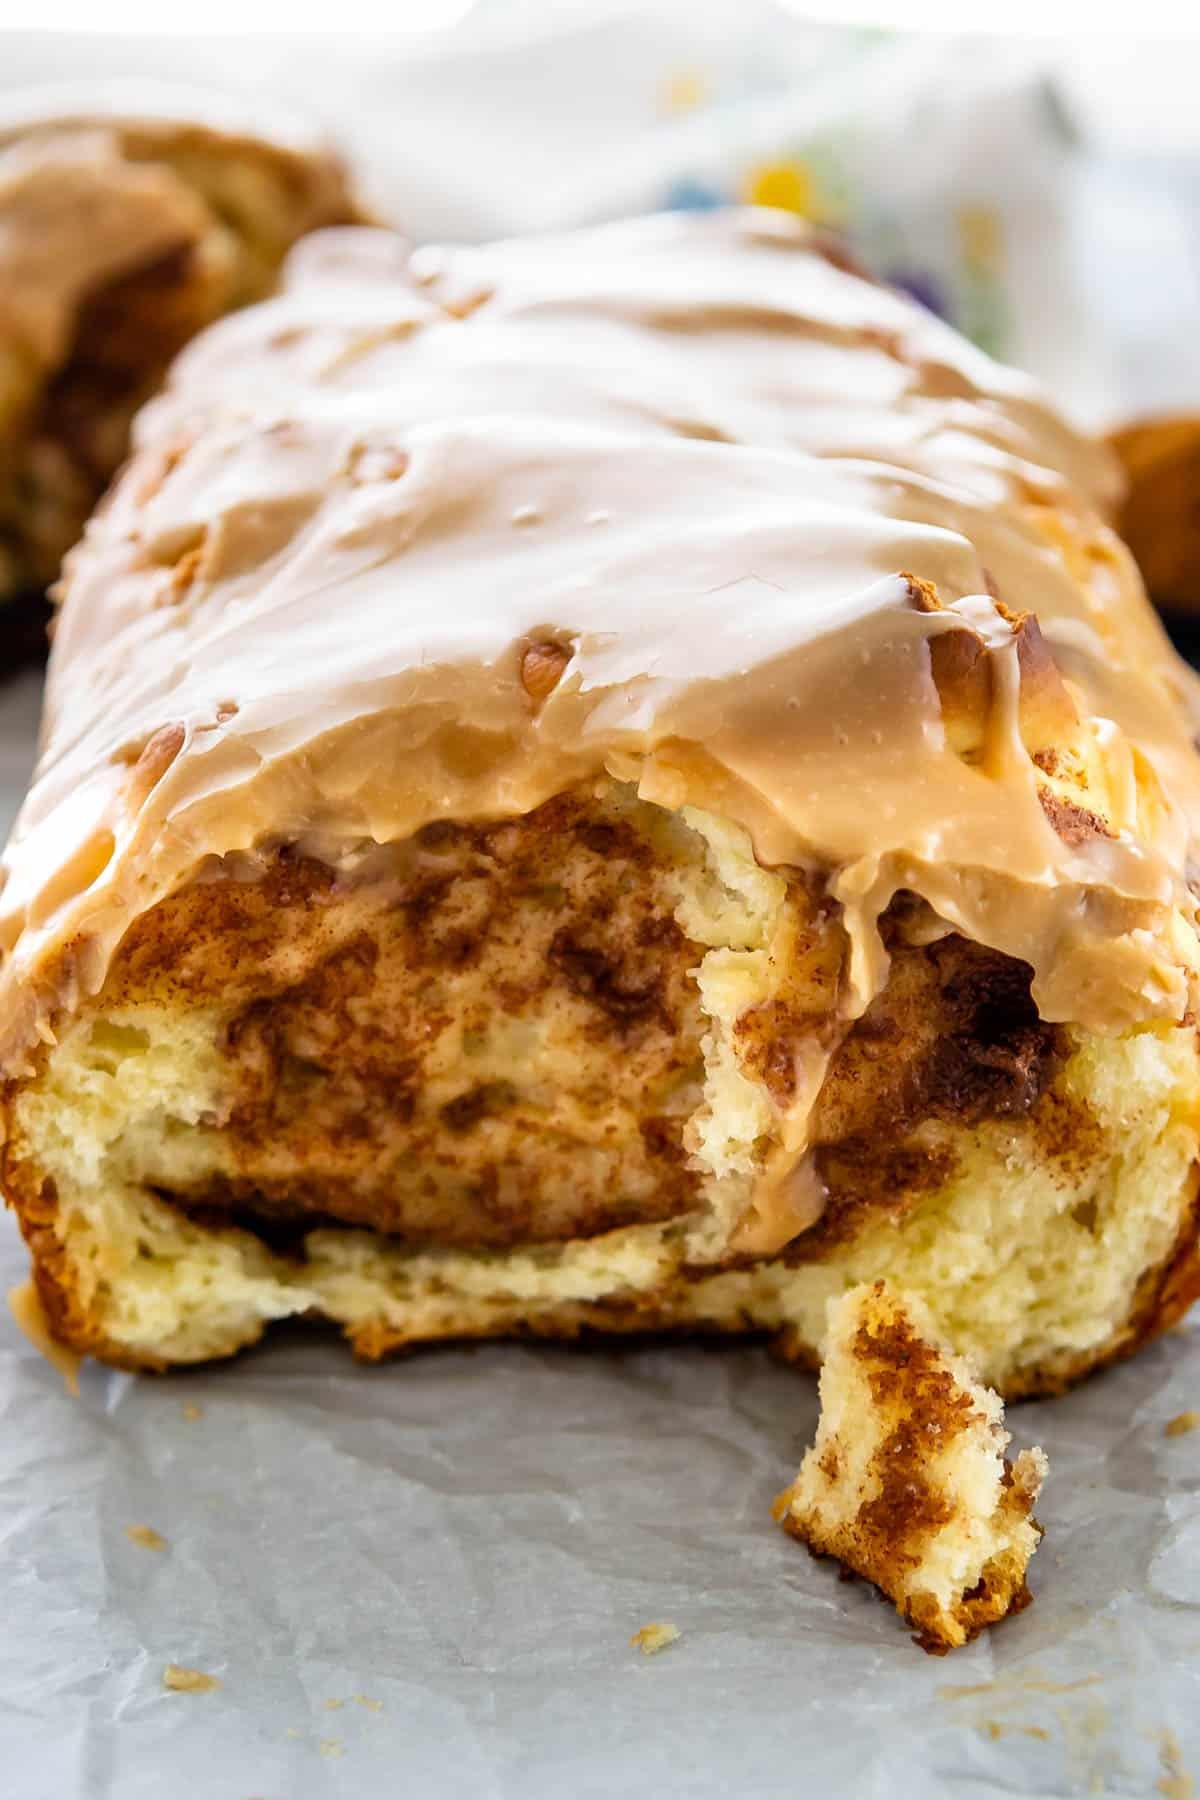
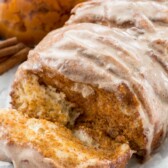
Cinnamon Pull Apart Bread from scratch
That’s one of my favorite things about my cinnamon roll bread recipe: all the hard work is done the day before. The day of you just have to bake it and eat it. That’s my kind of breakfast!
- From scratch yeast cinnamon roll dough
- Buttery cinnamon sugar filling
- Baked in a loaf pan – just pull it apart to eat it!
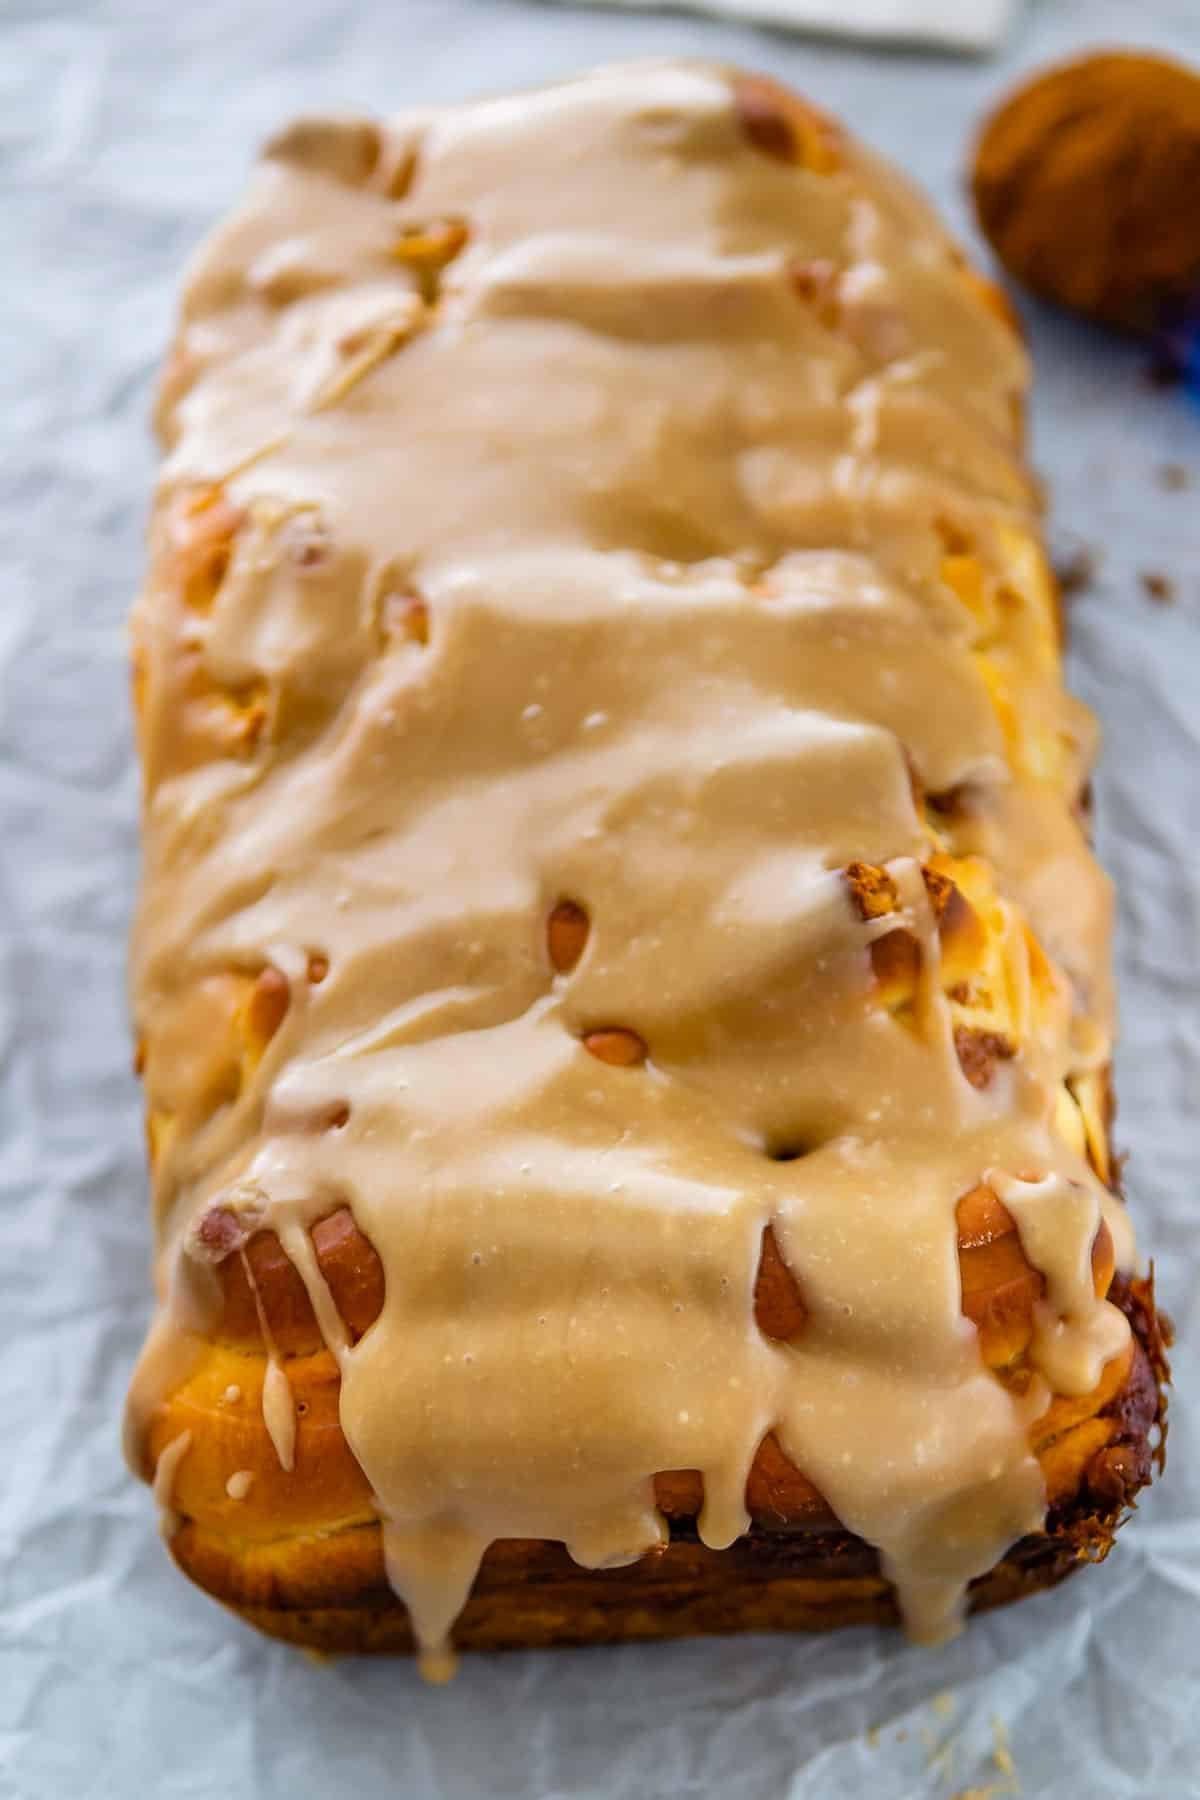
- Maple frosting on top!
Wake up to your kitchen smelling like a fresh bakery and enjoy this gooey sugar cinnamon bread with your morning coffee.

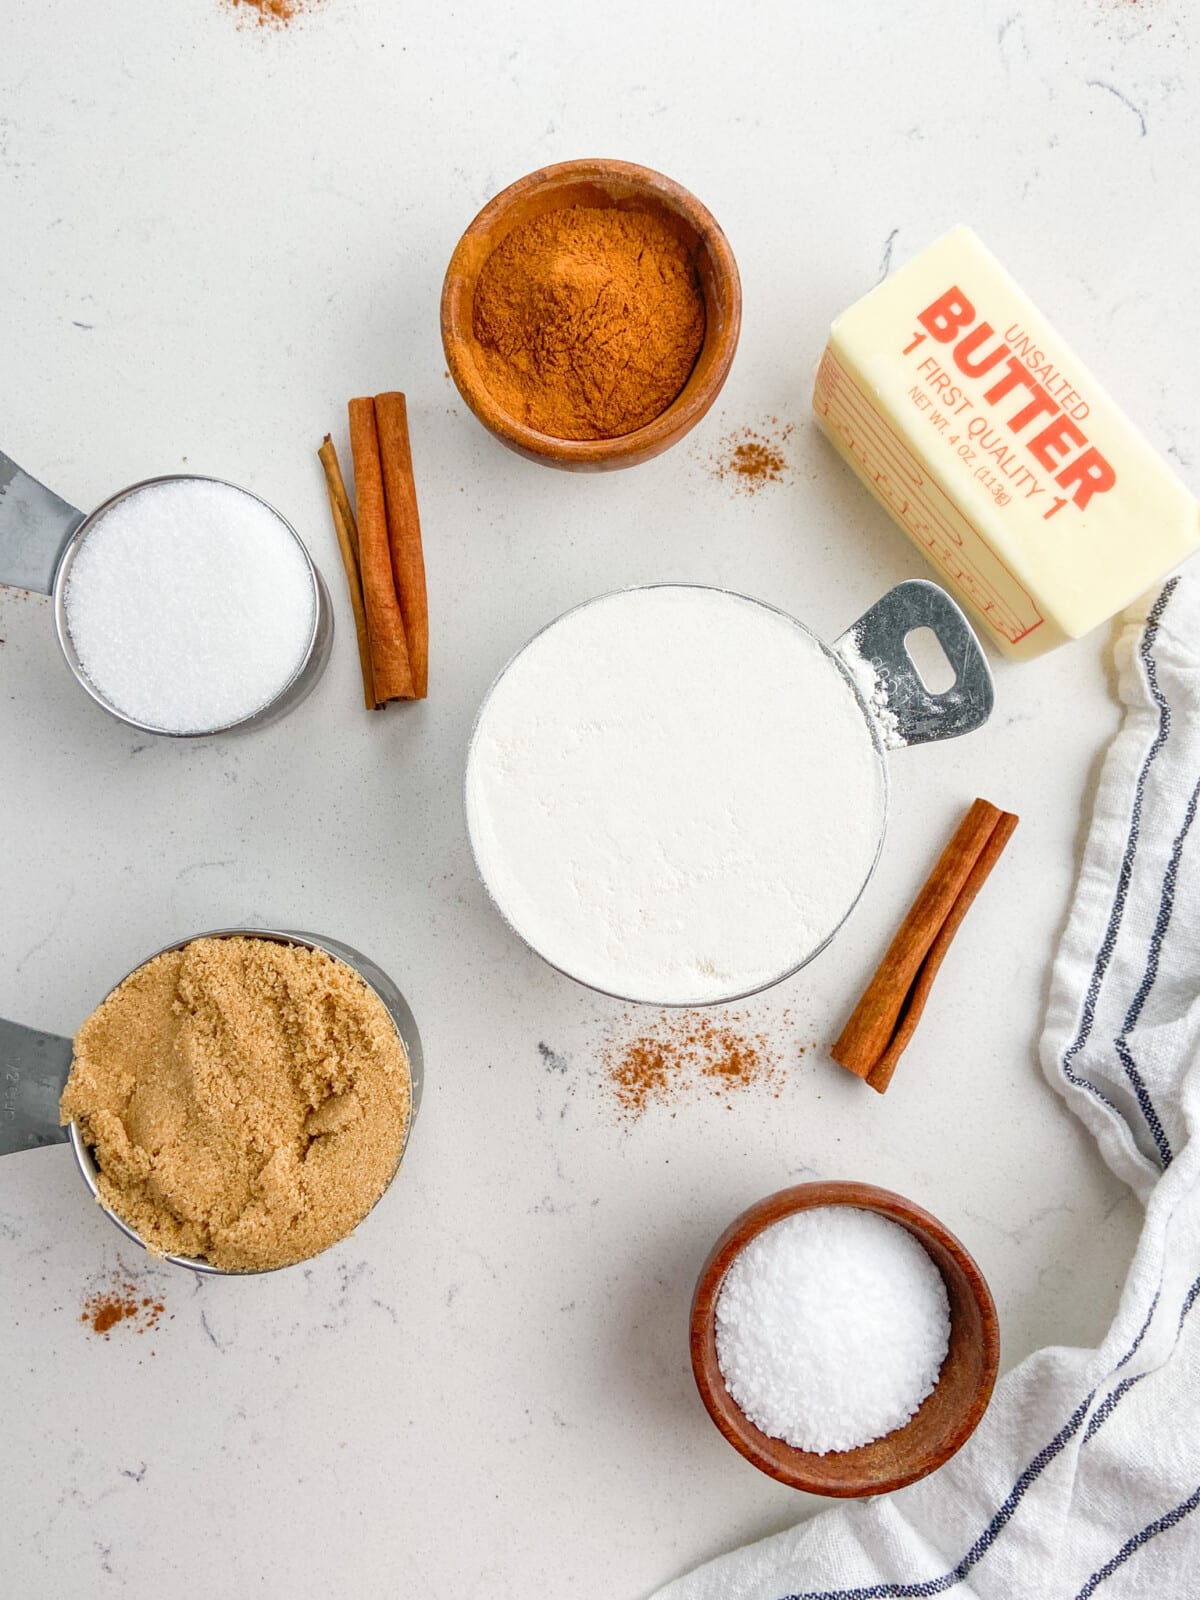
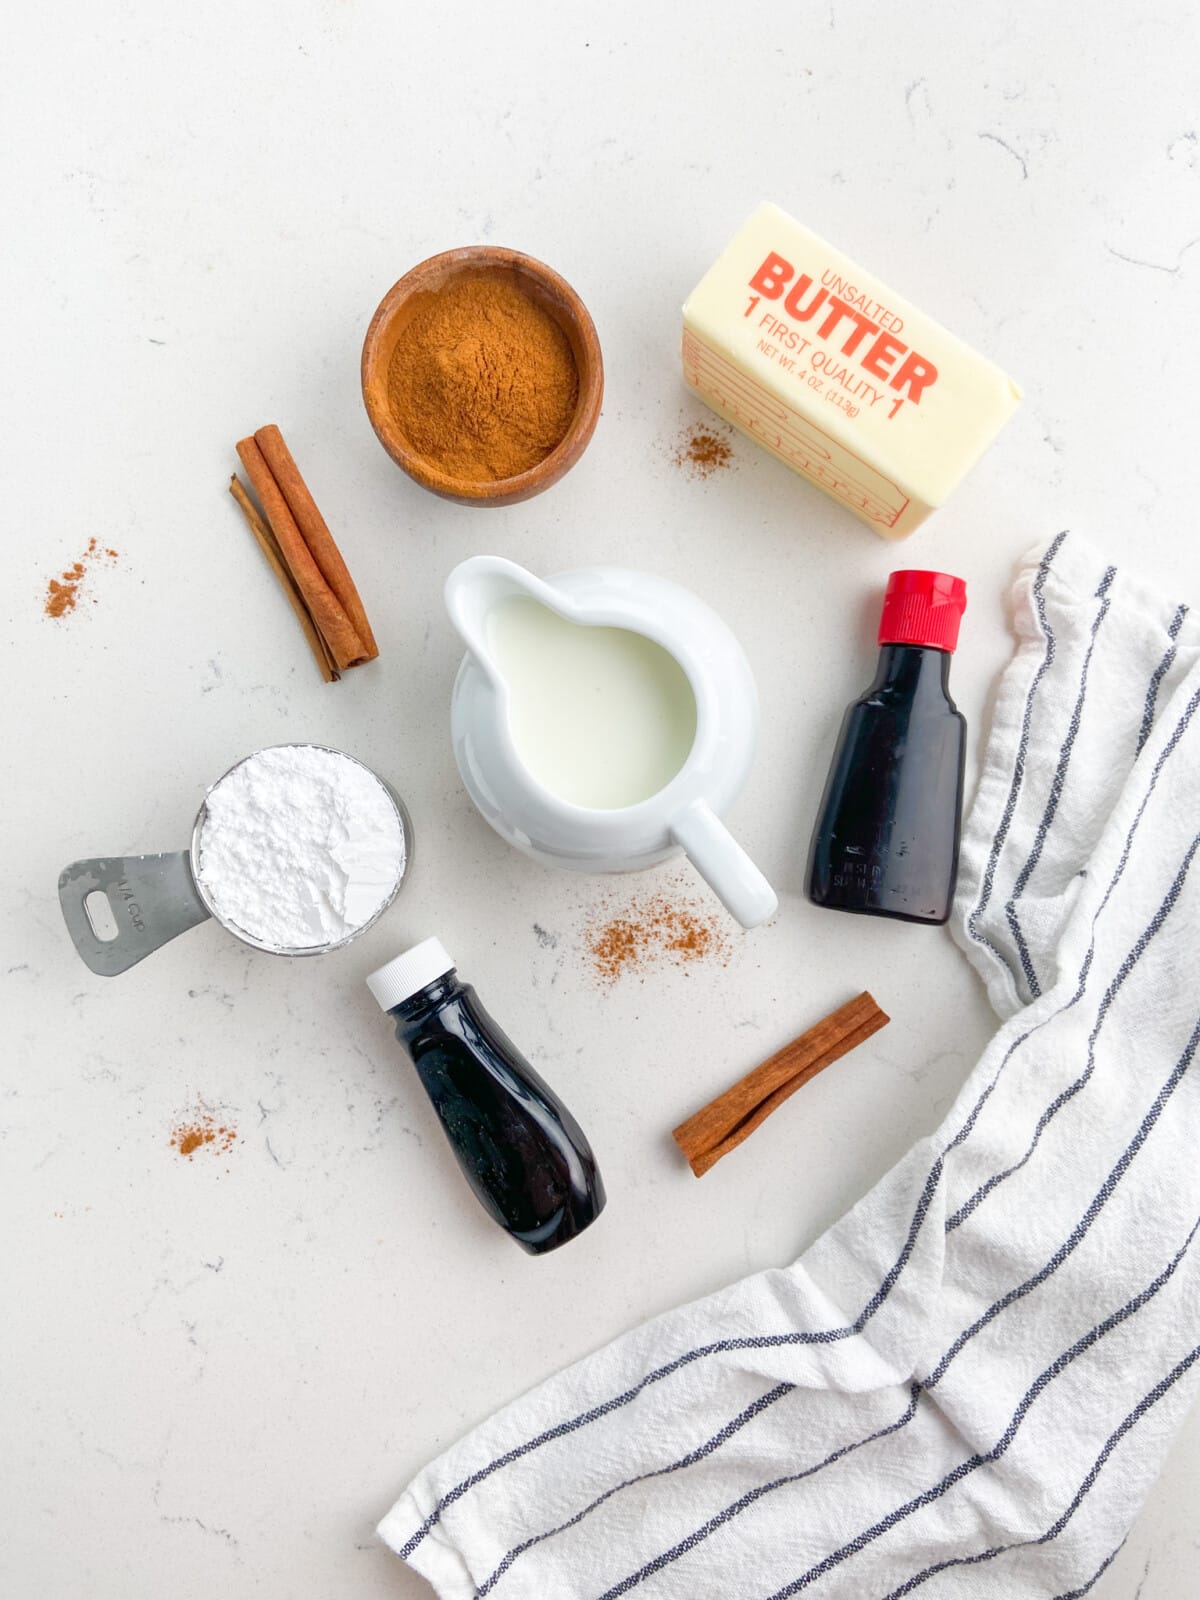
Ingredients needed
- Active Dry yeast: be sure to get active dry yeast, not instant. This recipe was written with active dry in mind.
- Milk: warm non-fat milk in a microwave safe bowl for about 30-45 seconds in the microwave
- Egg: Adding an egg to yeast dough gives it more moisture and fat, making the dough nice and fluffy.
- All-purpose flour: You’ll need it to make the dough, plus more for dusting
- Butter: at room temperature softened unsalted butter is best.
- Brown sugar: you could use white sugar but the brown sugar gives the filling a caramelized taste
- Cinnamon: A must in cinnamon bread!
- Maple extract: adds a delicious sweet flavor to the icing
Click to see the recipe card below for full ingredients & instructions. See below the recipe card for even more information: process shots, variations, FAQ and more.
How to make Cinnamon Pull Apart Bread
Making Yeast Dough
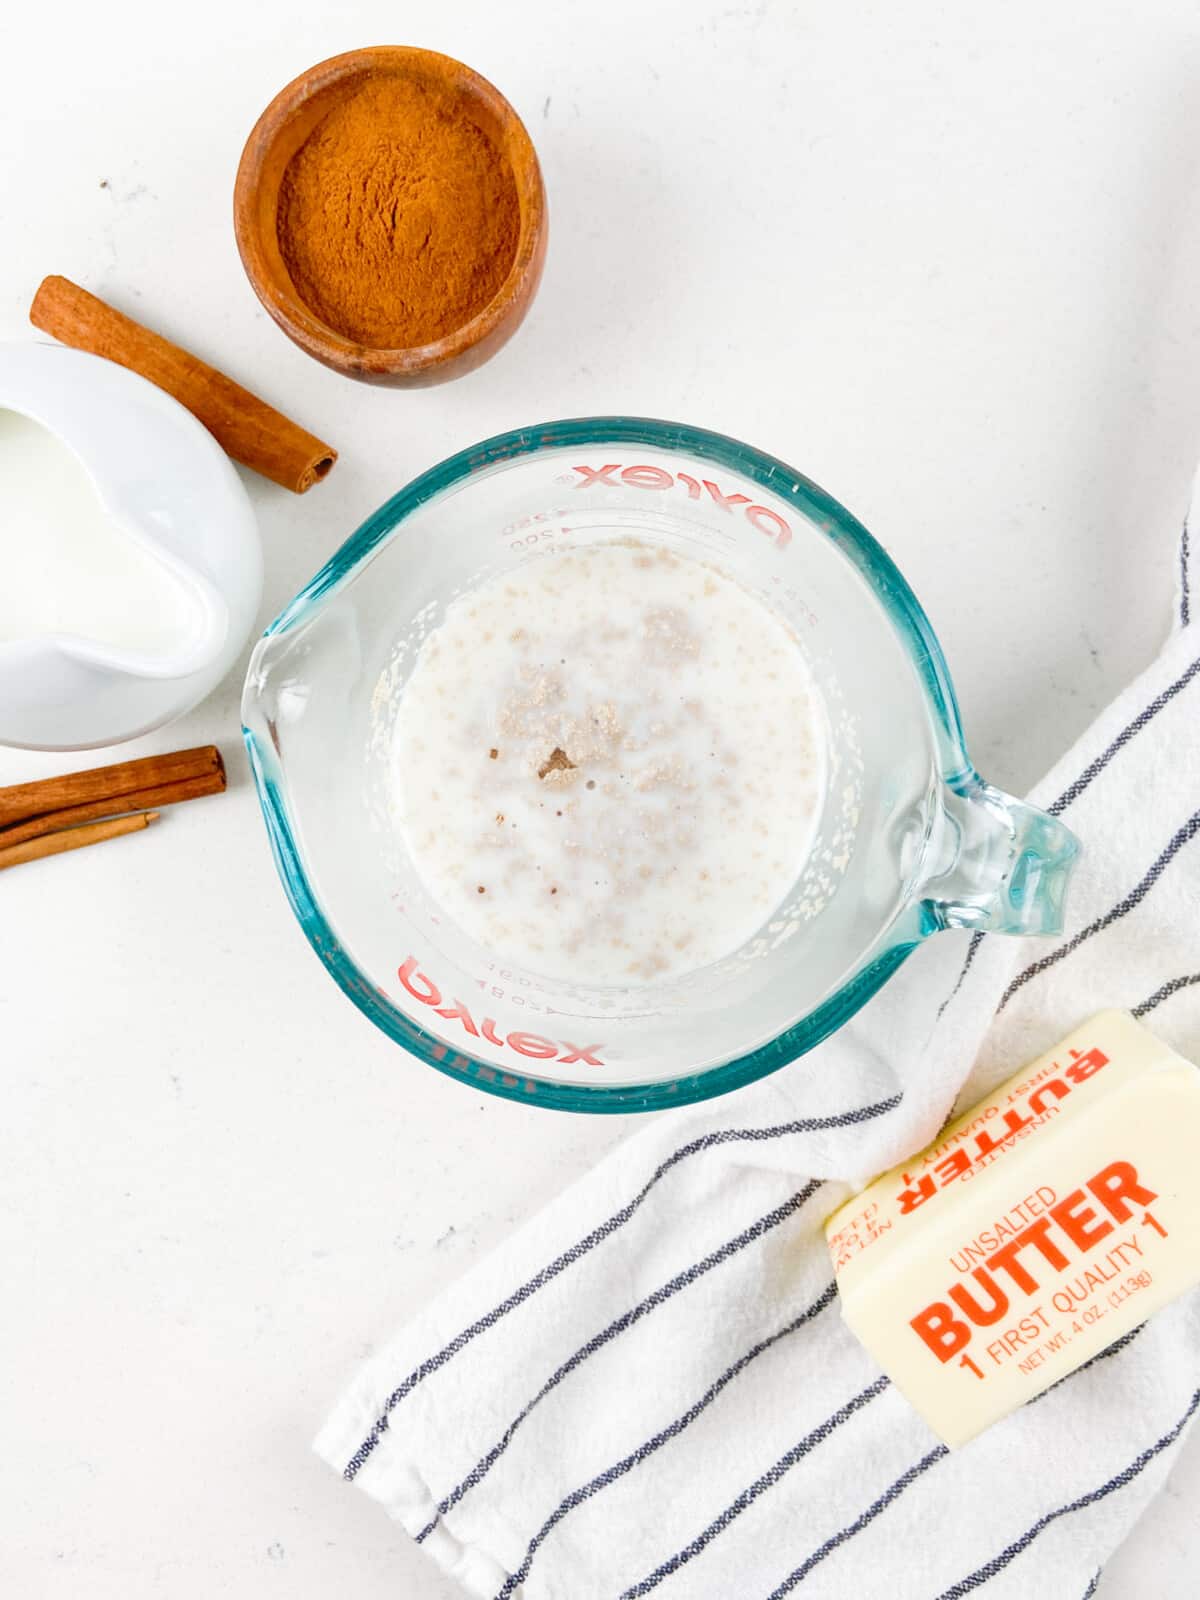
- Add yeast to warm milk and stir. Let it sit for a few minutes.
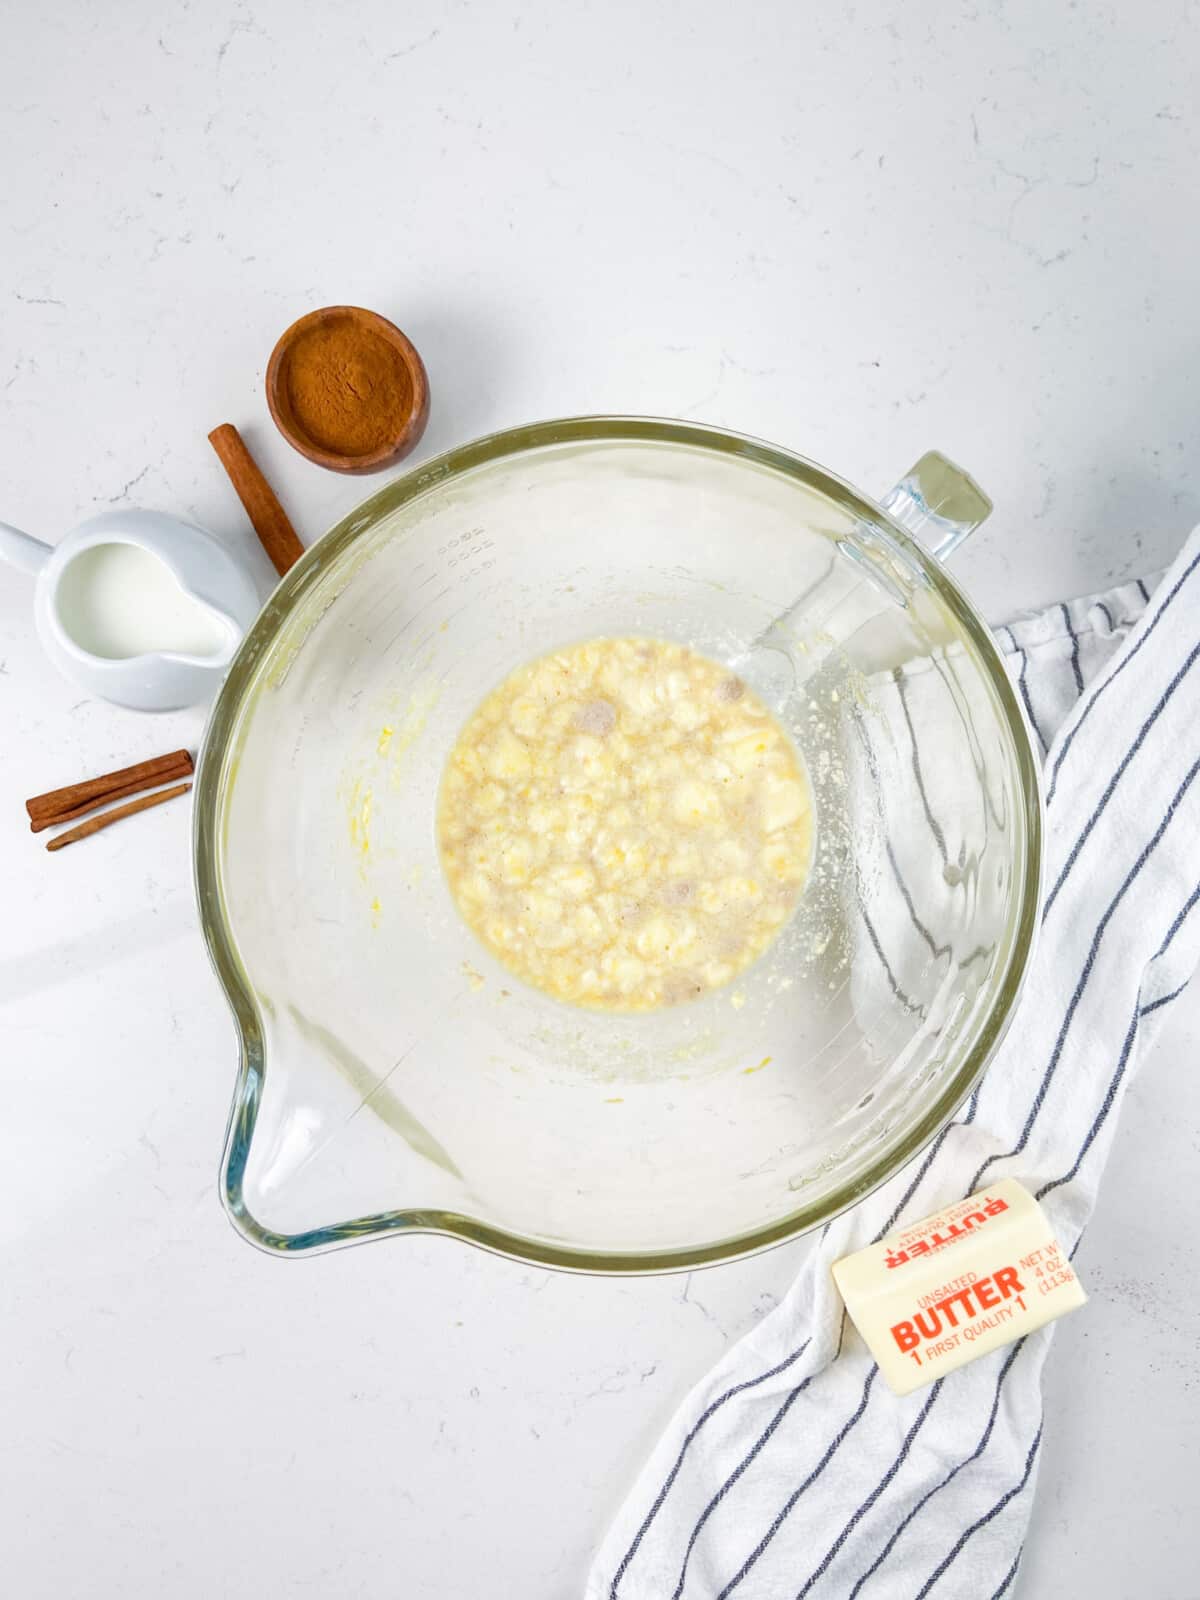
- Place sugar, butter, salt, and egg in the bowl and mix until the butter is distributed throughout the liquids. It may be chunky. Pour in the milk/yeast mixture and stir.
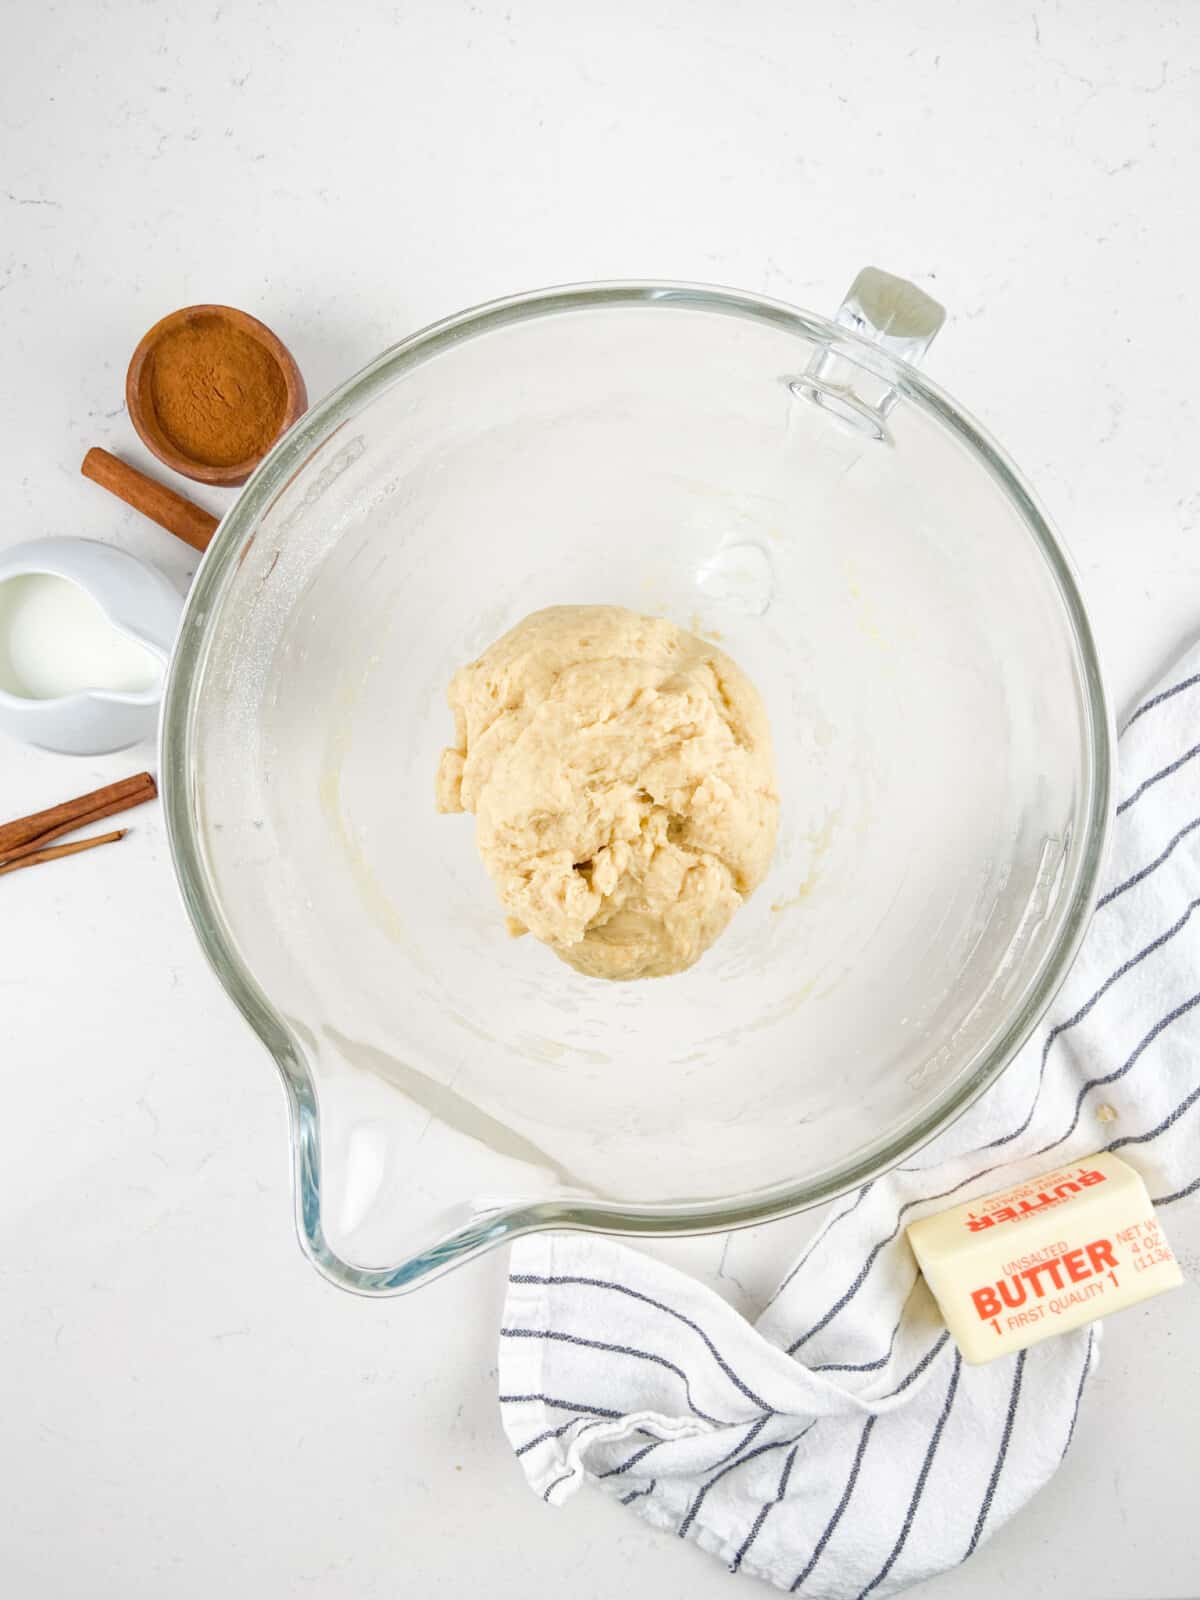
- Add flour and stir until the dough forms a ball in the center of the bowl. If the dough is still very sticky, you can add an additional 1/4 cup of flour.
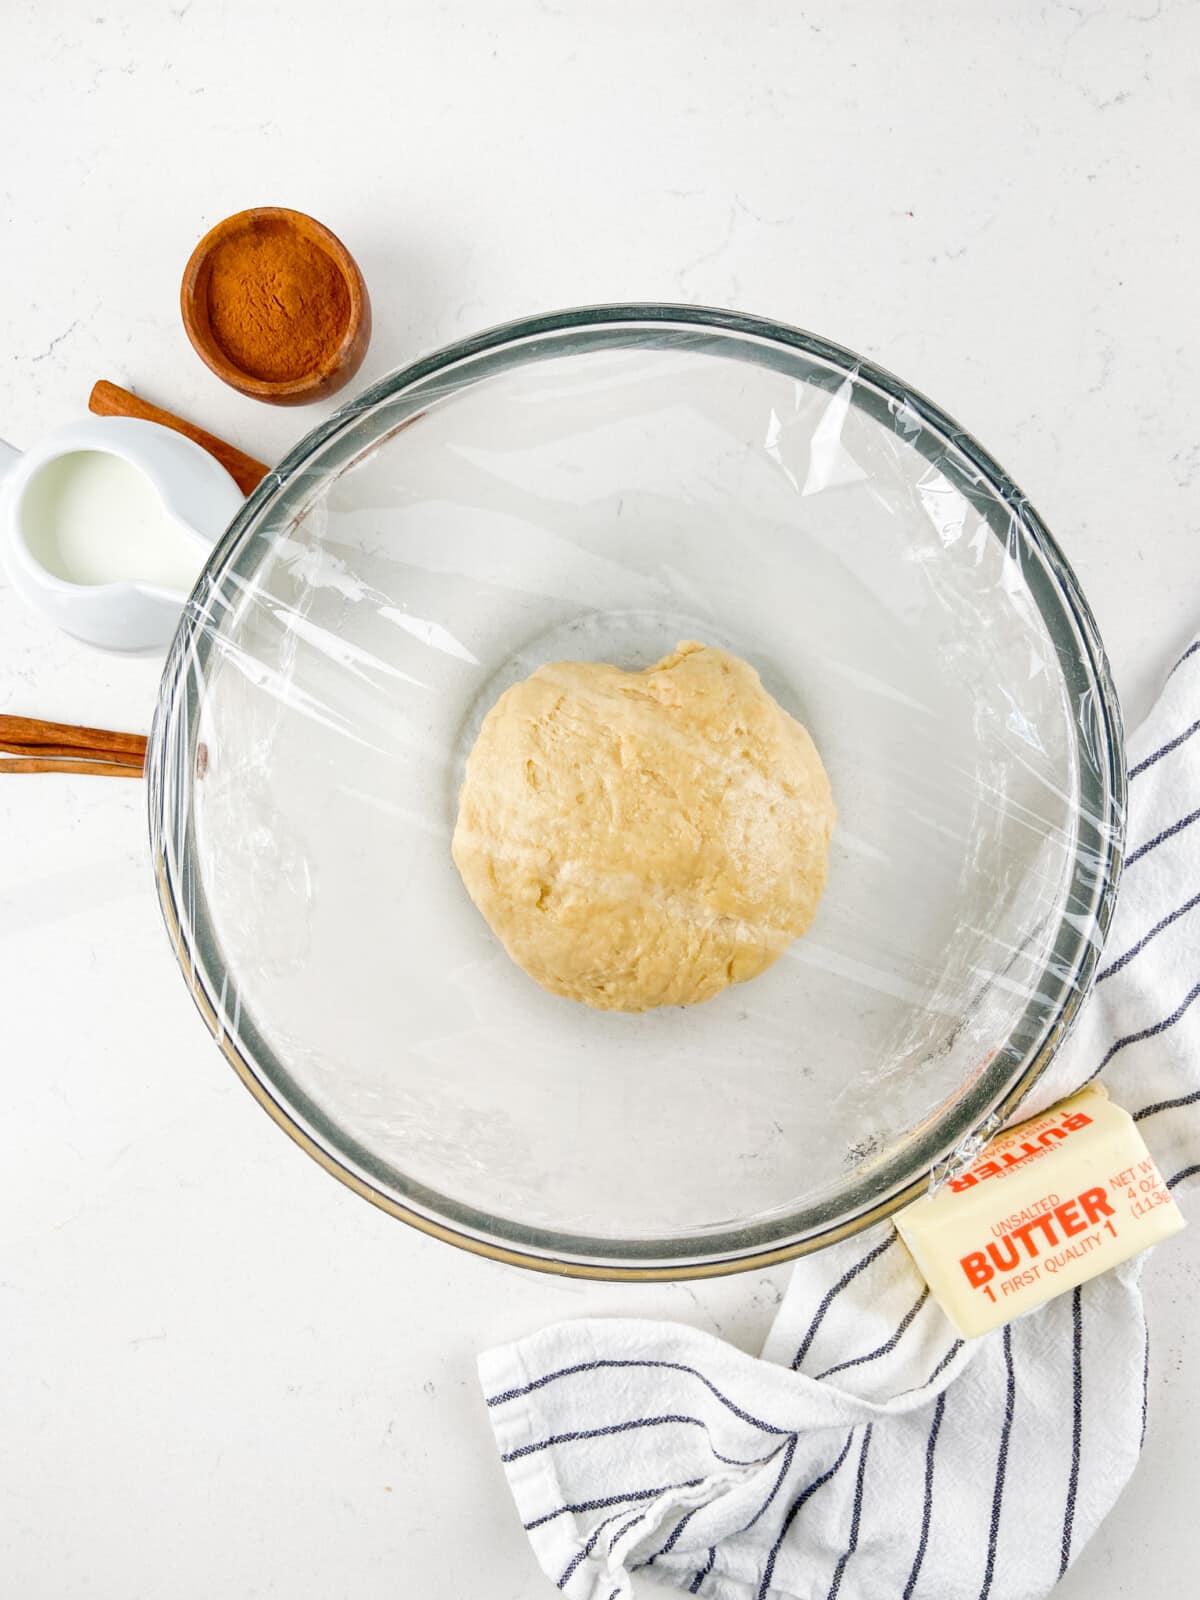
- Spray a large bowl with cooking spray and place the dough ball in it. Spray the top of the dough ball with cooking spray (lightly) and cover the bowl with plastic wrap. Let sit for 2-4 hours until it doubles in size.
SAVE THIS RECIPE

How to assemble Pull Apart Bread
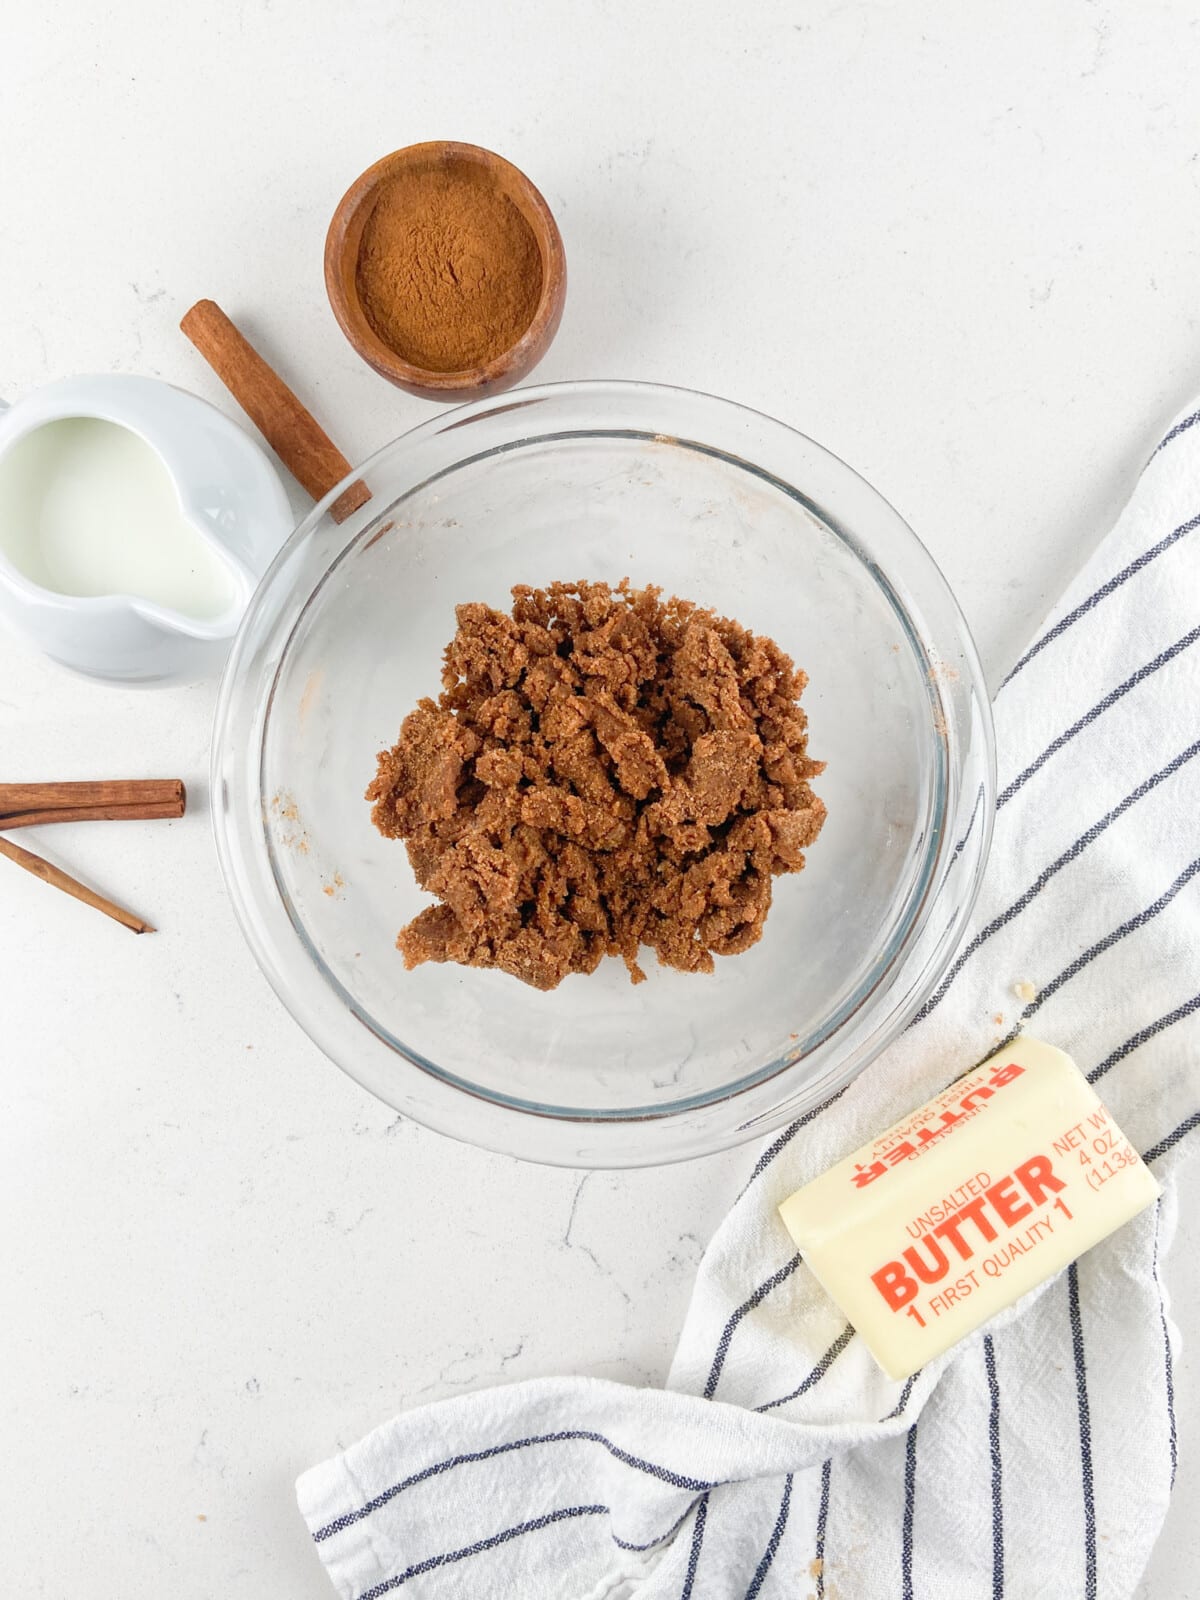
- Stir together butter, brown sugar, cinnamon, and flour until it forms a paste.
- Spray an approximate 9×5” loaf pan with cooking spray.
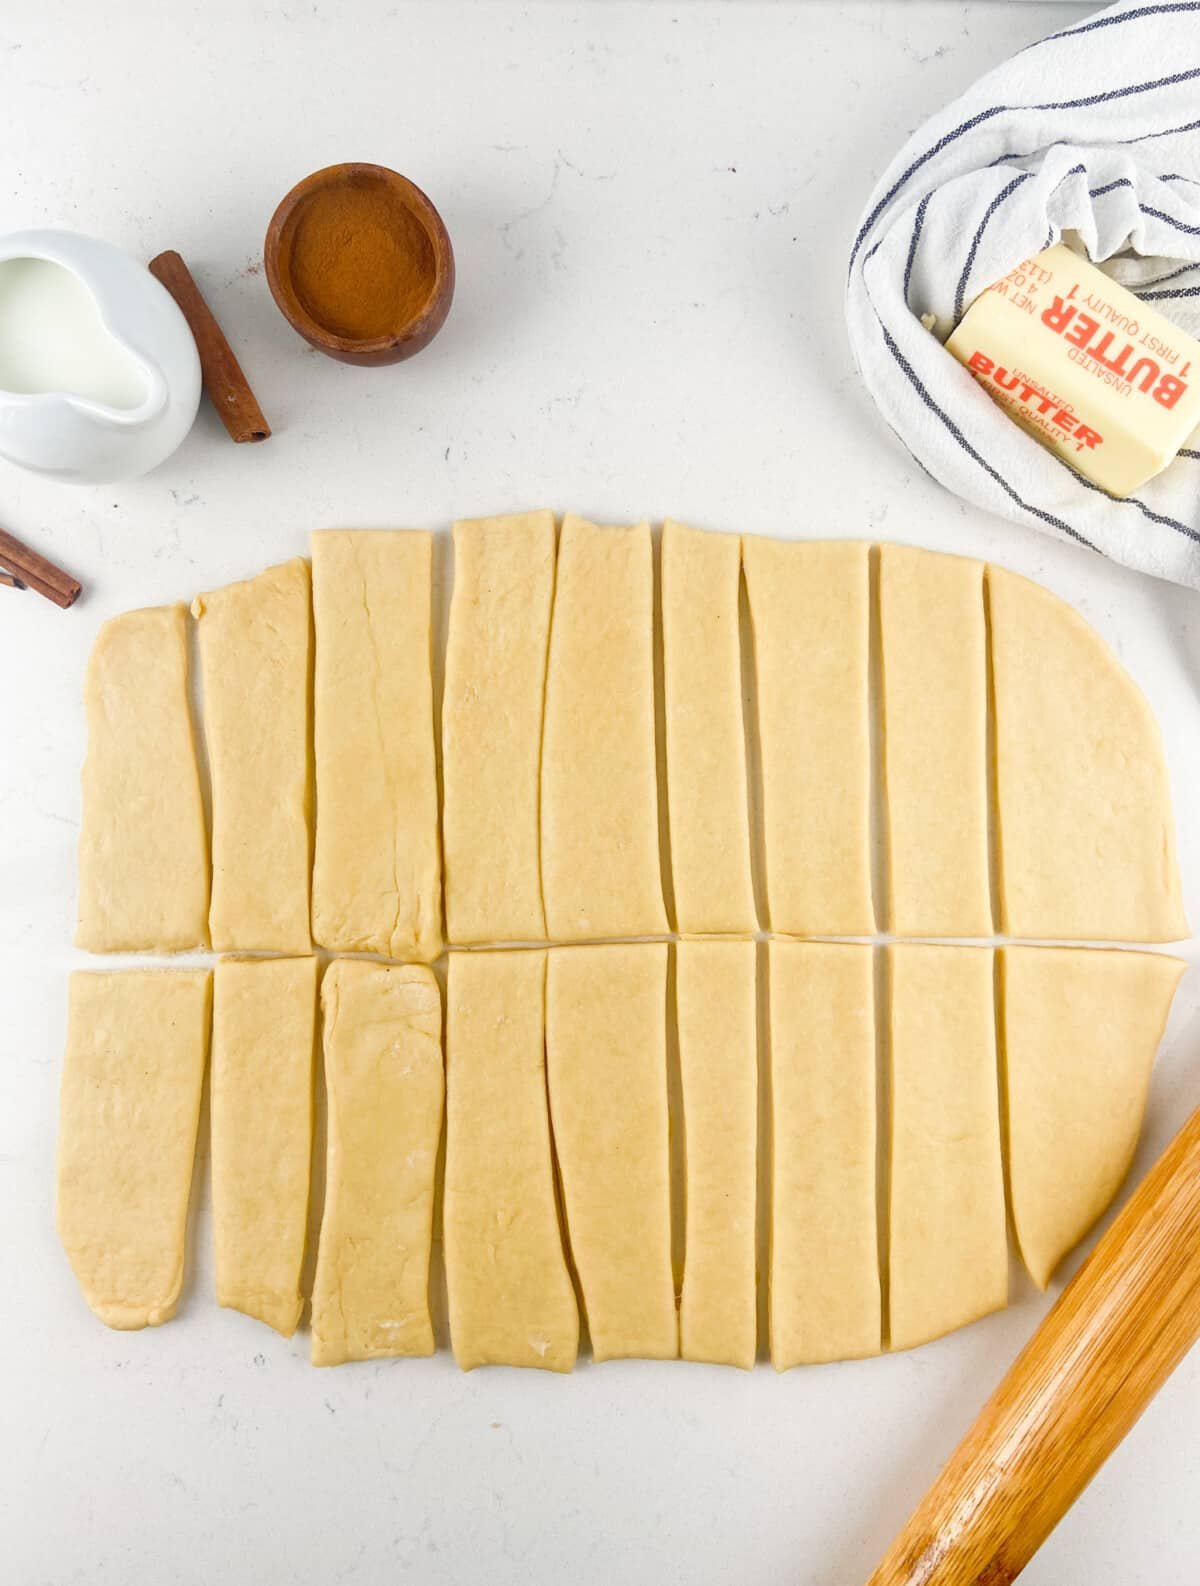
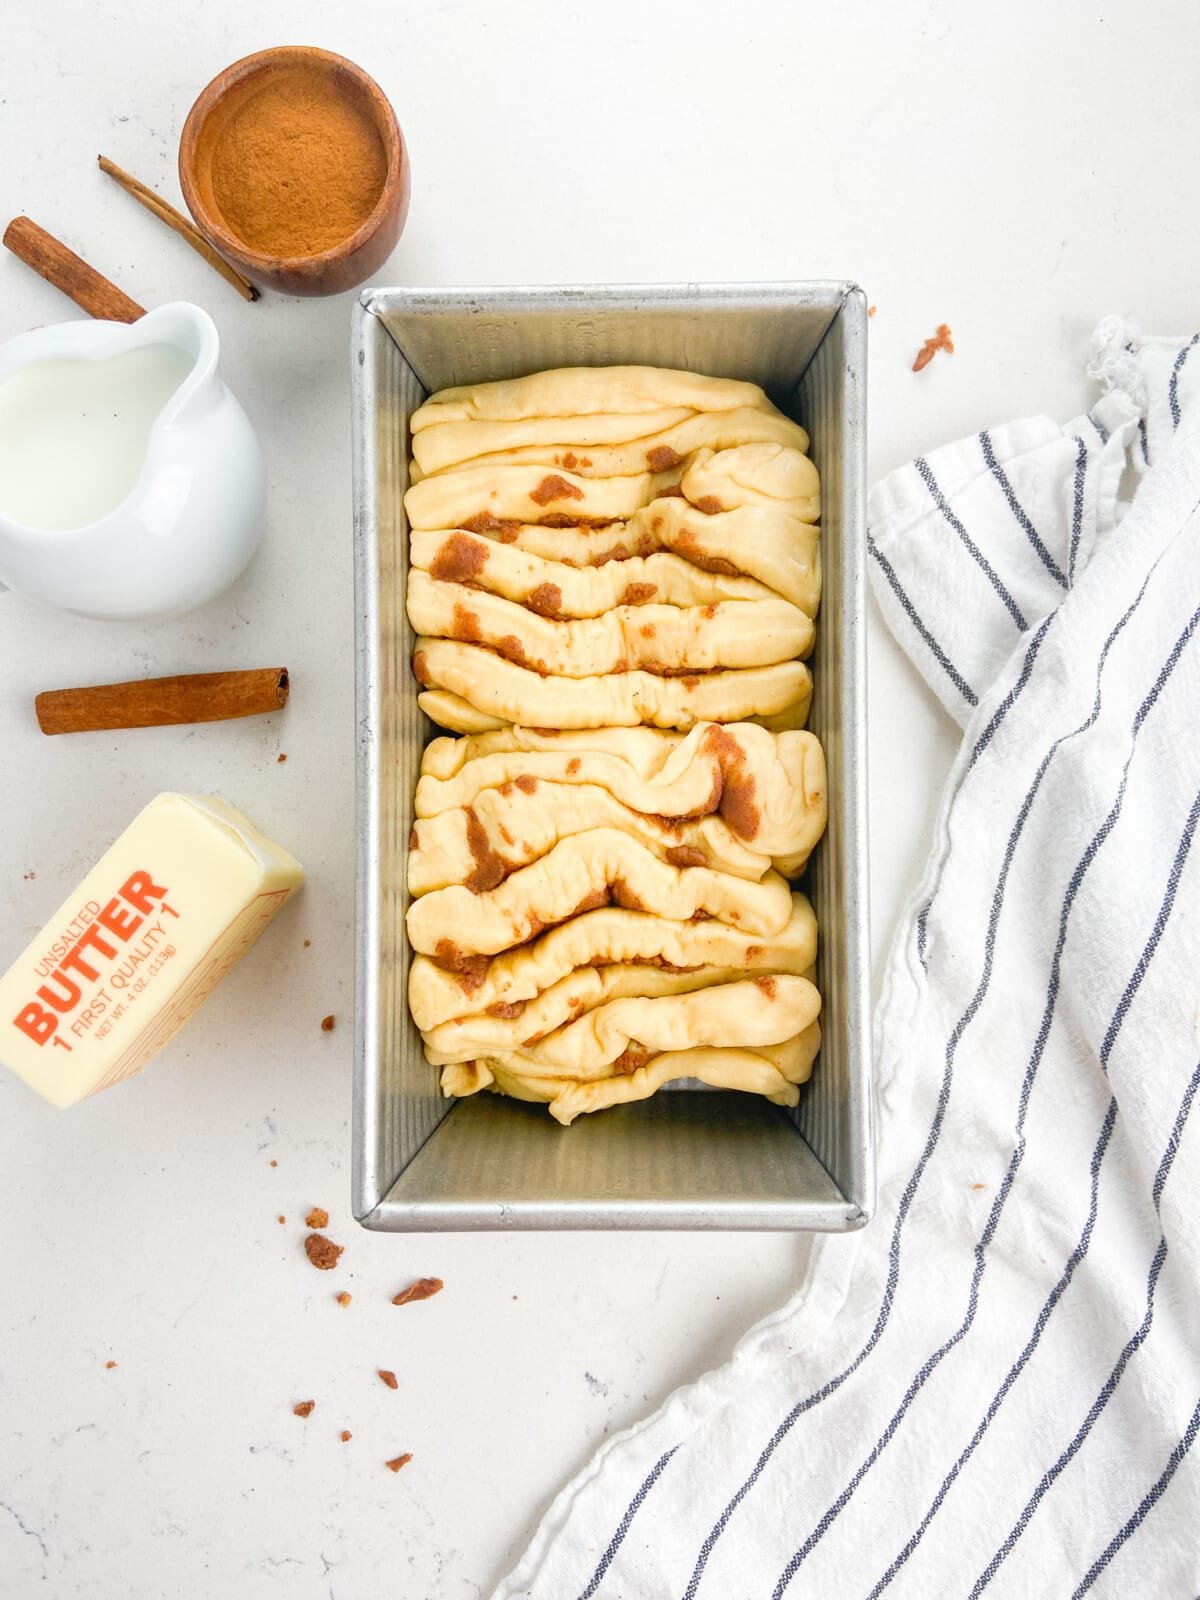
- Once the dough is risen, roll it out on a lightly floured surface into a large rectangle and slice into 18 sections. Spread a little filling on each section, except for one (that will be your last piece, you don’t want the filling touching the end of the pan).
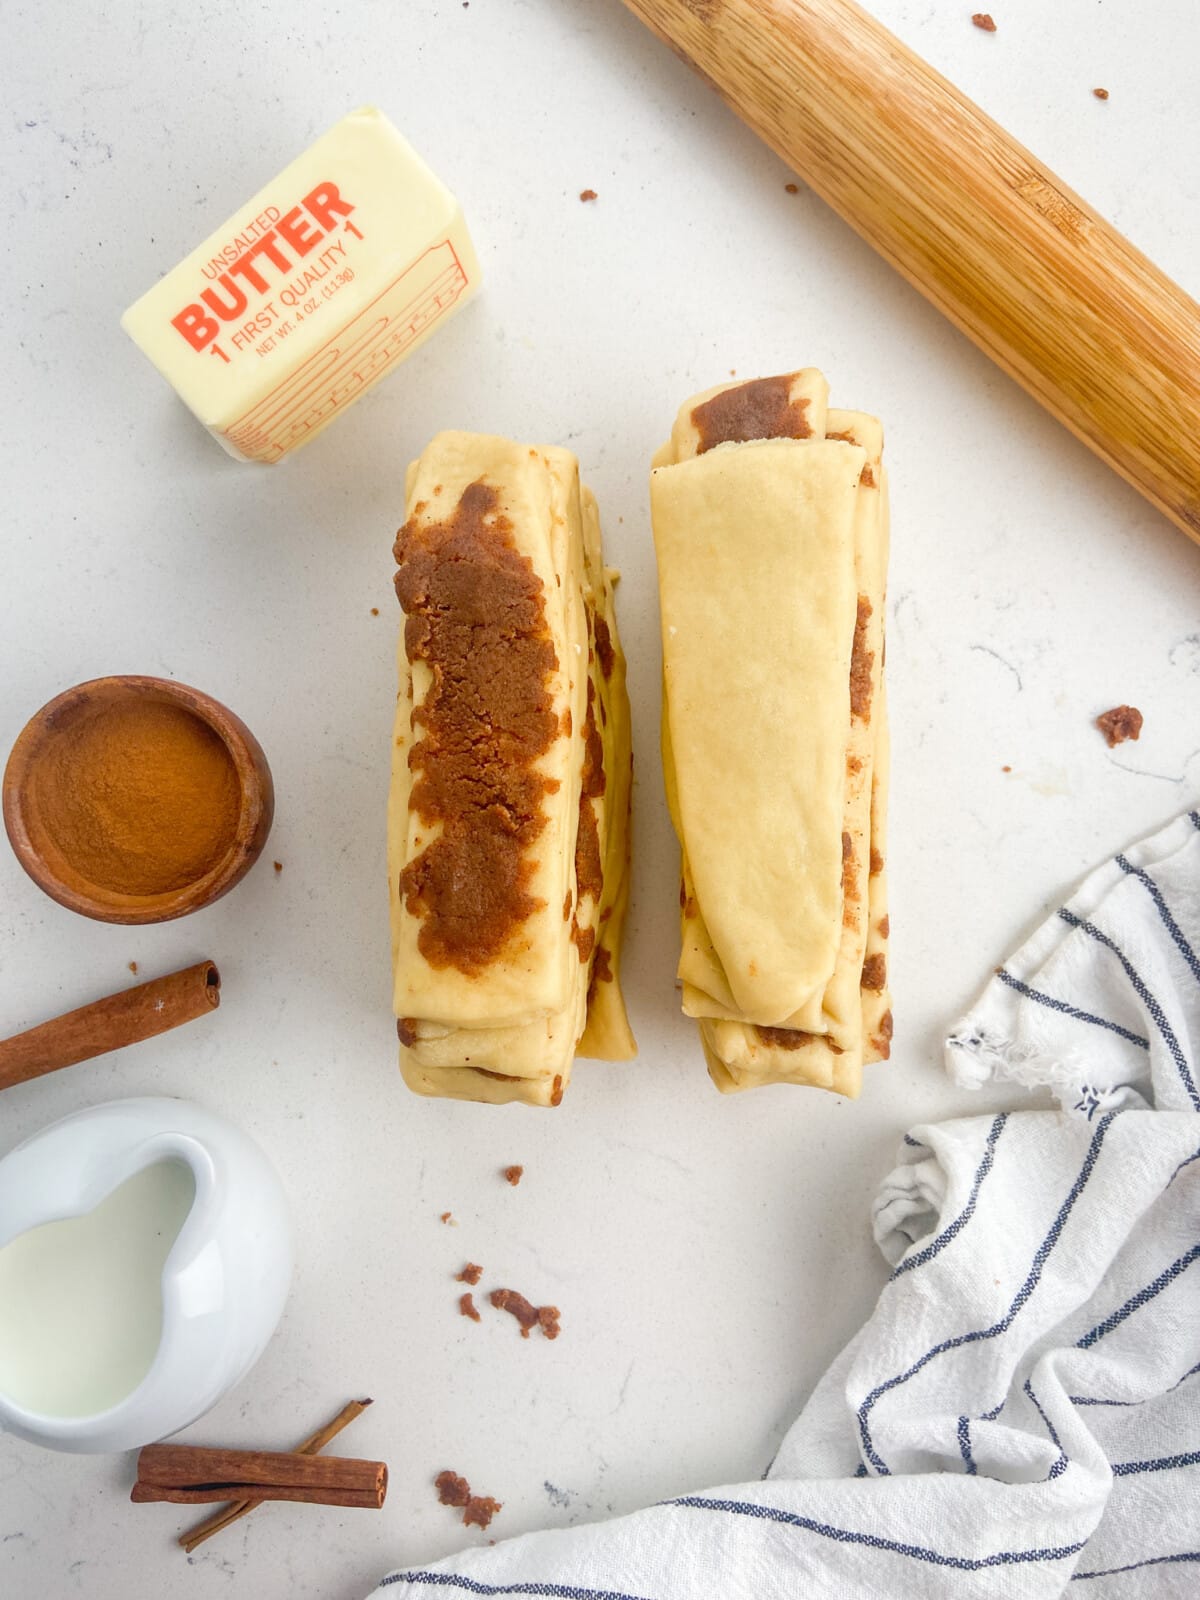
- Stack half of the sections and place in the prepared pan. Stack the second half and place them in front of the first, making sure that the ends touching the ends of the pan have no filling on them.
- You have two ways to continue. (1) let the pan rise for 1 hour at room temperature then bake as directed or (2) cover the pan with plastic wrap and refrigerate overnight.
- When ready to bake, preheat the oven to 350°F. Remove the rolls from the refrigerator (if you chilled them overnight) and let them warm up to room temperature while the oven is preheating. Remove the plastic wrap and bake for about 25 minutes, or until they are golden brown.
Tip From Dorothy
Expert Tips
- You can use any fat content milk or nondairy milk.
- Want a semi-homemade pull apart bread? Skip making the bread dough and use canned biscuits (slice each biscuit into thirds). See my 2 ingredient pull apart bread!
- Store bread loosely covered at room temperature for up to 4 days or freeze for up to 3 months.
FAQs
Yes you can. Use the same amount of instant yeast as directed.
Until it’s golden brown or about 25 minutes.
Yes. This cinnamon pull apart bread holds well in the freezer for up to 3 months in a sealed container.
Cinnamon Roll Pull-Apart Bread Recipe
Video
Ingredients
For the Dough:
- 1 package (7g) active dry yeast, (2 ¼ teaspoons)
- ¾ cup (177ml) warm non-fat milk, (heated to about 120°F, about 30-45 seconds in the microwave)
- ⅓ cup (67g) granulated sugar
- 3 tablespoons (42g) unsalted butter, , softened
- ½ teaspoon salt
- 1 large egg
- 3 – 3 ¼ cups (372-403g) all-purpose flour, (plus more for dusting)
For the Filling:
- 3 tablespoons (42g) unsalted butter, , softened
- ⅓ cup (67g) packed brown sugar
- 2 teaspoons cinnamon
- 2 tablespoons (15g) all-purpose flour
- ¼ teaspoon salt
For the Frosting:
- 2 tablespoons (26g) unsalted butter, , melted
- ¾ cup (85g) powdered sugar
- 1 teaspoon vanilla extract
- ¼ teaspoon maple extract
- 2 tablespoons (30ml) heavy whipping cream
Instructions
Make the Dough:
- Place milk in a microwave safe measuring cup. Heat for 45-60 seconds in the microwave, until it’s about 120°F. (The time you heat it will need to be adjusted depending on your microwave. You can use a candy or a meat thermometer to test the temperature.) Add yeast and stir. Let it sit for a few minutes.
- Place sugar, butter, salt, and egg in the bowl of a stand mixer fitted with the paddle attachment. Mix until the butter is distributed throughout the liquids, although it may be chunky. Pour in the milk/yeast mixture and stir for a few seconds.
- Add flour and stir with the paddle attachment just until the mixture starts to stick to the paddle. Then replace the paddle with the dough hook. Continue mixing on low speed until the dough forms a ball in the center of the bowl. If dough is still very sticky, you can add an additional 1/4 cup of flour.
- Spray a large bowl with cooking spray and place the dough ball in it. Spray the top of the dough ball with cooking spray (lightly) and cover the bowl with plastic wrap. Let sit for 2-4 hours until it doubles in size. Note on rising: if your house is warm, it should rise no problem. If it’s cold in your house, it may take longer for the dough to rise.
Prepare your Bread:
- Stir together butter, brown sugar, cinnamon, and flour until it forms a paste.
- Spray an approximate 9×5” loaf pan with cooking spray.
- Once the dough is risen, roll it out on a lightly floured surface into a large rectangle, about 10” by 14”. Slice into 18 sections. Spread a little filling on each section, except for one (that will be your last piece, you don’t want the filling touching the end of the pan).
- Stack half of the sections and place in prepared pan. Stack the second half and place them in front of the first, making sure that the ends touching the ends of the pan have no filling on them. (You need to stack them in two sections because otherwise the weight of the top of the stack with seal the bottom of the stack together and it won’t be “pull-apart” anymore.) The stack won’t totally fill the pan, but it will once it rises again.
- You have two ways to continue. (1) let pan rise for 1 hour at room temperature then bake as directed or (2) cover pan with plastic wrap and refrigerate overnight.
- When ready to bake, preheat oven to 350°F. Remove the rolls from the refrigerator (if you chilled them overnight) and let them warm up to room temperature while the oven is preheating. Remove the plastic wrap and bake for about 25 minutes, or until they are golden brown.
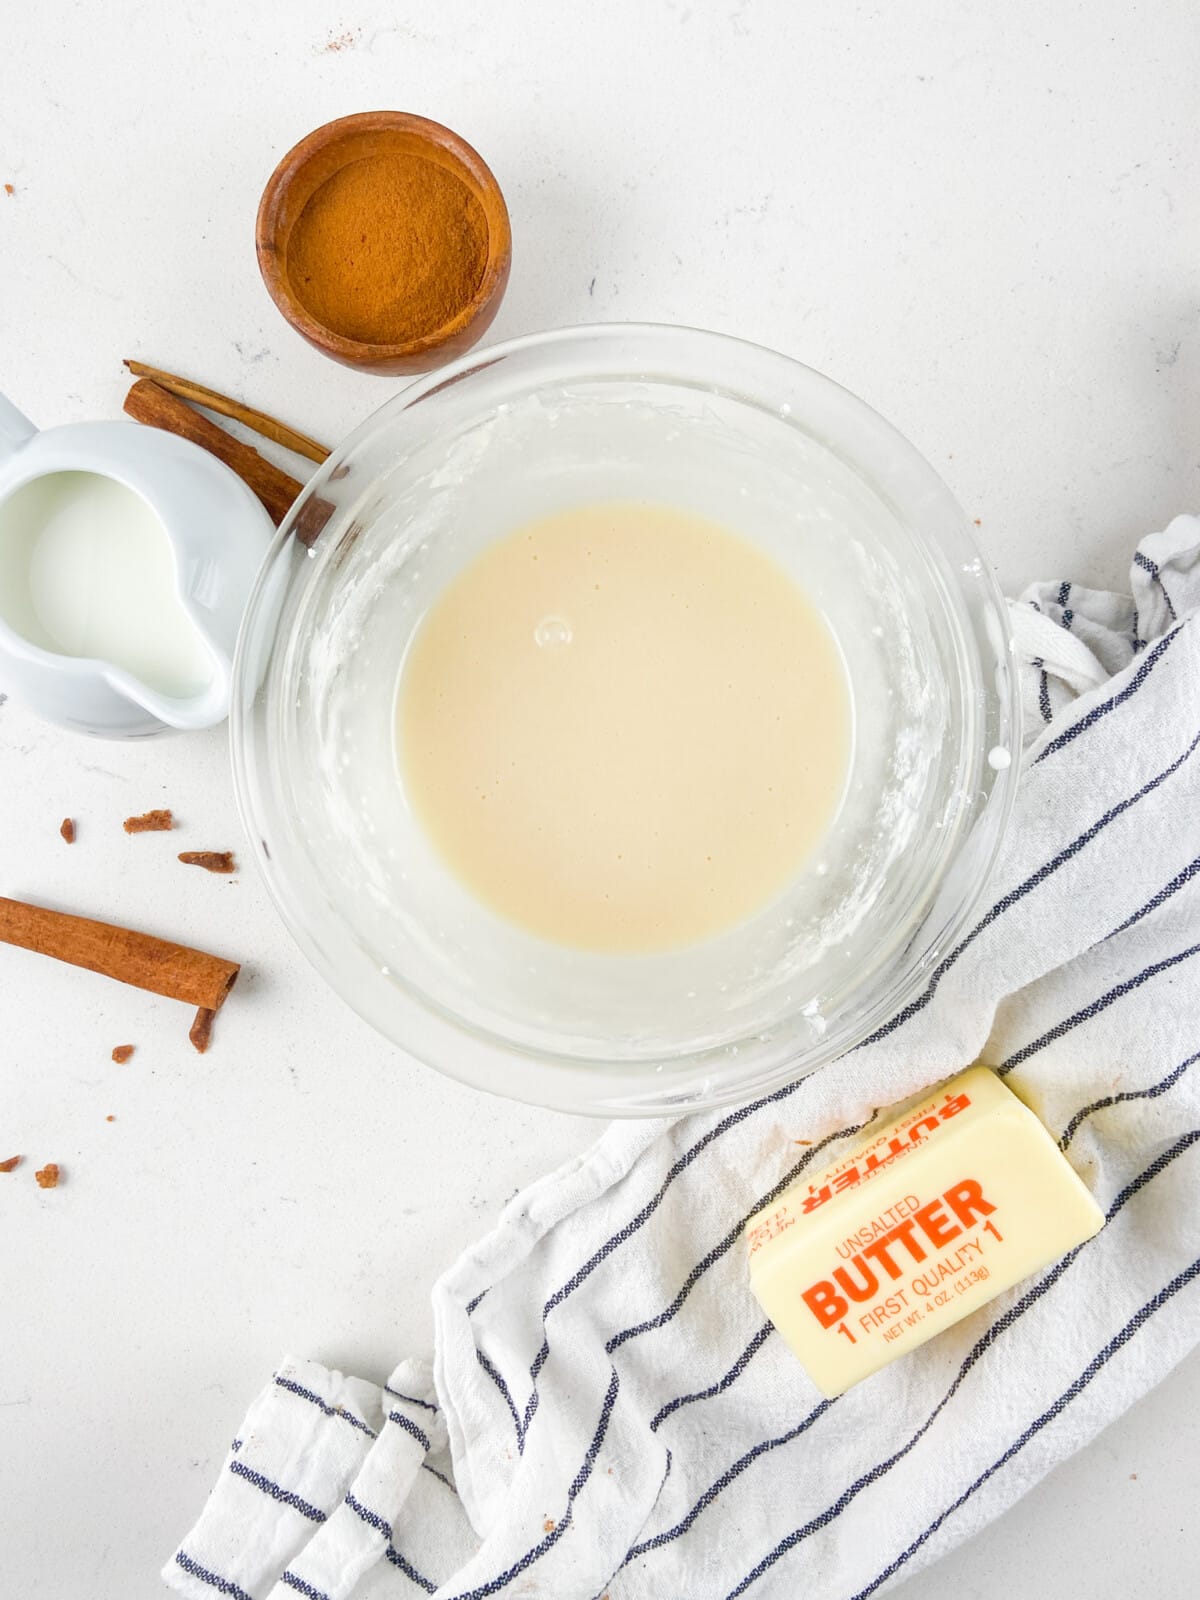
Make the frosting:
- Whisk the melted butter and powdered sugar until mostly smooth. Whisk in vanilla and maple extract (if using). Whisk in heavy cream and pour over warm bread and serve.
Notes
- You can use any fat content milk or nondairy milk.
- Want a semi-homemade pull apart bread? Skip making the bread dough and use canned biscuits (slice each biscuit into thirds).
- Store bread loosely covered at room temperature for up to 4 days or freeze for up to 3 months.
Nutrition
Nutrition information is automatically calculated, so should only be used as an approximation.
© Crazy for Crust. Content and photographs are copyrighted. Sharing this post is much appreciated, but copying and pasting full recipes without authorization is strictly prohibited.
Did you try this recipe? Click here to rate the recipe below.


Do u think this can be done
(Mixed) in a bread machine?
This is written with active dry yeast, bread machines use instant yeast I believe, so I don’t know if that would work.
Me gusto la receta
I loved the idea of this method, but the filling was oddly paste-y and I had to modify it to get it to stick to the dough. Also, I left it in the fridge overnight, let it sit at room temp for 30 minutes and then baked, as instructed. It needed at least 50 minutes in the oven, not 25. I covered the top with foil so it didn’t get too brown and it was still tasty. I wonder if the 25 min time might be for traditional cinnamon buns?
I cant wait to try this. Cause it’s different and has to be delish.
Question When you put stack in , do you just put whole stack in or piece by piece?Maybe ajusting some here and there? Then second stack. I would have made this tonight but to late now.
Thank you , love your recipes.
Featured In
Rate This Recipe
Recipe Ratings without Comment