This post may contain affiliate links. For more information, read my disclosure policy.
Welcome back to my series on Blog to Business! We’ve already talked about Blog Design and Finding a Blog Community. Today we’re moving on to something I love and struggle with every day: Food Photography.
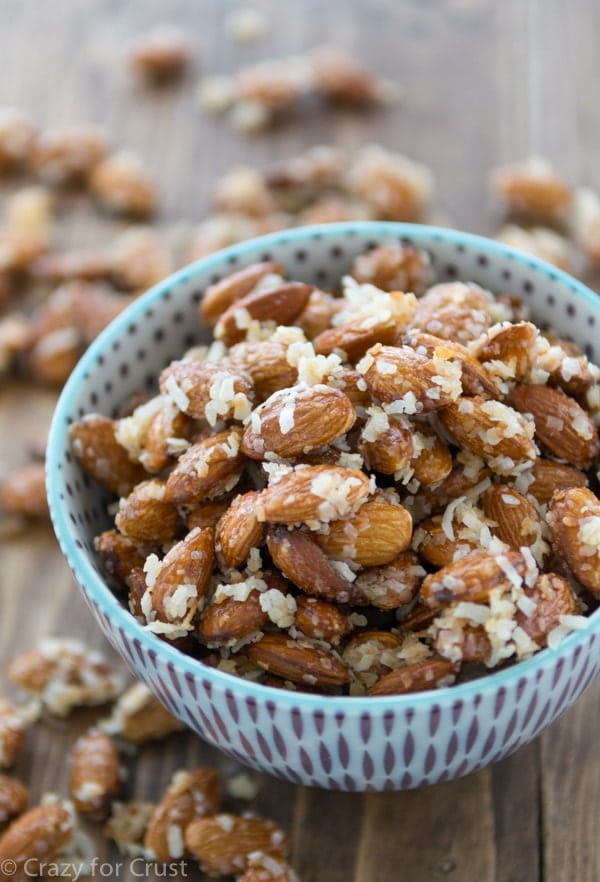
When we talked about blog design, I mentioned that the first thing people see when they get to your site is very important. It’s the first impression of YOU. After they take in the top half of your site design, visitors to your site most often will notice the photographs next. Remember, people eat with their eyes first. If something doesn’t look good it doesn’t matter how it tastes, or how your writing is, or how your site looks. You want your food photos to be the best they can be.
Not only do good photos get people to stay on your site and drool, but they are often what get people to your site. Think about it: Facebook, Pinterest, Google+, Instagram – all of those social media sites are visual. Sure, there’s text and descriptions of things, but the photos are what really pop. If your photo doesn’t catch someone’s eye, no one is going to click on it.
I don’t consider myself an expert on food photography. I actually feel like I have a lot to learn (don’t we all?), but I do feel like I’ve learned a lot over the past 4 years. I started with an ancient point and shoot and have worked my way through more expensive P&S cameras and a DSLR with a variety of lenses. I’ve gone from not editing any photos to using online software to using Lightroom. Hopefully I can share a little of what I’ve learned with you.
1. Your Camera
Obviously you need some sort of a camera for food photography. A point and shoot (P&S), a cell phone, a DSLR. Most likely you’re using one of those things already.
{If you’re not, um, you need to start. Food blogs need food photos. The end.}
For 2 years I used a P&S camera. I started off with a Cannon Powershot that was about 5 years old. About 6 months into my blog I bought a higher-end Cannon P&S (with super zoom). I shudder at the thought that for only $100 more I would have had a DSLR.
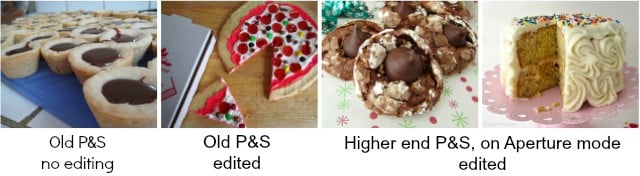
2 years ago, I purchased my DLSR: a Nikon D3100, which is an entry-level crop-body camera. It’s the one I use today and it’s the one I shot my cookbook with. I started off using the “stock” lens, which is an 18-55mm f/3.5-5.6G. It’s the one that comes with the camera.
In January of 2013 I started shooting with a 35mm 1:1.8G prime lens.
And, finally, in December of 2013 I started shooting with my current lens, the 17-55mm 1:2.8G which is made to fit my Nikon’s crop body camera. This is the lens I shot my cookbook with.
That kind of gives you an overview of my photography over the last 4 years. I’m going to get into specifics in a minute, but I want to talk about the elephant in the room first.
Do you have to have a DSLR to make it as a food blogger?
My answer? I don’t know. But I’ll tell you what I do know. When I used a P&S camera, I think I learned a lot as a photographer. I knew my photos weren’t as good as bloggers with DSLRs so I had to work three times as hard to make a difference. I learned about light and photo editing and reflectors and all of that. And I think I took some pretty good pictures with my P&S. Some of those posts did pretty well. I think you can definitely get good page views and “make it” using a point and shoot camera.
BUT. And yes, that is a very big but.
I think that a time will come when you need to invest in a DSLR. Start thinking about it now. My page views doubled when I got my good camera, because I’d taken all of what I’d learned about making photos better and applied them to, well, better photos. Another argument for a DSLR camera: I started in the “second wave” of food bloggers. The big guns had all been around a few years but there weren’t a gazillion food blogs out there. In the last 4 years I think the food blogging community has grown exponentially. With the onset of Pinterest and gawker sites, photography has become hugely important. To be able to stand out in the crowd, you need to be able to wow people. Good photography can help with that.
2. Light. Use it. Lots of it.
Good food photos use lots of light. That’s just a fact. You need good lighting to get good photos. I am blessed to live in Northern California where it’s sunny a lot of the time, so those winter months aren’t a huge problem for me. I have two good windows I use and, depending on the month (or week or day, sometimes it seems) I shoot wherever the light is best. If you don’t have good windows or it’s snowing outside, then you might need to get some lighting help. I’ve never used studio lighting, but I’ve heard great things about Ego lights. I know a few bloggers that use them and their photos are stunning.
3. Just say NO to the Flash.
So it’s getting dark outside and you want to photograph cookies. My advice: WAIT UNTIL TOMORROW. Do not use the flash. Please. Unless you’re a trained photographer with equipment who knows what they’re doing, please just say no to flash. I never use my flash – even for people photos. The 35mm prime lens I talk about in #1 is great for low light. Flash gives everyone red eyes and causes all sorts of glare and funky behavior. Just say no.
4. Set yourself up for success.
Since light is one of the most important things for your photo, you need to make sure and have a good set-up. A few years ago I read Plate to Pixel and it totally changed the way I photographed. I thought only professional photographers had reflectors but I all of a sudden realized I needed one too. Guess what? You can make a reflector board yourself.
Step one: buy foam core. Step two: wrap foam core board with aluminum foil. Done. All for about $2 + tax if you shop at the dollar store.
Here are some shots of how I set up my photo shoots:
Side lighting: window on the left, reflector on the right, (or window on the right; reflector on the left) backboard behind to hide my ugly kitchen counters. (You can see I use canned goods to hold up my reflectors. I’ve been meaning to by “L” brackets or clamps but I never get around to it, probably because I loathe the hardware store.)
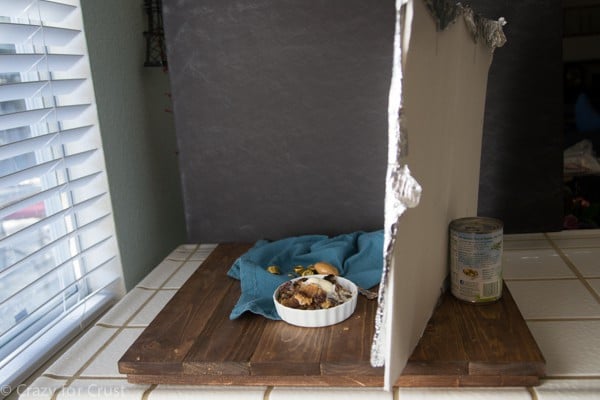
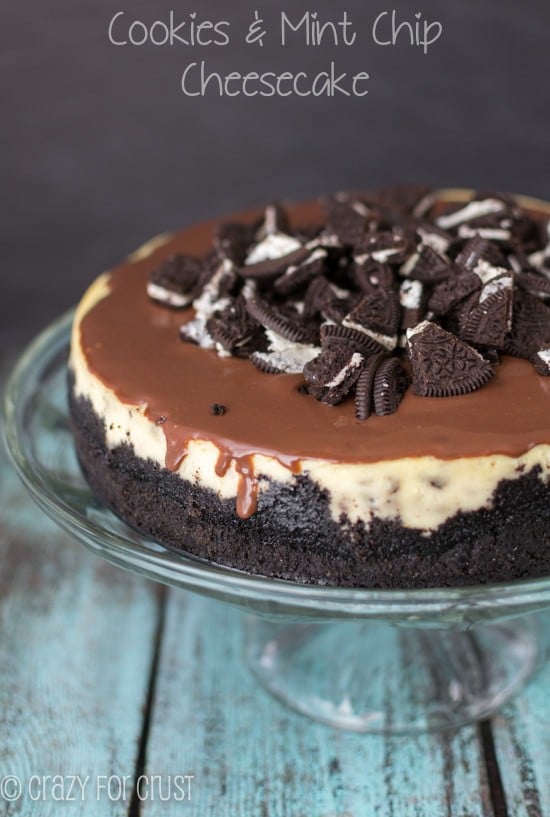
Photo example: Cookies and Mint Cheesecake, taken with my 35mm 1:1.8 lens. Light was on the left, reflector on the right.
Back lighting: window behind, reflectors on each side at angles in relation to the food. I try to get my reflectors as close as possible to the front of the food, because when the light is behind the front tends to get shaded. Get the reflectors as close as possible together but far enough apart you can get your camera in between. (This is when I really like my zoom lens.)
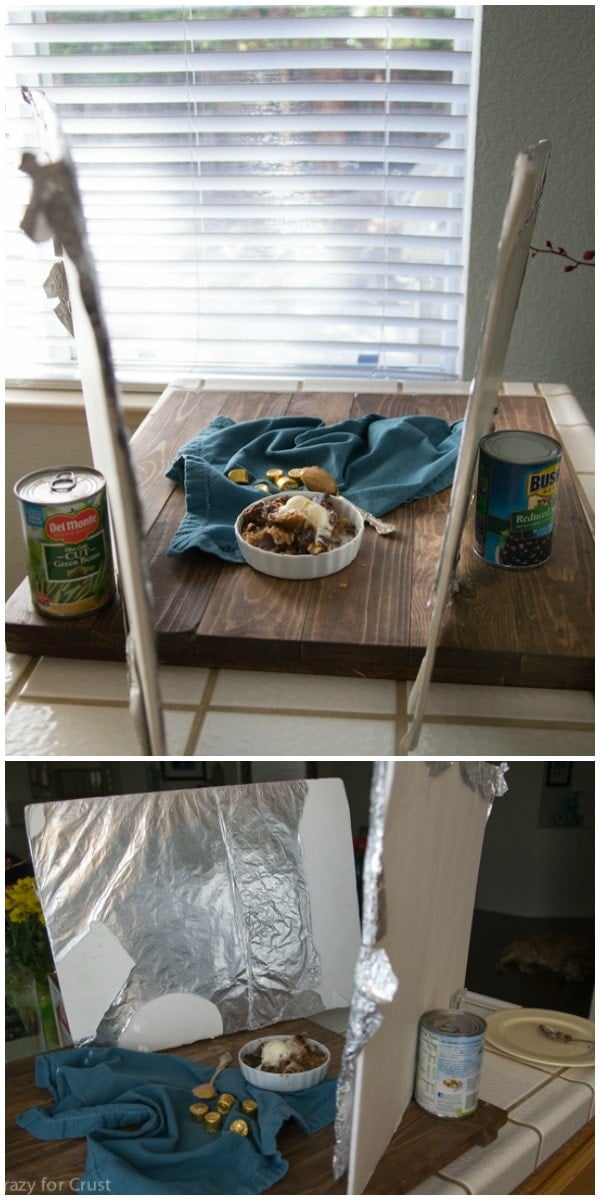
Photo example: Mini Lemon Chess Pies, taken with the 17-55mm 1:2.8G lens.
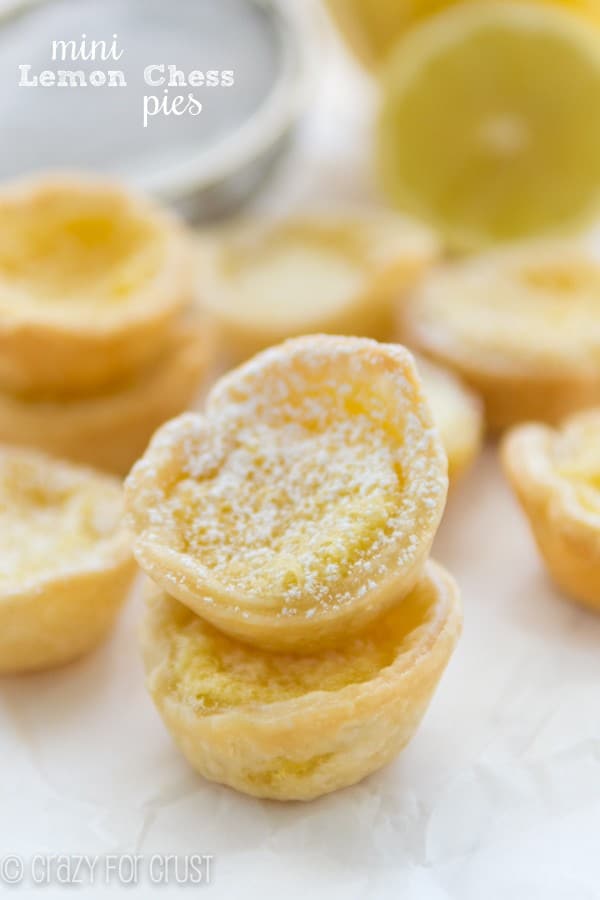
I absolutely love back lighting. If you haven’t tried it, you need to!
5. GET OFF AUTO.
Seriously, please. Take your camera off Auto mode. You have so many more options available to you when you’re not using auto. Even P&S cameras have the option for different modes. Read your camera manual and make the jump.
When you first click that little dial away from auto, it can be scary. For food photography, I suggest starting with Aperture mode (A or Av depending on your camera). The Pioneer Woman has a whole series on Aperture that helped me a lot when I started. More recently, Karly from Buns in My Oven shared her own secrets on aperture. Play with the dials on your camera, changing the aperture to different values and seeing what works for you.
Then, once you do that, make the jump to manual. It will make a huge difference in your photography. Karly has a whole post on that too. Once you start shooting in manual, a whole new world opens up. ISO, aperture, shutter speed – they all work together to create fabulous photographs.
SAVE THIS RECIPE
This was my first photography I ever shot in Manual, about a year and a half ago: Skinny Chocolate S’mores Pie using my 35mm lens.

The second I took these photos I noticed a difference. Being able to control the shutter, the aperture, and the ISO all together makes pretty photos.
Also? This photo is how my cookbook editor found me. So it has a special place in my heart. 🙂
Here’s how I shoot in manual:
- My ISO usually sits at 200 or 400 when the sun is shining.
- Aperture sits at it’s lowest setting for whatever lens I’m using. (Currently, f/2.8. In the photo above, about f/1.8.)
- Shutter speed ranges between 1/60 to 1/200 depending on how much light is in my room.
6. What do you do when it’s cloudy outside?
Take a vacation until spring. Kidding! We all have those days, right? Where we need to take pictures but the weather is just not cooperating. If you’re shooting in Manual (or at least Aperture mode) you have a ton of options. The main thing that I do is I up my ISO. I don’t know tons about it (read more here) but when it’s a little gloomy outside I up it to 400 or sometimes 800. You have to be careful when you increase your ISO because it can cause graininess depending on your lens and camera, but it’ll help in a pinch. Increasing the ISO can also help with the blurriness you get in your photos when it’s lower light. Often, especially on Aperture mode, you get blur if you or your subject move at all. Upping the ISO can help that stabilize.
Also, you can try getting a tripod. Using a tripod stabilizes your camera, so you don’t get blur while changing the settings to let in as much light as possible. I have never been successful with a tripod (I like to move during shooting) but I’ve heard Manfrotto makes the best. In listening to others talk about their tripods, this Manfrotto has been recommended several times. (That’s just the tripod. You also need to buy a head for it.) And don’t forget to check the specs on your camera to make sure whatever you buy will fit (and that the weight will be supported.)
7. Shoot in RAW.
Once you take the step from Auto to Manual, the next step is to shoot in RAW. When you take .jpeg photos, some of the information is compressed and lost. Shooting in RAW captures all the information and stores it in each photo. You record all the data from the sensor, so you get a larger and higher quality photo.
A .jpeg photo gets somewhat processed in your camera but your camera is not as good at editing as you are. A RAW photo gives you all the data so that you get to control how it’s edited.
Benefits of shooting in RAW:
- The editing options increase dramatically with RAW photos. When you open a RAW photo in your processing program, more options open up to you to fix your photo.
- You can easily correct exposure. If you’ve under- or overexposed a photo, much of that can be fixed with editing.
- You can easily fix the white balance (temperature) of a photo.
- Sharpening is better.
- Your photos are non-destructive. When you shoot in .jpeg some of your photo is immediately destroyed before you even download it to your computer.
- The files are huge, which make them perfect for large prints…or for saving off for printing in a cookbook.
The downsides of RAW:
- The files are huge. You’ll need an external drive to store them on or you’ll fill up your hard drive fast. Same goes with camera memory cards. You’ll need more than one card unless you want to delete often.
- You’ll spend more time editing. Where you could do a few minor tweaks with .jpeg photos, you have to process RAW photos a lot. But I assure you, after awhile it’ll become like second nature and it won’t feel as slow. In fact, if you ever make a mistake and shoot in .jpeg, you’ll be mad because you can’t edit them the way you want.
- You’ll need a photo editing software. I think there are online sites that let you work with .jpegs, but you’ll probably want to get something like Photoshop or Lightroom to deal with RAW photos.
So your assignment for today is to try and take a few RAW photos, okay? Here’s my suggestion: if your camera lets you take both RAW and .jpegs at the same time (check and see; mine allows it) do that for the first few times you shoot RAW. You’re going to absolutely hate the way they look when you get them off your camera and you’re going to freak out they suck. So have the .jpeg as a backup. Eventually you’ll lose the crutch and just shoot in RAW.
And, BTW. Keep all the RAW files you edit. You can delete the ones you don’t, but keep the others in case you ever need to make changes!
8. Edit your photos.
I always edit my photos. Hardly ever does a photo go on my blog or social media without being edited. I even edit my instagram photos and I may have been known to edit the wrinkles out of my forehead when I post family photos on Facebook.
Editing is one of the most important things you can do to your photos, besides take them.
If you’re working with .jpegs, you can edit in online software. My favorite is PicMonkey. They have a free version, but the yearly plan is not very expensive and opens up tons of options. (Also…they have a nip/tuck tool. Where the aforementioned wrinkles get fixed. Hey, it’s cheaper than Botox!)
If you’re working with RAW images or you want to use a software, I highly suggest Lightroom. In fact, I think everyone should use Lightroom. It’s daunting at first but it’s actually super easy for a basic workflow and your images come out looking amazing.
A couple things I really love about LR:
- You can bulk edit. If you’re like me, you probably take 27 shots at the same time that look the same to everyone else but only you can see the difference. Well, in editing, you don’t have to edit them 27 times. Edit once, then select all and sync them. Boom, 27 edited photos.
- You can export them with your watermark. All of them, at once.
- You can export them in different sizes, different dpi, and all sorts of different things as many times as you need.
- As long as you don’t delete the files off your computer, you can go back and re-edit or re-export or do whatever you want with them. They’re always there.
Now, I could probably write a whole post about my workflow in LR. And, in all honesty, I don’t do 1/10 of what I should be doing. Every once in awhile Irvin will mention some little LR trick and my head explodes and all I want to do is drive to San Francisco to give him a hug and a pie. I always adjust white balance, exposure, saturation, and sharpness. This LR workflow video by Baked Bree got me started.
Do you want me to write a workflow post on how I use LR with shiny images and info? Let me know in the comments below!
9. Styling and Props
This is one of those things I always get stuck on. I’m the kind of girl that rarely remembers to wear jewelry or lipstick and I often buy the same shirt in 10 colors because I like the way it fits. I normally wear the same outfits every week and usually I just pray people aren’t as observant as I am and don’t remember I’ve worn the same blue tank top every Wednesday for a month.
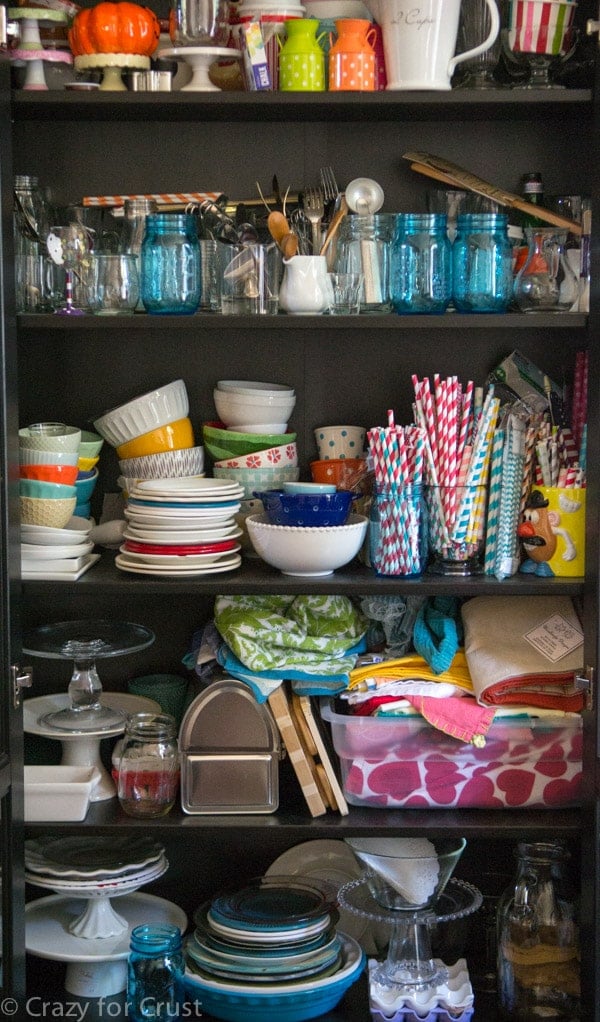
The same goes with my photo styling. I have a full cabinet of props and I only use a handful. But you know what? It works for me. And that’s my tip for styling:
Do what works for you.
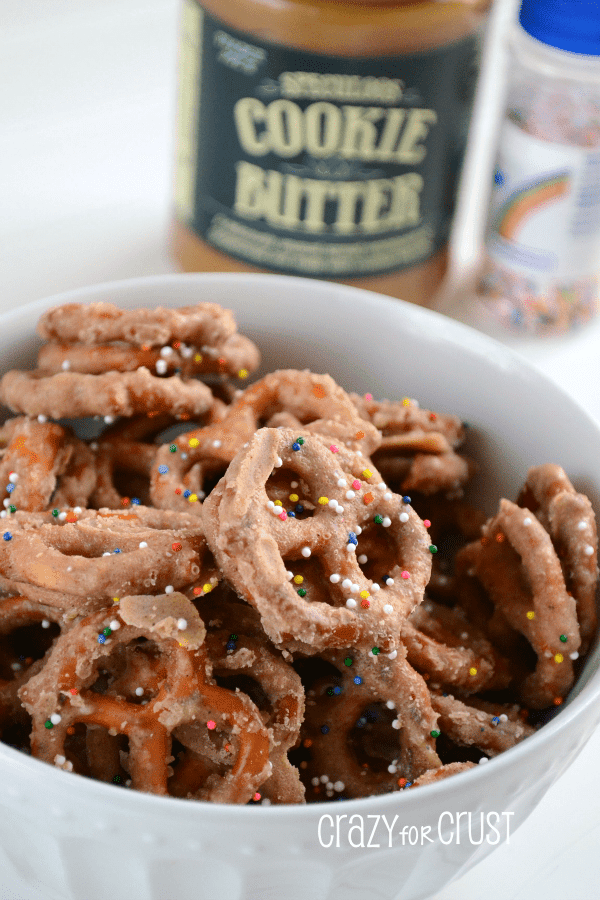
I like photos that are all food. I like close up shots with little bits of props here and there, so that’s how I shoot. It’s somewhat minimalist because I’m not good at matching all sorts of dishes and linens. Here are a few general rules I follow (for myself):
- Neutral plates. I almost always use white plates. Sometimes, if the food is white or light colored, I’ll use a colored plate, but not very often.
- Crinkled parchment paper is my best friend.
- Always try to have something in the background. A linen, some bowls, some food that’s in the recipe like a spoon of peanut butter or stack of candy. Let the photo tell the story.
- Double check for dog hair. Seriously, that’s part of my process. There’s nothing worse than getting to editing and realizing all of your photos have hair in them. (I have a golden retriever. Dog hair is probably embedded in my organs.)
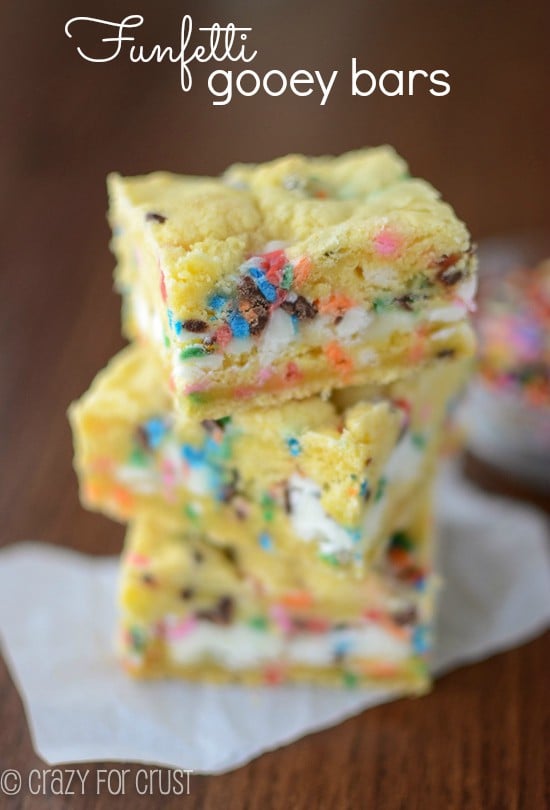
- Stack food. I like to stack cookies and bars for better effect.
- Get the gooey inside shot. Gooey sells.
- Don’t use super loud patterned linens. (This might only be specific to me, but I find that super loud patterns and colors take away from the star of the photo – the food.)
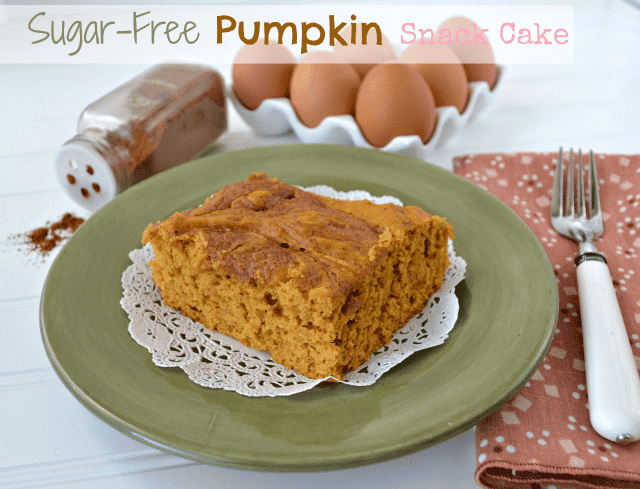
- Sometimes all white is not great. The light needs to be perfect for that. When in doubt, use a brown base. It’ll immediately add warmth – especially in colder/bluer shots (like in morning light).
- When in doubt, throw in some paper straws.
- Don’t stress – if you crop in tight enough you won’t even see much styling so it won’t matter!
And, after all that, you still need to do what works for YOU. If you love accessories and can easily put together and outfit with necklaces, shoes, and a handbag in under 3 minutes, styling is probably easy for you. It’s not easy for me, but I’ve made it easy by using a minimalist approach.
So…that’s all folks. Twenty minutes of reading you won’t get back. 😉 But seriously, I hope I gave you a nugget or two about photography. What did I forget? What tips do you have for me? Leave them in the comments!
Don’t miss the other posts in the Blog to Business Series:
Part 1: 7 tips for building your blogging community
Part 2: 11 tips for good blog design
{This post includes affiliate links.}
Amazing tips for people who are looking for food photography. Thanks
Keep sharing!!!
Nice Blog Posted
So amazing food photography tips. So helpful for beginners. Many many learn this post.
Fantastic article, thank you! Was googling lemon curd recipes and look where I ended up!! Needed that push with RAW and LR, so scared, though.. Eeek 🙂
Yeah it totally is scary at first! If your camera allows it, have it take RAW and JPEG at the same time (or do both) at first, just in case you hate the raw photos!
Featured In