This post may contain affiliate links. For more information, read my disclosure policy.
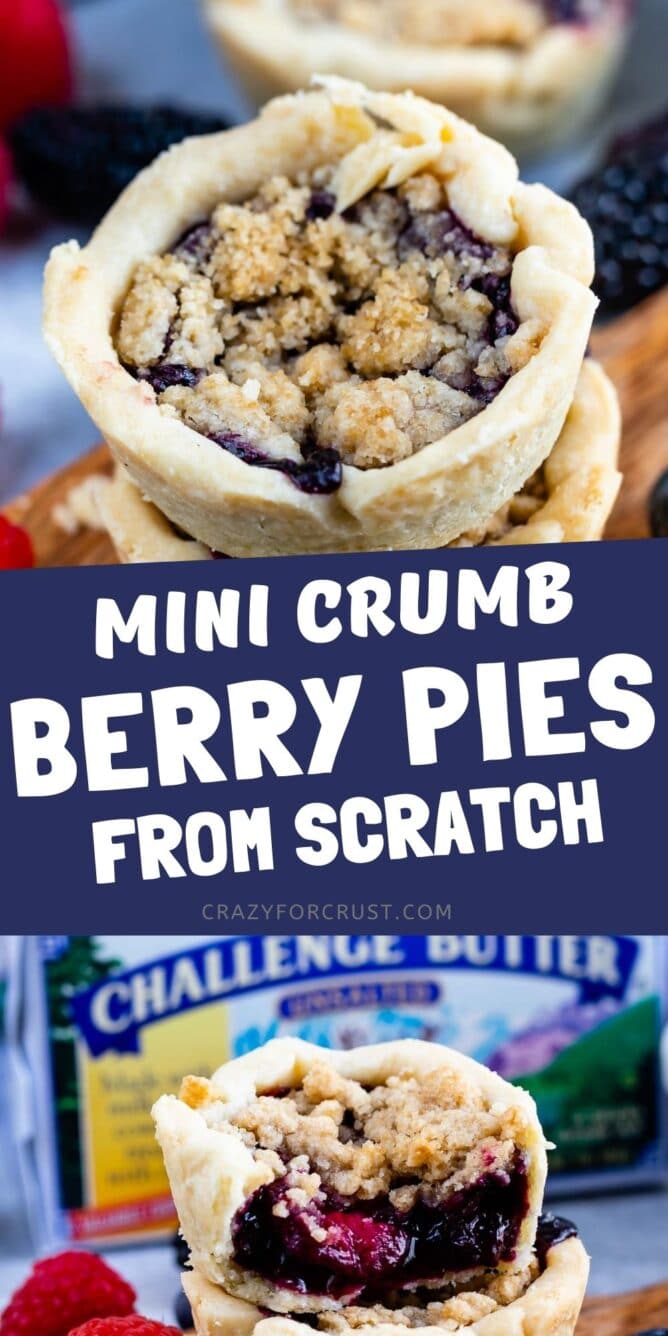
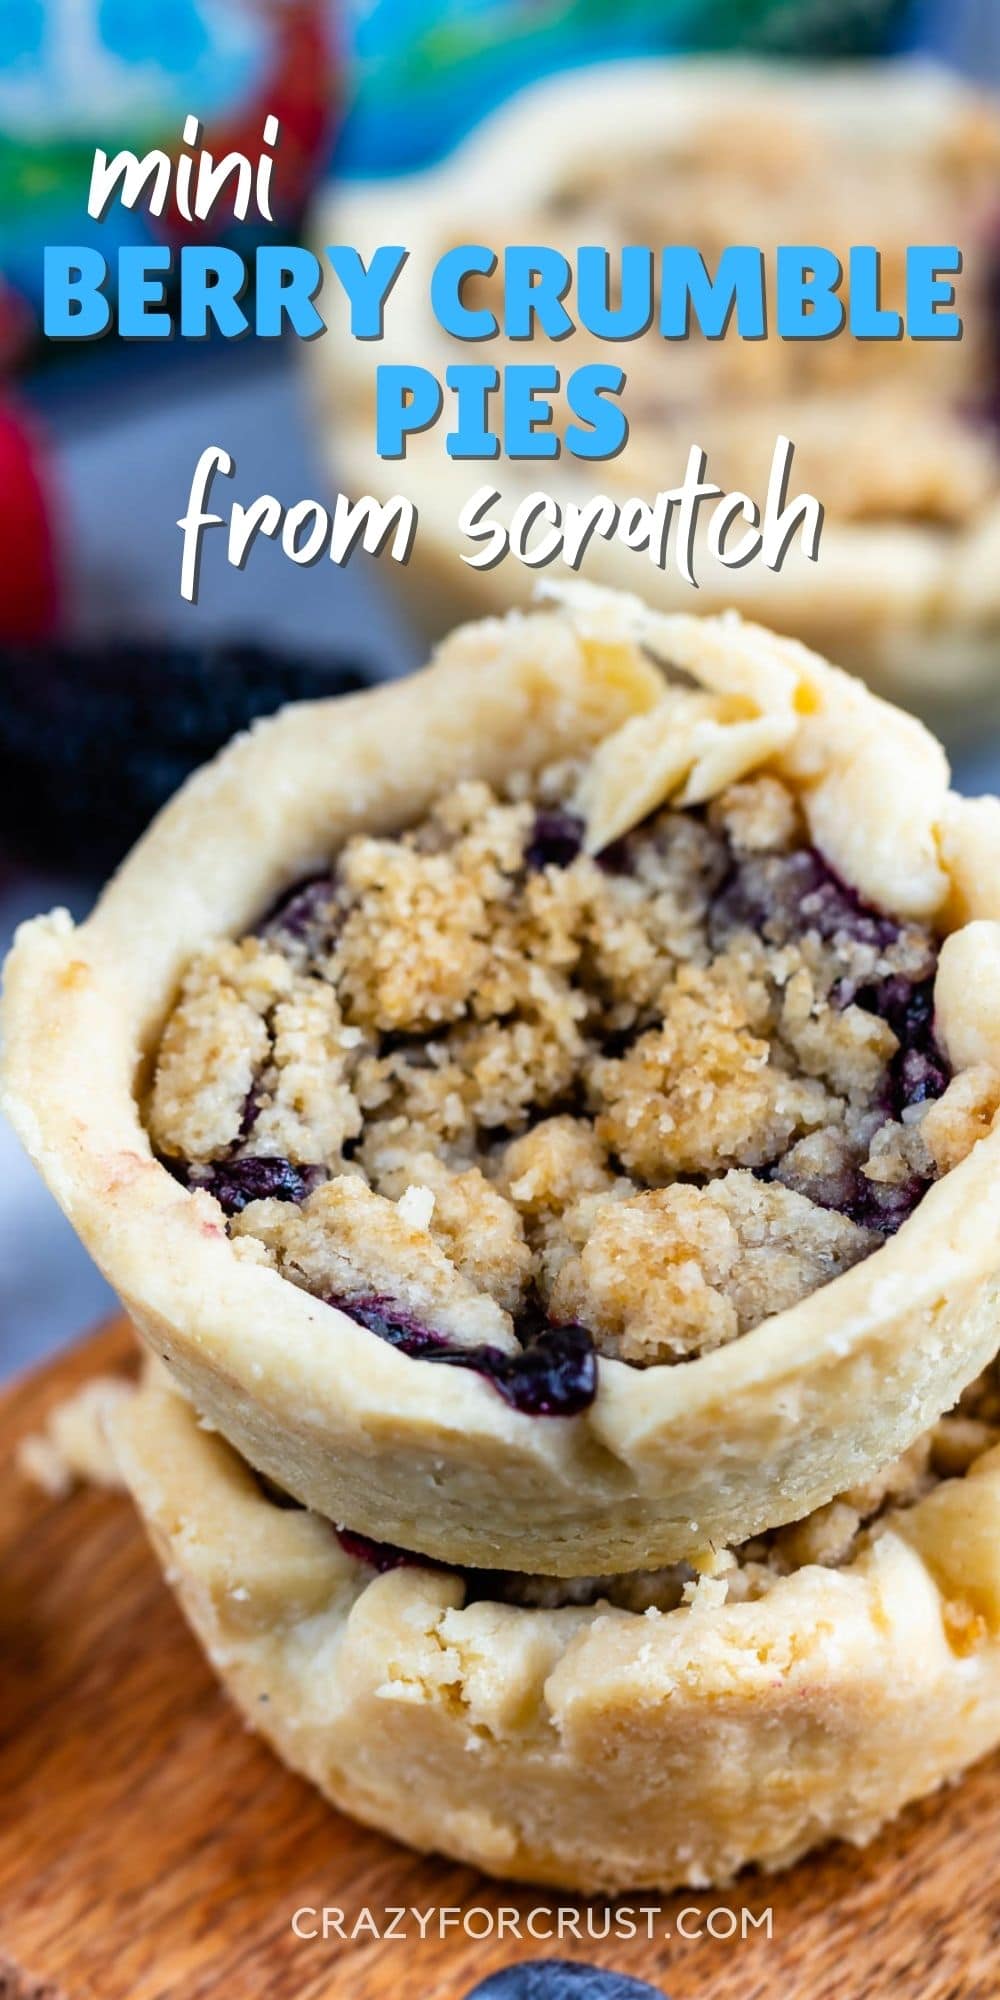
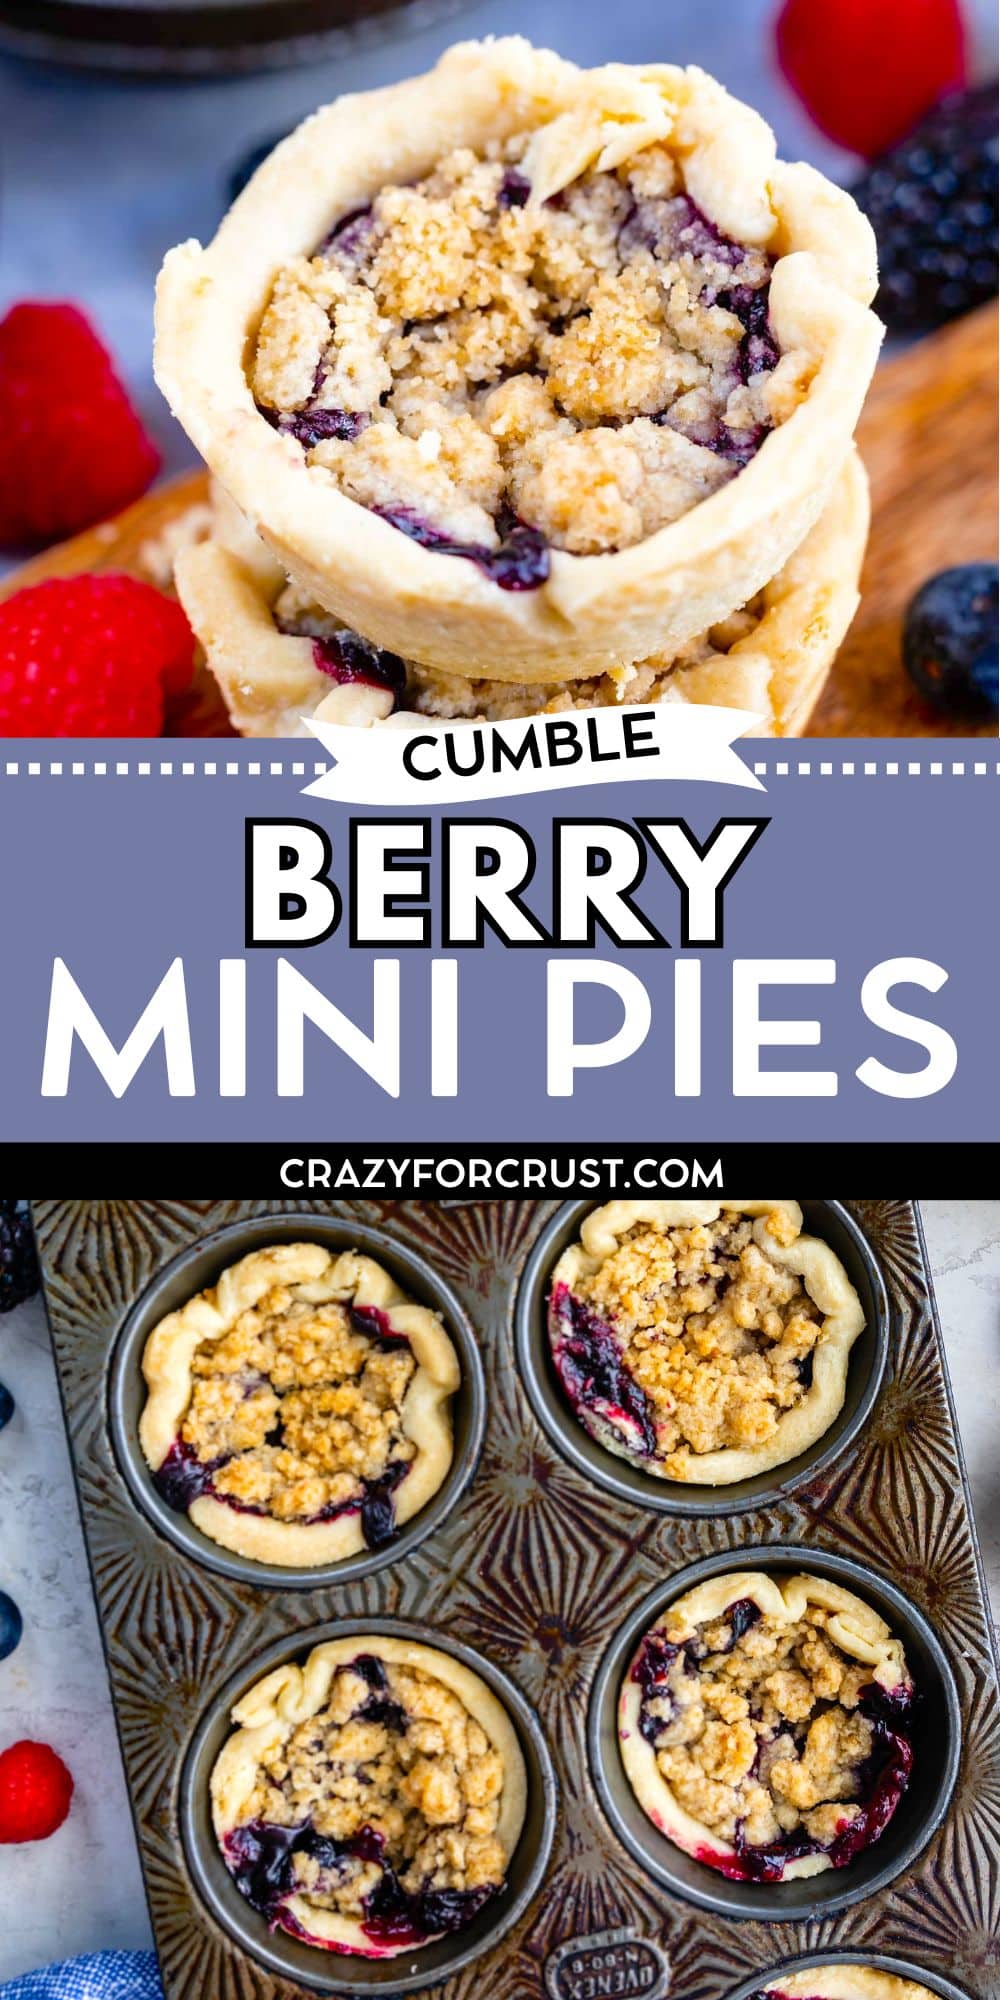
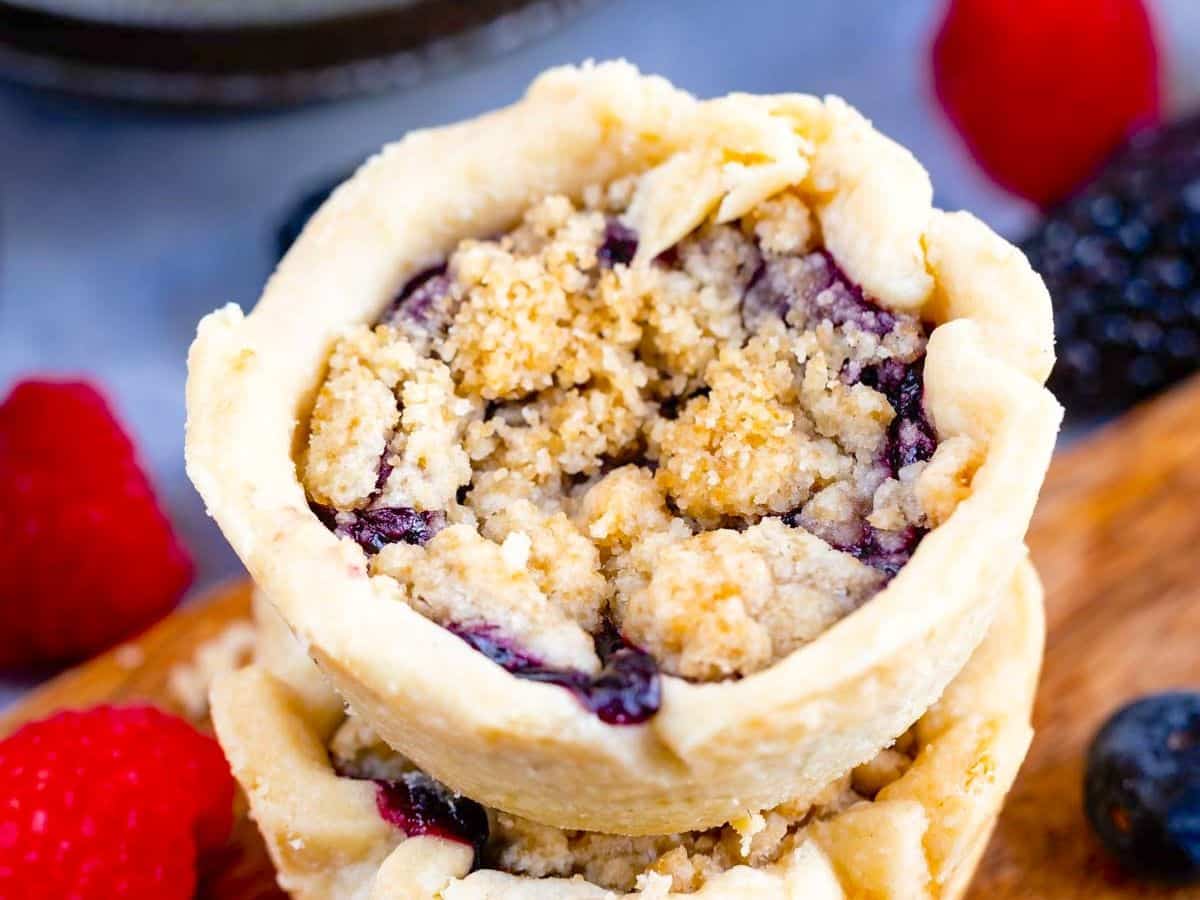
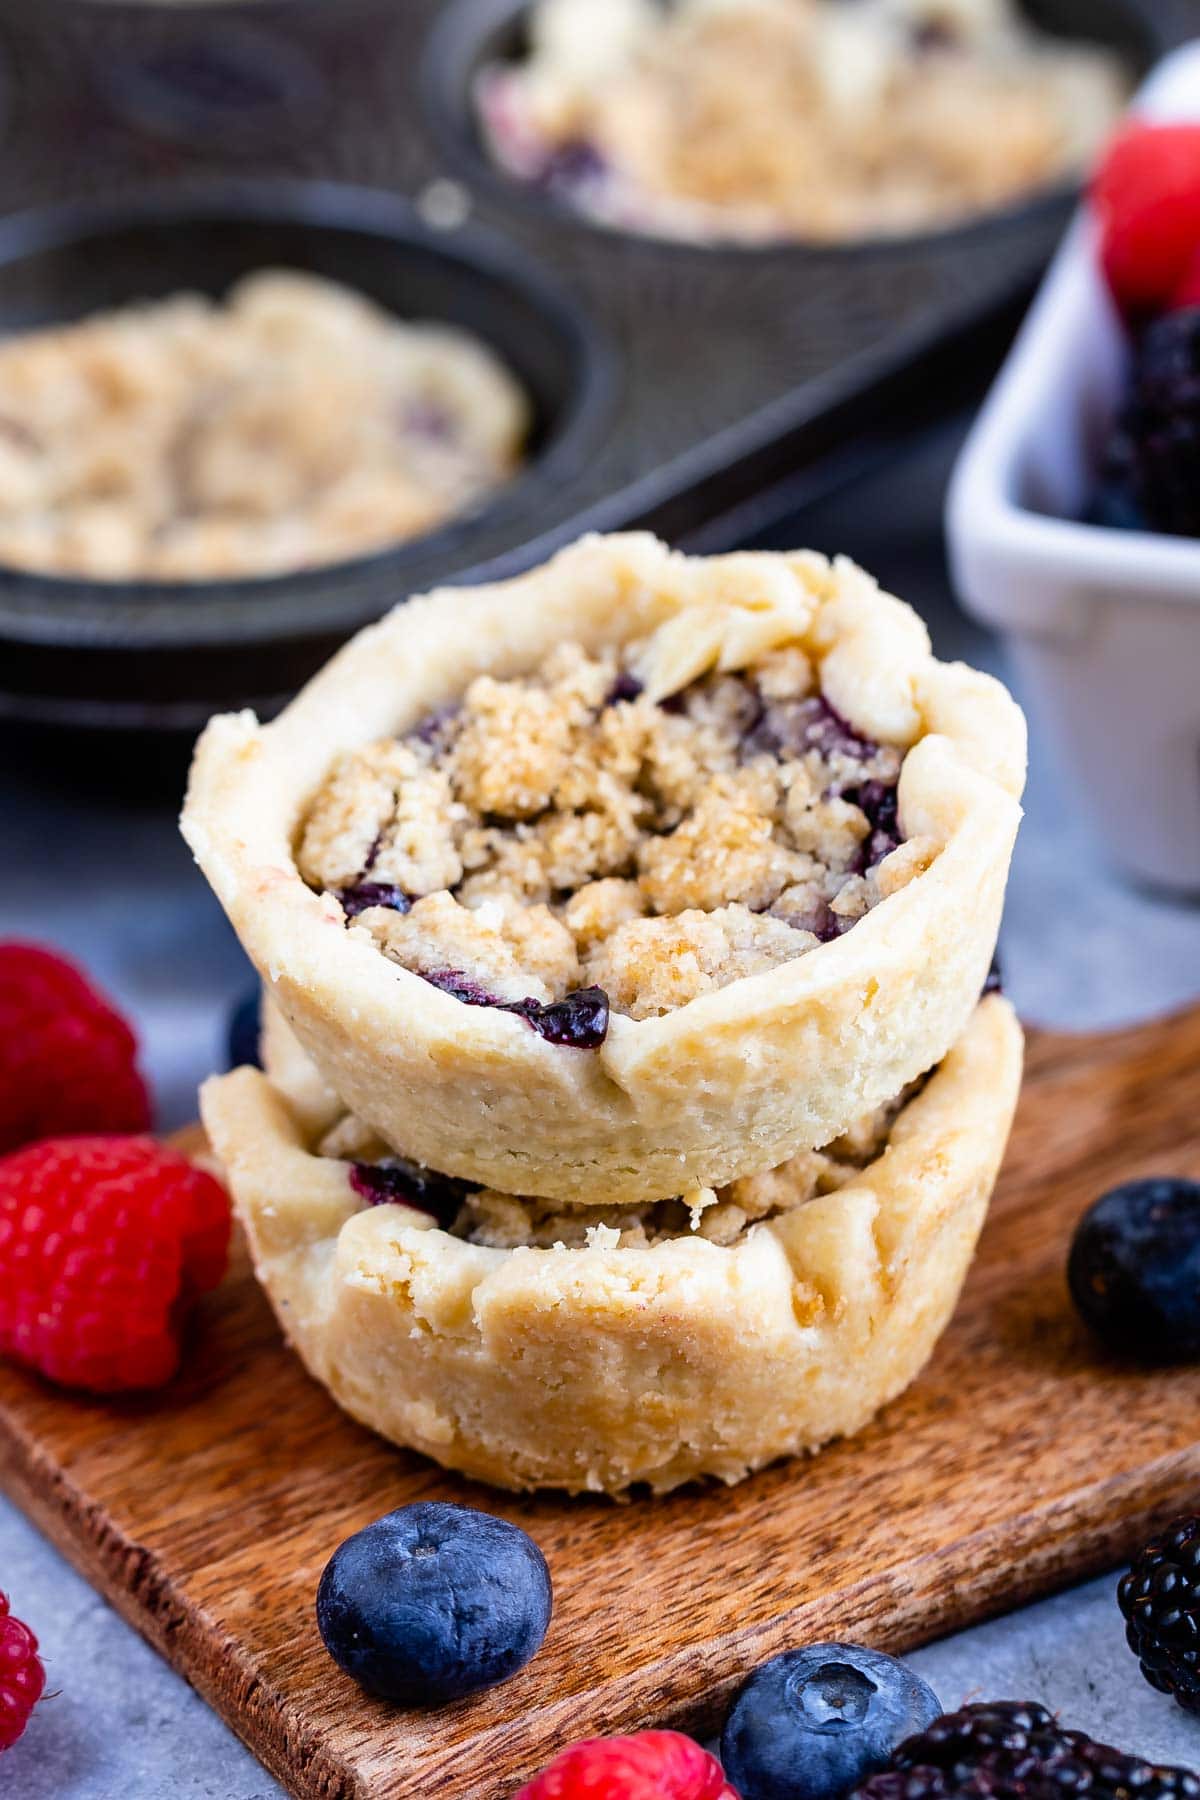
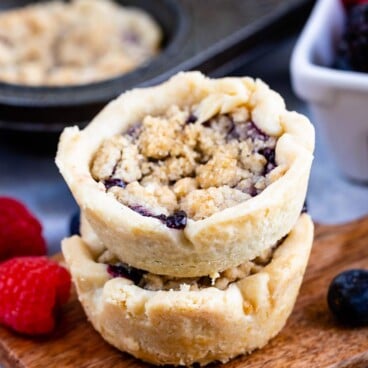
Mini Berry Pies are completely from scratch: a buttery pie crust filled with a jammy berry pie filling and topped with a sweet crunchy crumble. Mini Pies are so much easier to serve (and eat) than regular pie. These are perfect for any holiday!
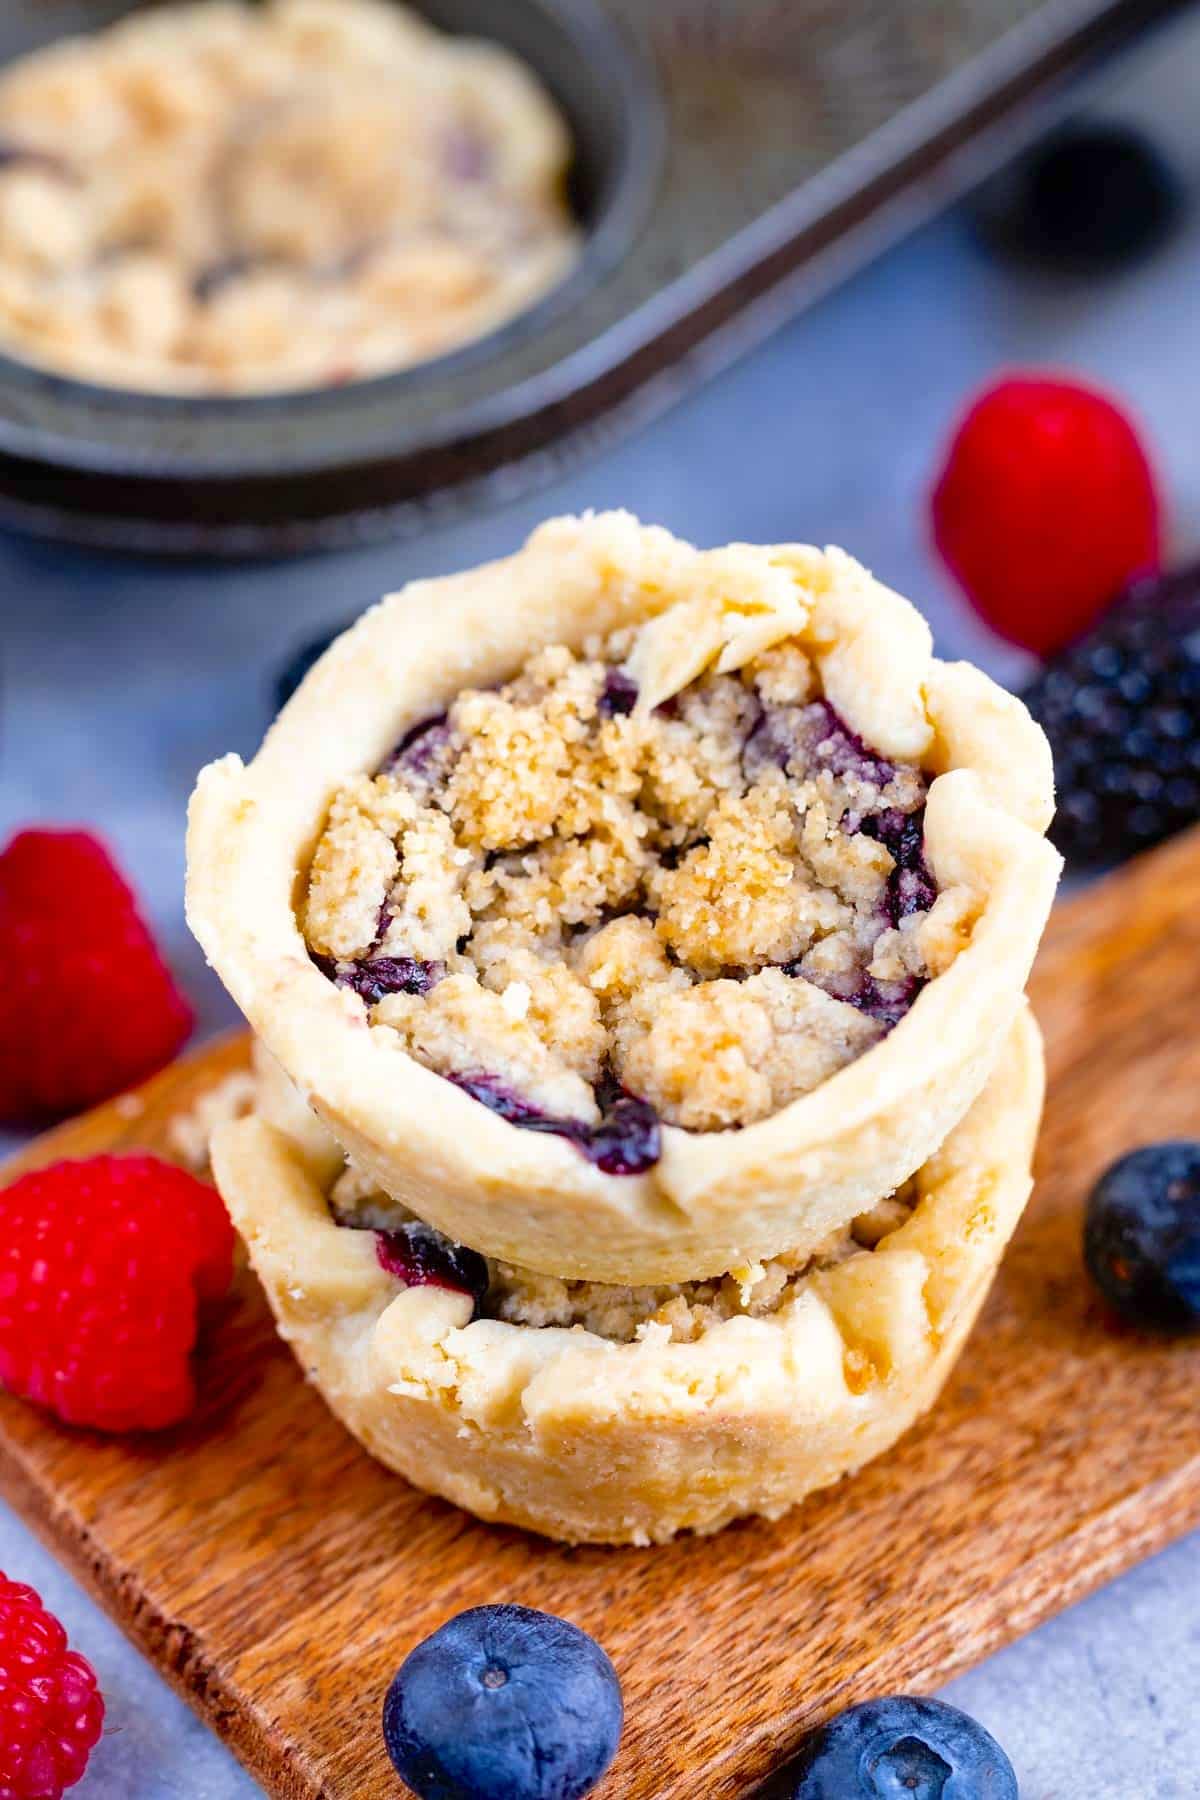
I love making mini pies because I can’t help but make ALL the desserts and then, of course, I want to have one of everything. In my experience, people want to taste everything you serve, but they feel guilty asking for slices of multiple pies…which is where tiny pies come in. Plus, single serving pies are much easier to serve, display on a dessert table, and eat!
The secret to making mini pies are to use a buttery crust, fresh or frozen berries with cornstarch for the filling, and crumble topping. Not having to use a double crust makes these much easier to make.
Ingredients for Mini Pies in Cupcake Tins
- I used frozen mixed berries for this recipe, because those are always in season. You can use any kind of berries (blueberries or blackberries or mixed) that are frozen or fresh.
- Cornstarch helps for thickening the berry pie filling.
- The filling uses granulated sugar and I used brown sugar in the filling.
- Lemon Juice: A little lemon juice in the filling just brightens up the flavor.
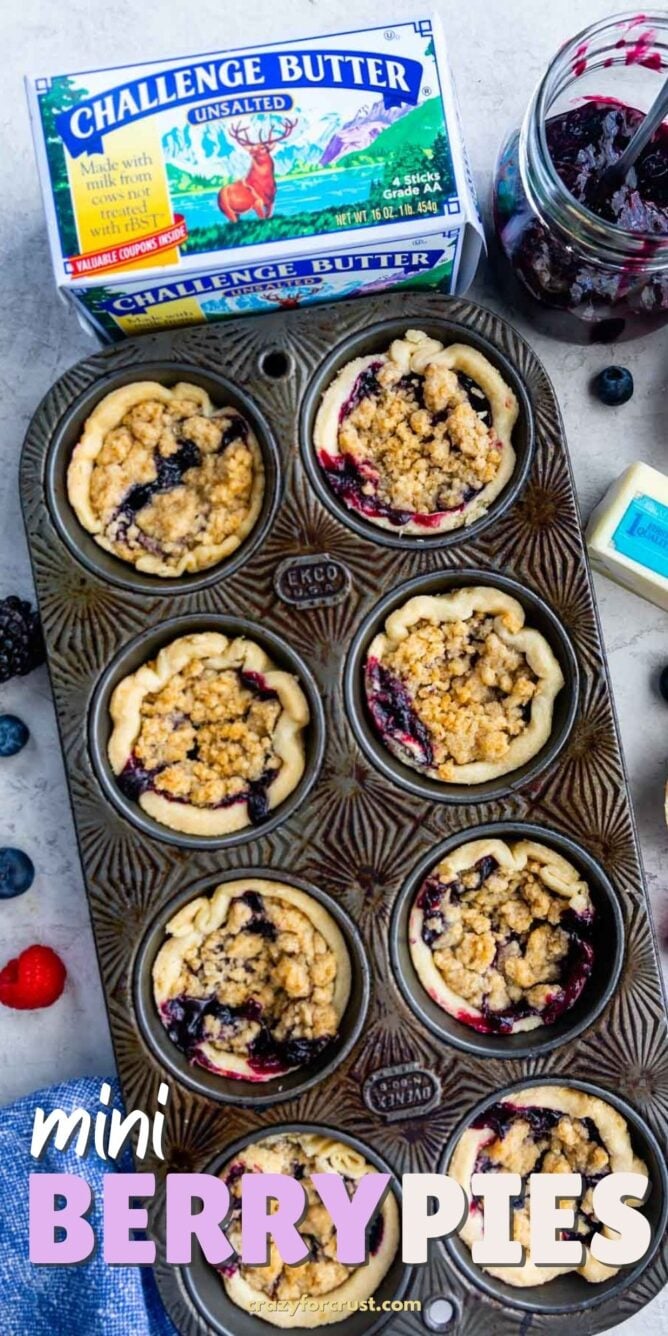
- Butter is the key ingredient in the crust and the crumble. My all butter pie crust is an epic recipe – thanks to all that butter!
Click to see the recipe card below for full ingredients & instructions. See below the recipe card for even more information: process shots, variations, FAQ and more.
SAVE THIS RECIPE
Expert Tips for Mini Berry Pies
- COLD ingredients: It’s really important when you’re making crumble or crust that you start with COLD butter and ICE water. It helps the crust be more flaky.
- Don’t have a 3.5-inch round cutter? Use a large glass, mason jar lid or mason jar.
- Fresh or frozen fruit may be used to make the filling.
- Be sure the filling is cold before assembling the pies.
- Don’t over fill the pies with pie filling or it’ll bubble up. Just about 1 or 1 1/2 tablespoons is perfect.
- Make sure to grease your muffin pans with the nonstick baking spray (with flour) or grease and flour them or use muffin liners.
- Cooled or chilled pies release from the pans much easier than when they’re warm.
- These taste best warmed or at room temperature. Serve them plain or with ice cream or whipped cream.
Mini Berry Pies Recipe
Video
Ingredients
Filling:
- 16 ounces frozen mixed berries, thawed (see note)
- ⅓ cup (79ml) water
- 2 tablespoons (16g) cornstarch
- 2 tablespoons (10ml) water
- ⅔ cup (133g) granulated sugar
- 1 teaspoon lemon juice
Crust:
- 10 tablespoons (141g) Challenge Unsalted Butter
- 1 ⅔ cups (207g) all-purpose flour
- ½ teaspoon salt
- 2-3 tablespoons (10-13ml) ice cold water
Crumble:
- 4 tablespoons (57g) Challenge Unsalted Butter
- ¼ cup (50g) packed brown sugar
- ½ cup (62g) all-purpose flour
Instructions
Make the Filling:
- Drain berries really well. Place them in a medium saucepan with 1/3 cup water. Heat over medium-low heat and cook, stirring occasionally, until you notice some of the berries breaking down, about 3-5 minutes.
- While that’s cooking, stir together the cornstarch and 2 tablespoons water in a small bowl.
- Stir in the sugar and lemon juice into the berries, then stir the cornstarch slurry to make sure it’s not clumped. Add to the berry mixture and stir constantly until the mixture thickens, about 1-3 minutes. Once it bubbles and looks thicker, it’s done. Remove from heat and transfer to a bowl or jar to cool completely, then refrigerate at least 2 hours.
Make the Crust:
- Slice your butter and place it back in the refrigerator to stay cold.
- Add flour and salt to the bowl of a large food processor and pulse once to combine. Add the cold butter and pulse just a few times until the butter is incorporated (mixture will be crumbly). Slowly add 2 tablespoons water while running the food processor. Let the processor run about 10 seconds, adding just a teaspoon more water at a time until the mixture comes together in a ball.
- Turn the pie crust ball out onto a sheet of wax or parchment paper laid out on a clean work surface. Top with a second sheet of wax or parchment paper and roll to ¼-inch thickness. Chill 30 minutes.
- Use a 3.5-inch round cookie cutter to cut circles out of the pie crust, re-rolling as needed. If the dough gets too soft, pop it back into the refrigerator to chill it for 15 minutes or so.
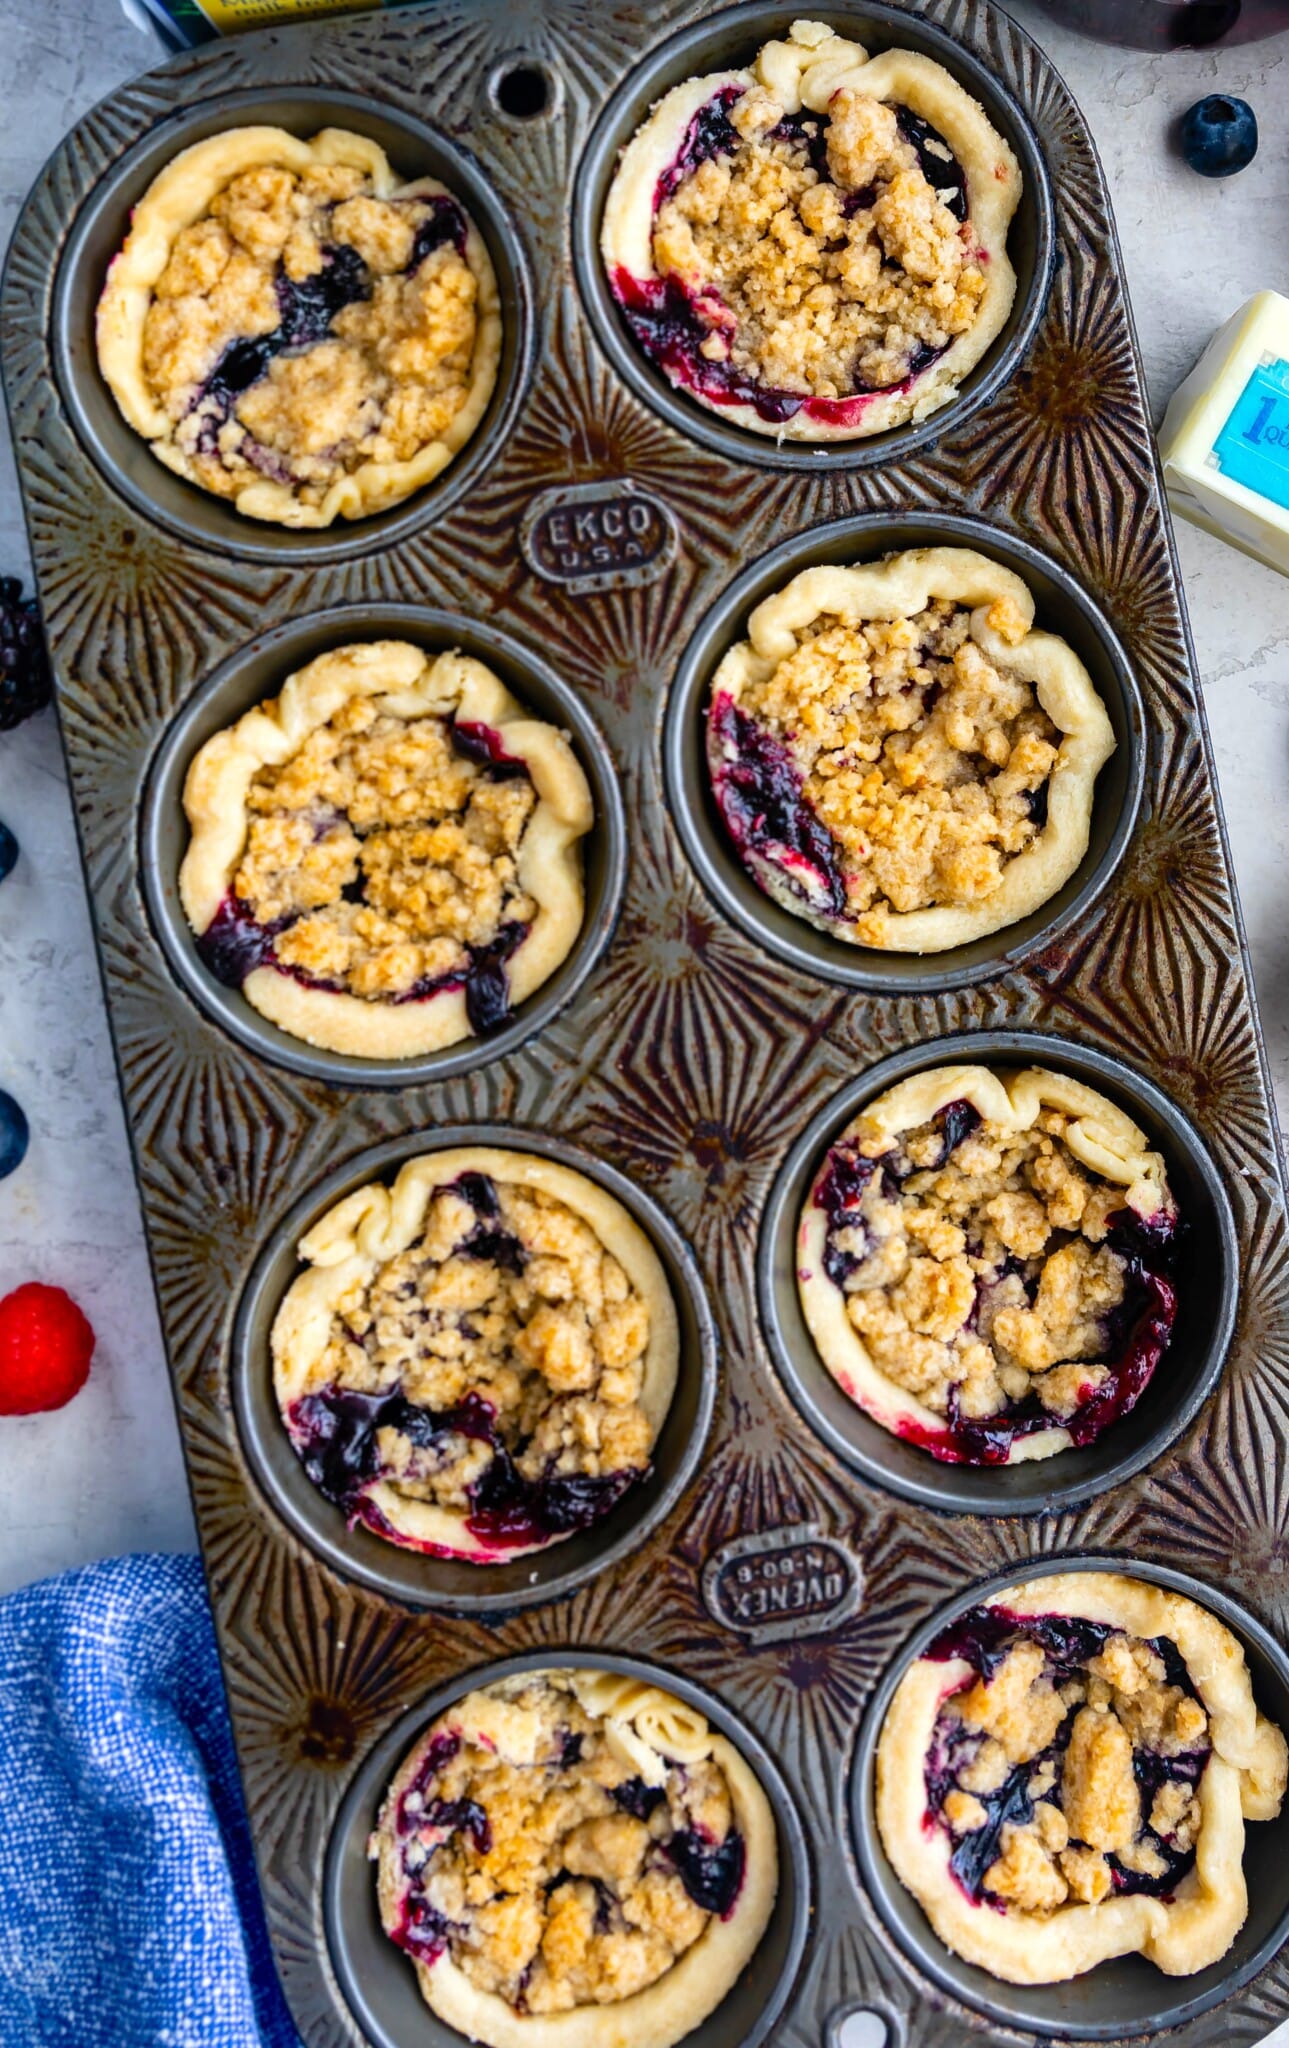
- Spray a 12-cup cupcake pan with nonstick baking spray (the kind with flour in it) or grease and flour the cavities.
- Press a round into each muffin cavity, pressing gently so you don’t poke holes in the crust. Chill the crusts for at least 30 minutes before filling.
Make the Crumble and Assemble:
- Preheat oven to 400°F.
- Grate the butter, or dice it small.
- Whisk together the flour and sugar and add the butter, then use a pastry cutter to cut the butter into the dry ingredients until the mixture is crumbly.
- Spoon about 1-1 ½ tablespoons of berry filling into each pie crust and top with about 1-2 tablespoons crumble. Press the crumble to compact it slightly.
- Bake pies for 25-35 minutes, or until the crust is no longer opaque and the crumble looks dry. It won’t brown much. If any of the berry mixture has bubbled up to the muffin pan itself, use a butter knife to kind of clear it so it doesn’t cause the filling to harden to the pan and make the pies hard to remove.
- Cool completely in the pans on the counter before removing. I find it’s easiest to remove them if they’ve been chilled. Run a butter knife gently around the edges and they should pop out.
- Store in an airtight container in the refrigerator for up to 4 days or freeze for up to 3 months.
Notes
- You can use fresh berries if you want, just measure out about 16 ounces.
- Make sure to drain the frozen thawed berries very well.
- Don’t want to make your own filling? Use a canned pie filling!
- Try not to make the crusts thinner than ¼-inch thick or they’ll be harder to remove from the pans.
- Don’t overfill the pie crusts with the berry filling – 1 or 1 ½ tablespoons is about perfect.
Nutrition
Nutrition information is automatically calculated, so should only be used as an approximation.
© Crazy for Crust. Content and photographs are copyrighted. Sharing this post is much appreciated, but copying and pasting full recipes without authorization is strictly prohibited.
Did you try this recipe? Click here to rate the recipe below.
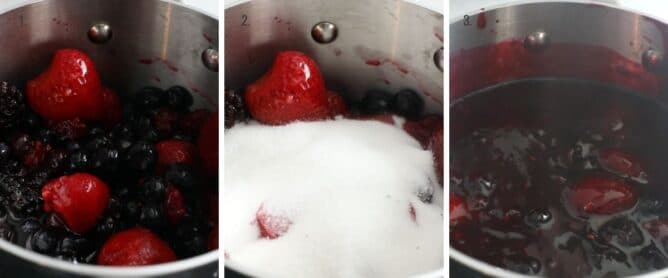
How to make Berry Pie Filling
- When you cook berries with sugar the fruit will break down and the pectin will be released.
- Once it bubbles and boils the cornstarch activates and the mixture will be thickened. It’ll thicken more as it cools. This can be done up to 24-48 hours ahead of making the pies.
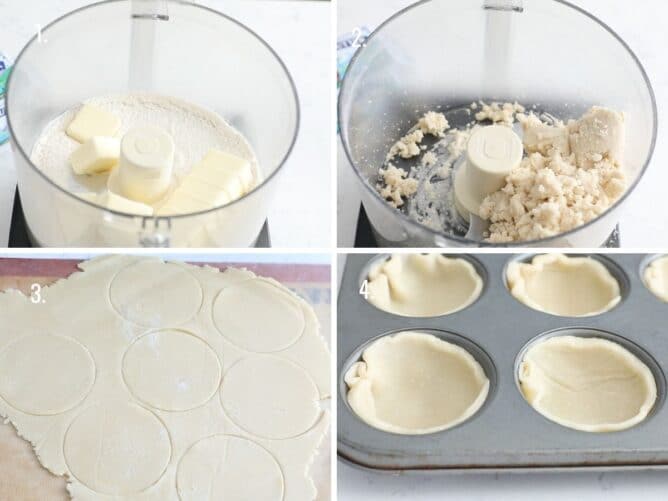
How to make Little Pie Crusts
For a more in depth look at how to make pie dough, check out my all butter pie crust recipe post.
- Using a food processor makes it much easier to combine your pie crust ingredients.
- Be sure to roll out the dough to an even thickness all over the surface of the crust.
- Use a cookie cutter or glass to cut the circles.
- The circles will fit easily into the muffin pan.
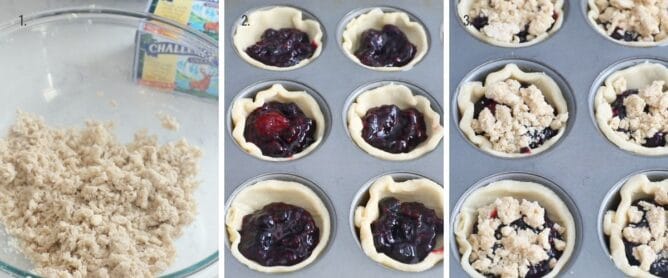
How to make Mini Pies
- Make the crumble by adding butter, flour and sugar to a large bowl. Cut in the butter until it’s crumbly.
- Fill crusts with berry pie filling.
- Top with crumble topping, then bake!
In your recipe for the crust: 2-3 tablespoons (10-13ml) ice cold water
This is incorrect. A tablespoon is 15 ml, so 2-3 tablespoons would equal 30 – 45 ml.
A teaspoon is 5 ml. It looks like you are using a teaspoon as measurement instead of a tablespoon.
That said, the recipe looks delicious and I will make it soon.
omg This is super delicious i used SAskatoons for a farmers market last week this week i used the recipe with rhubarb and cooked the fruit longer due to the juice again an A+ Thanks i have more berries left so next week will be smelling good againnnn.
The crust was great! So flakey and good. The only thing I did different was I use 1T each of lard and 1 T of shortening and 8 T of salted butter cause that’s all I had and I used 4 5inch mini pie plates. I had some dough leftover so I made
strips for lattice on the pie. I had already had my own berry sauce made up so I haven’t try that yet.
These were really good and easy to make!
Here’s some notes:
Don’t get discouraged if your filling doesn’t thicken at first, because it took me a little longer than the recipe said. Also, it thickens in the fridge. So if you’re not sure if it’s the right consistency, let it chill and then go from there.
I accidentally doubled the lemon juice and I’m glad I did.
I also put less sugar in the filling because I didn’t want it to be too sweet if you know what I mean (a little over 1/3 cup).
I also added a few oats to the crumble.
Speaking of crumble, mine didn’t really turn out the way it looks in the picture. But maybe that’s just me.
Overall I really liked these and would recommend!
Featured In
Rate This Recipe
Recipe Ratings without Comment