This post may contain affiliate links. For more information, read my disclosure policy.
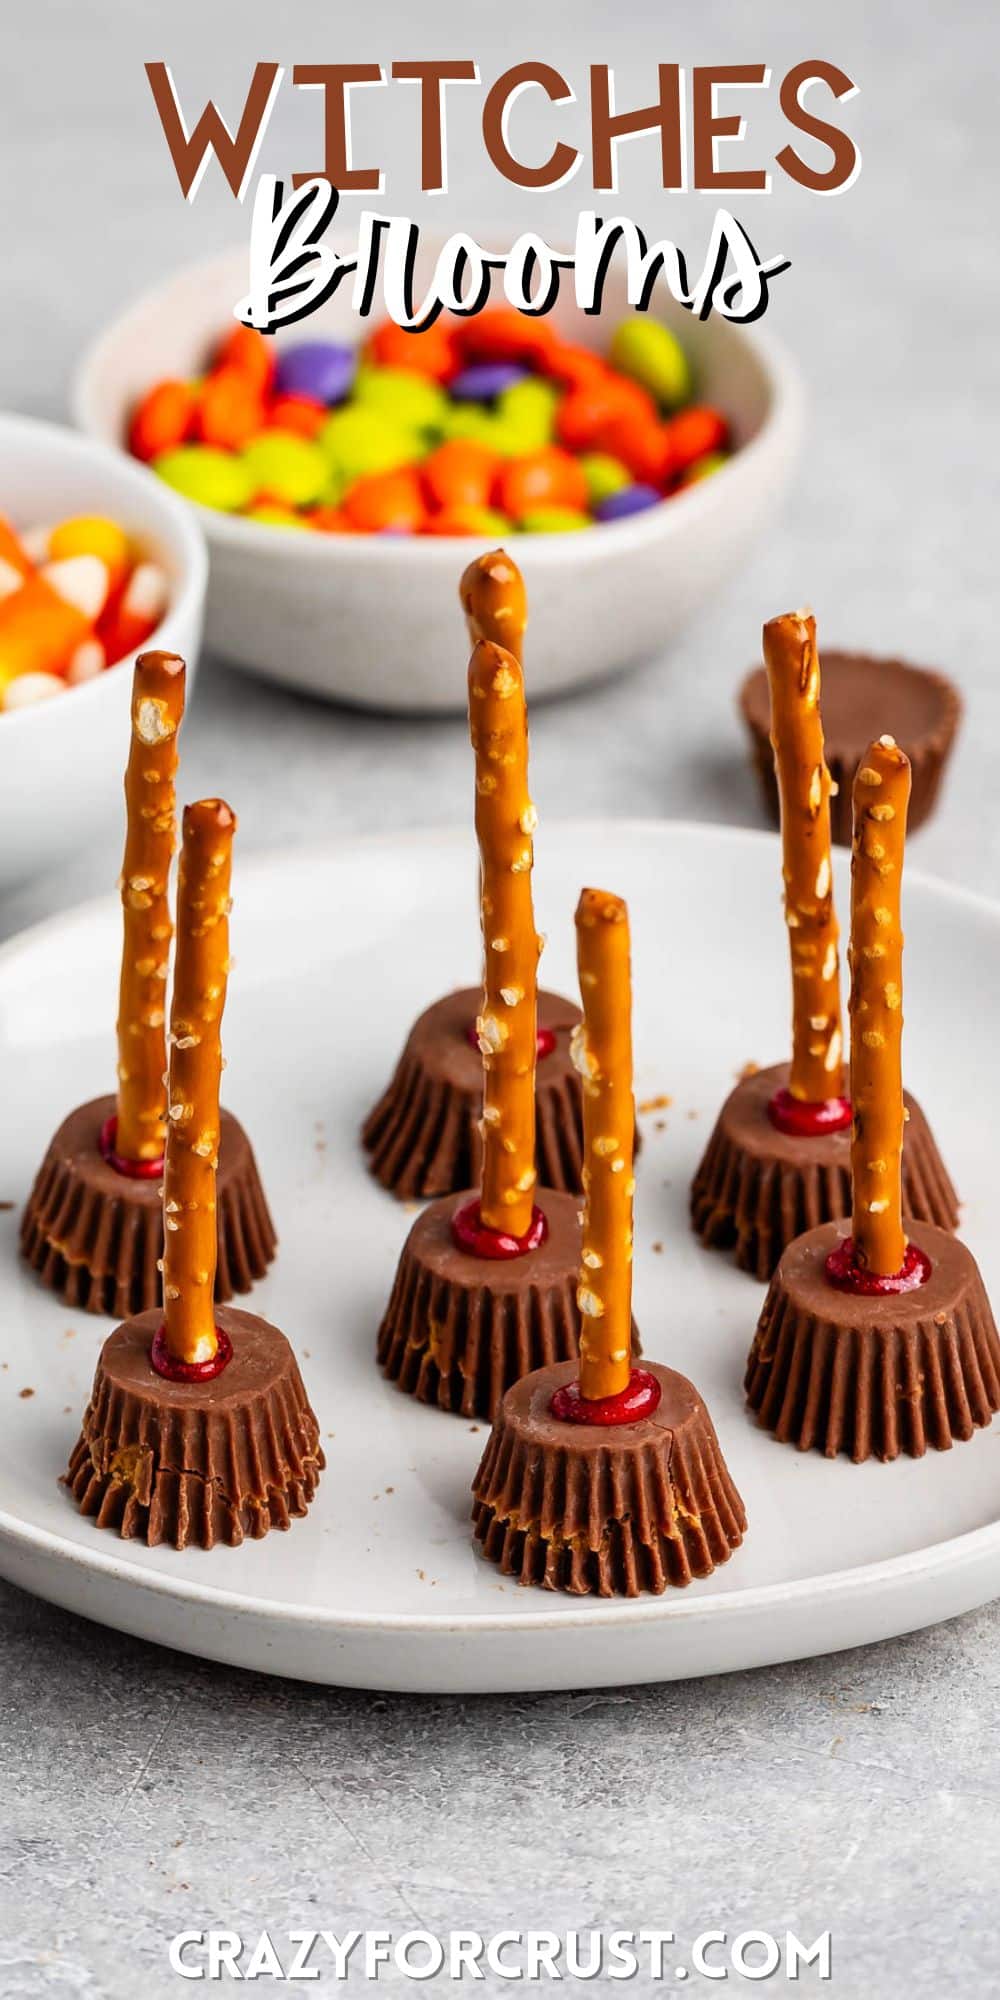
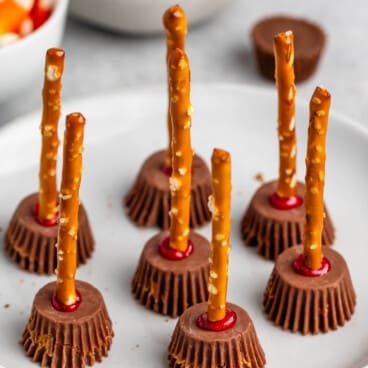
These Witches Brooms are the perfect Halloween recipe! With only 3 ingredients they’re done in minutes – plus they’re super cute and the kids can even make them themselves!
Halloween Witch Candy
What is more halloween than witches’ broomsticks? These candy treats are super easy to make and they are perfect for a party. We love all things witch at Halloween (like Cauldron Cupcakes or Witch Hat Cookies) and these go perfectly alongside. Plus kids (and adults) absolutely love these treats – and it’s a fun party activity too!
Ingredients Needed
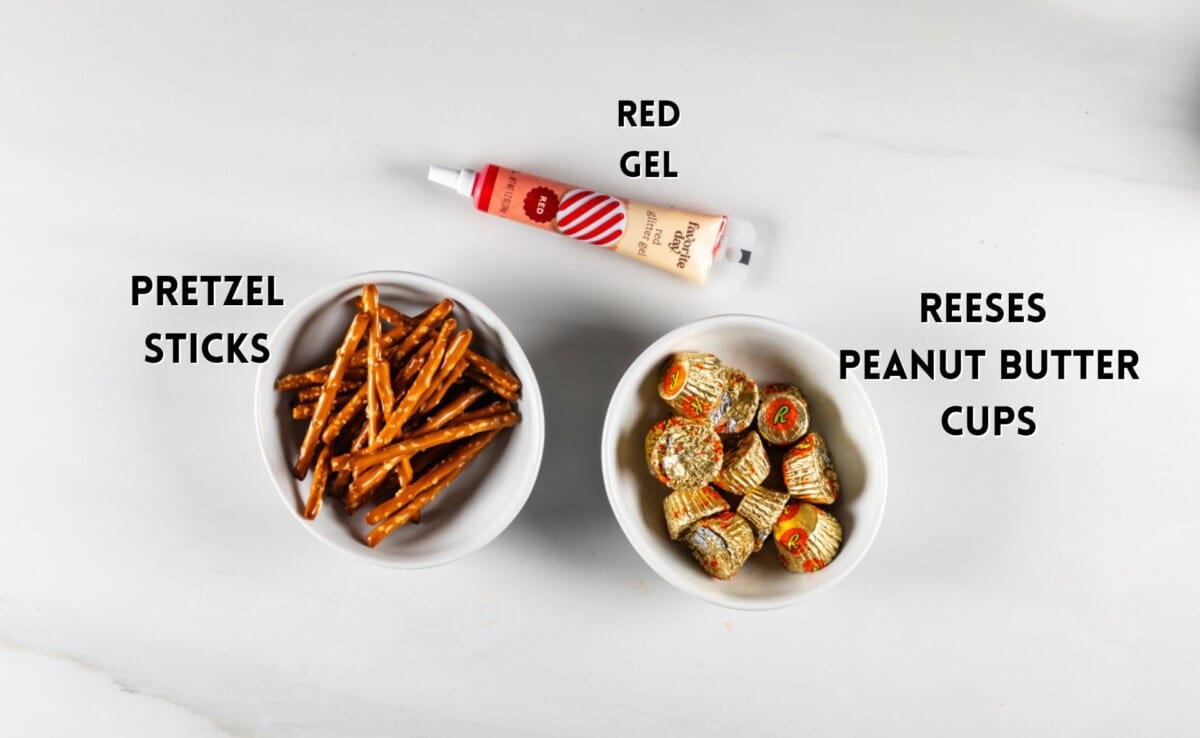
- Pretzel Sticks: For the broom handles
- Reese’s Peanut Butter Cups: For the broom heads
- Glitter Gel: To make sure the two ingredients stick together. You can use any color or use frosting.

SAVE THIS RECIPE
How to make Witches Brooms
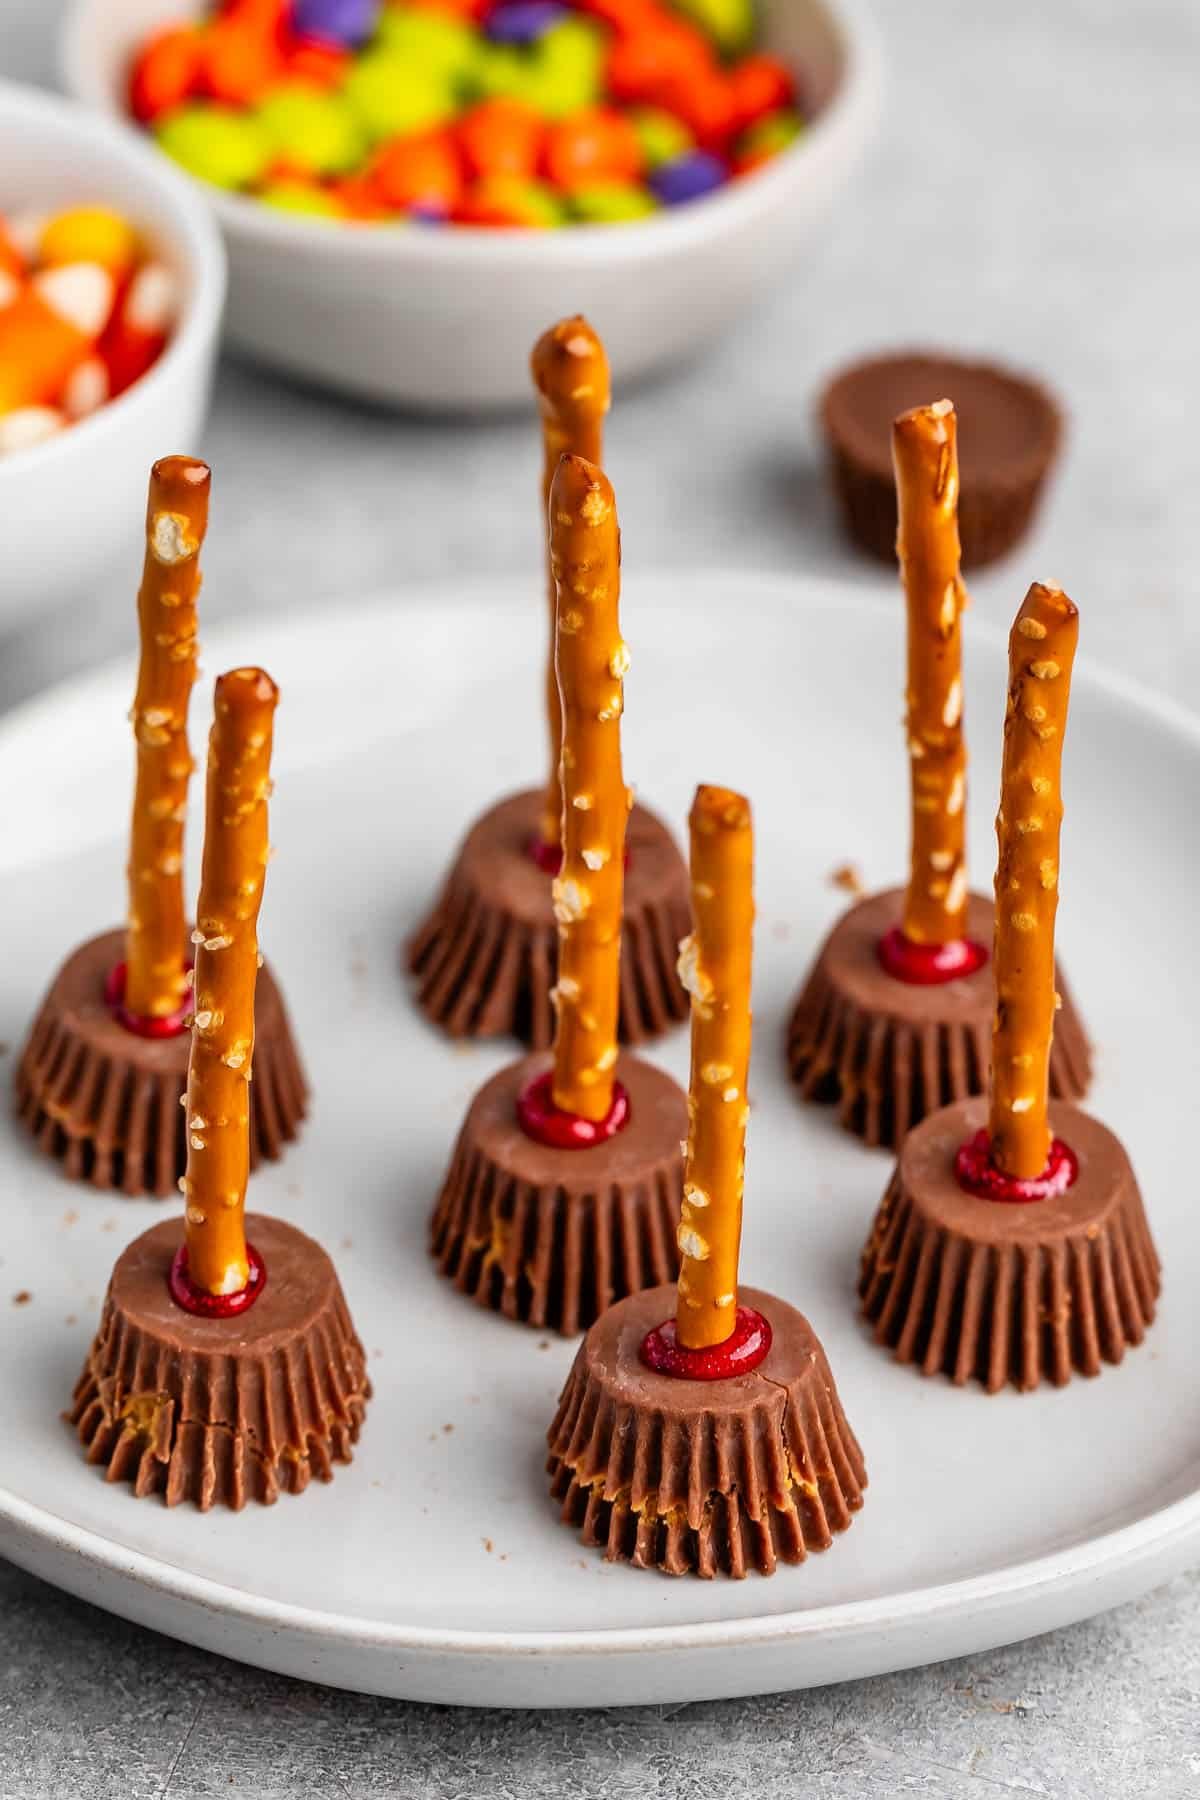
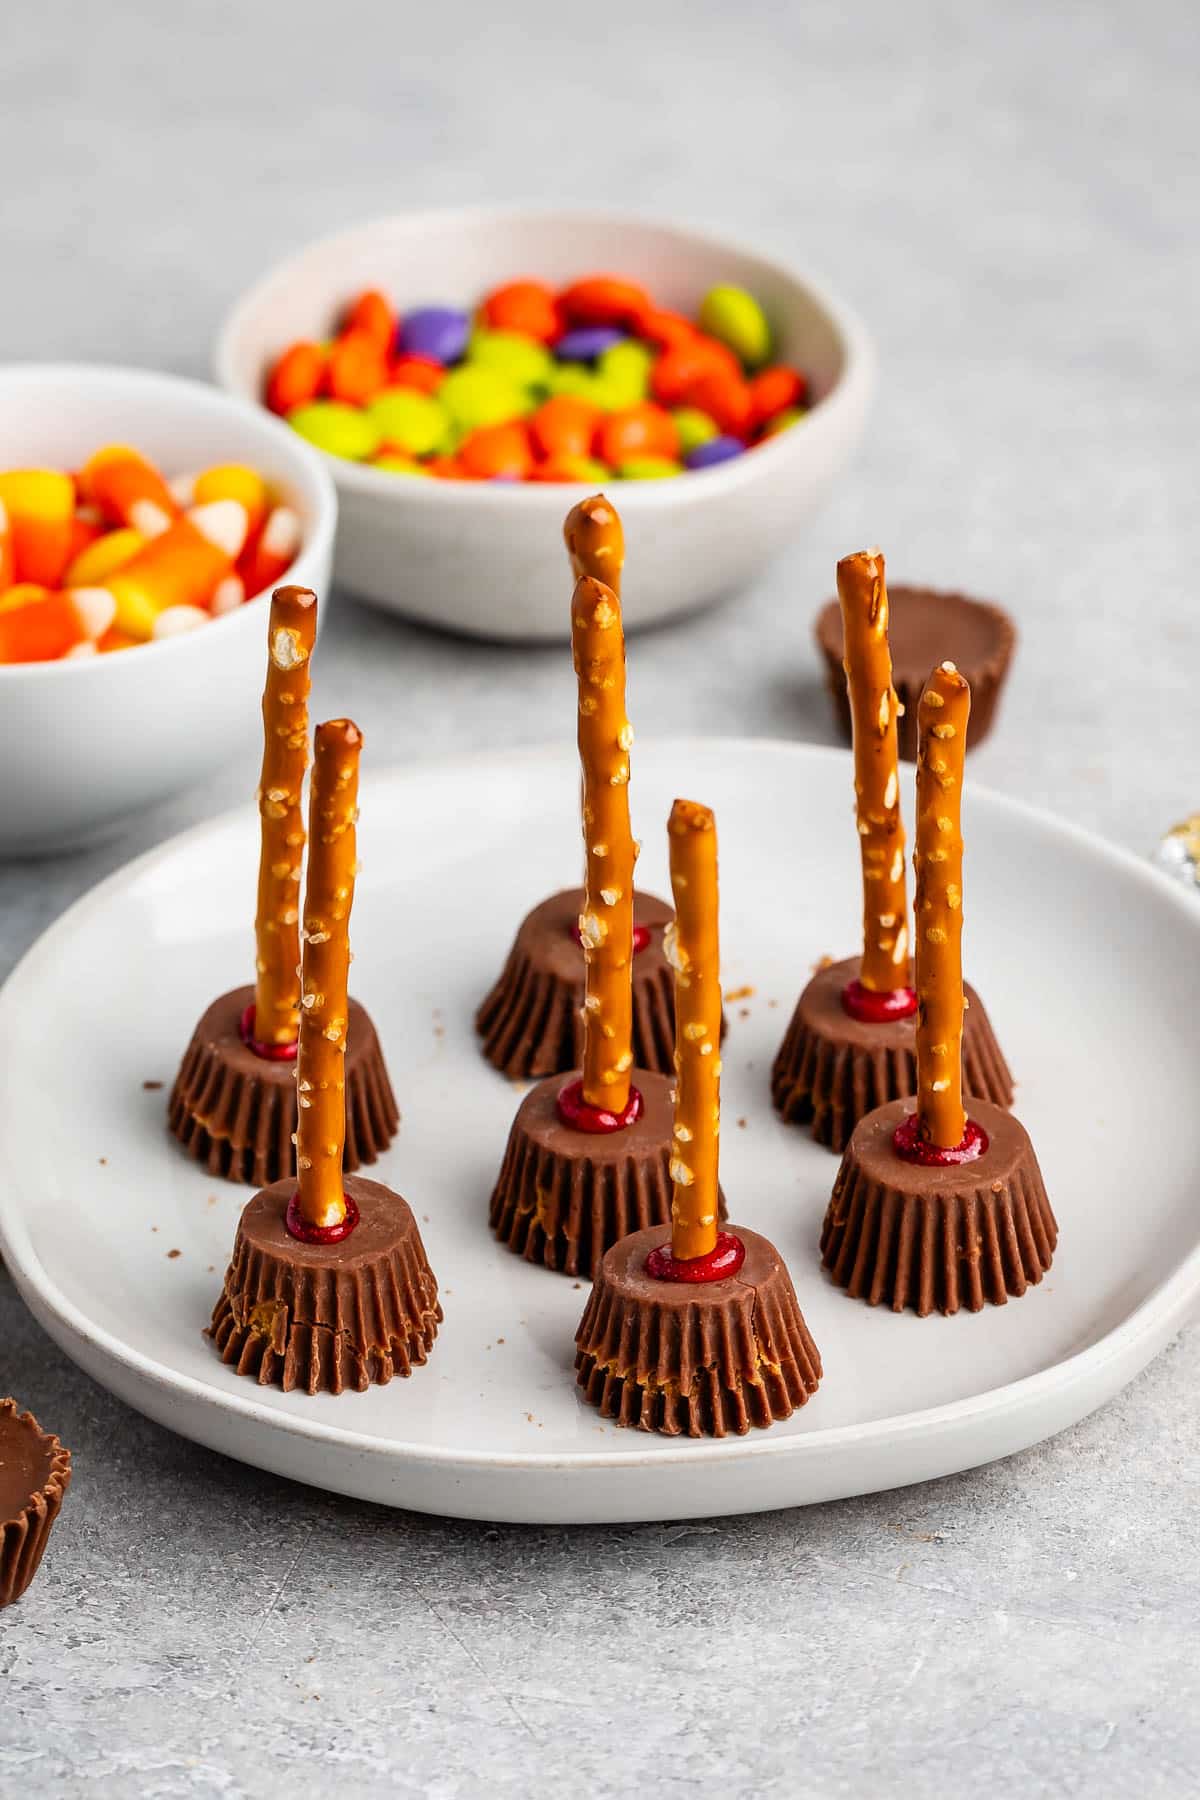
- Place peanut butter cups unwrapped upside down on a plate.
- Squeeze a bit of icing or gel icing on the top in the center.
- Insert a pretzel stick in the top.
Expert Tips
- Make these for a party! If you need anything last minute – these brooms are super easy to get done.
- If you peel the peanut butter cups and find that the chocolate is coming off, put them in the freezer for a few minutes.
- Store in an airtight container for up to one week. I do not recommend freezing these.
Witches’ Brooms Recipe
Ingredients
- 24 Miniature Peanut Butter Cups , (unwrapped)
- 24 Pretzel sticks
- Frosting or gel icing, (see note)
Instructions
- Place peanut butter cups unwrapped upside down on a plate.
- Squeeze a bit of icing or gel icing on the top in the center.
- Insert a pretzel stick in the top.
- Store in an airtight container for up to one week. I do not recommend freezing these.
Notes
- If your peanut butter cups are pulling off the chocolate edges when you’re unwrapping them (meaning they’re too warm), freeze for a few minutes.
- I used a little tube of red gel icing from the grocery store, but you can use frosting in a piping bag if you prefer.
Nutrition
Nutrition information is automatically calculated, so should only be used as an approximation.
© Crazy for Crust. Content and photographs are copyrighted. Sharing this post is much appreciated, but copying and pasting full recipes without authorization is strictly prohibited.
Did you try this recipe? Click here to rate the recipe below.
I love love LOVE the new look!!! Sorry about not decorating your house, but you definitely made up for it with all the fun Halloween treats:-) How cute and easy are these!!!
Those are so cute. Sorry you did not get to decorate, but it looks like you put your creative juices to good use! Come visit. We have an awesome panna cotta today.
Love these witches brooms! Noticed the new look… very cute!
very yummy looking! And I love, LOVE the new look!!!
Festive, creative and perfect for All Hallows Eve!
Featured In
Rate This Recipe