This post may contain affiliate links. For more information, read my disclosure policy.


Candy Bar Brownies baked in a pie crust! These are perfect to make when you want a good brownie, but you want to add something more! It’s the perfect combination of two desserts in one.
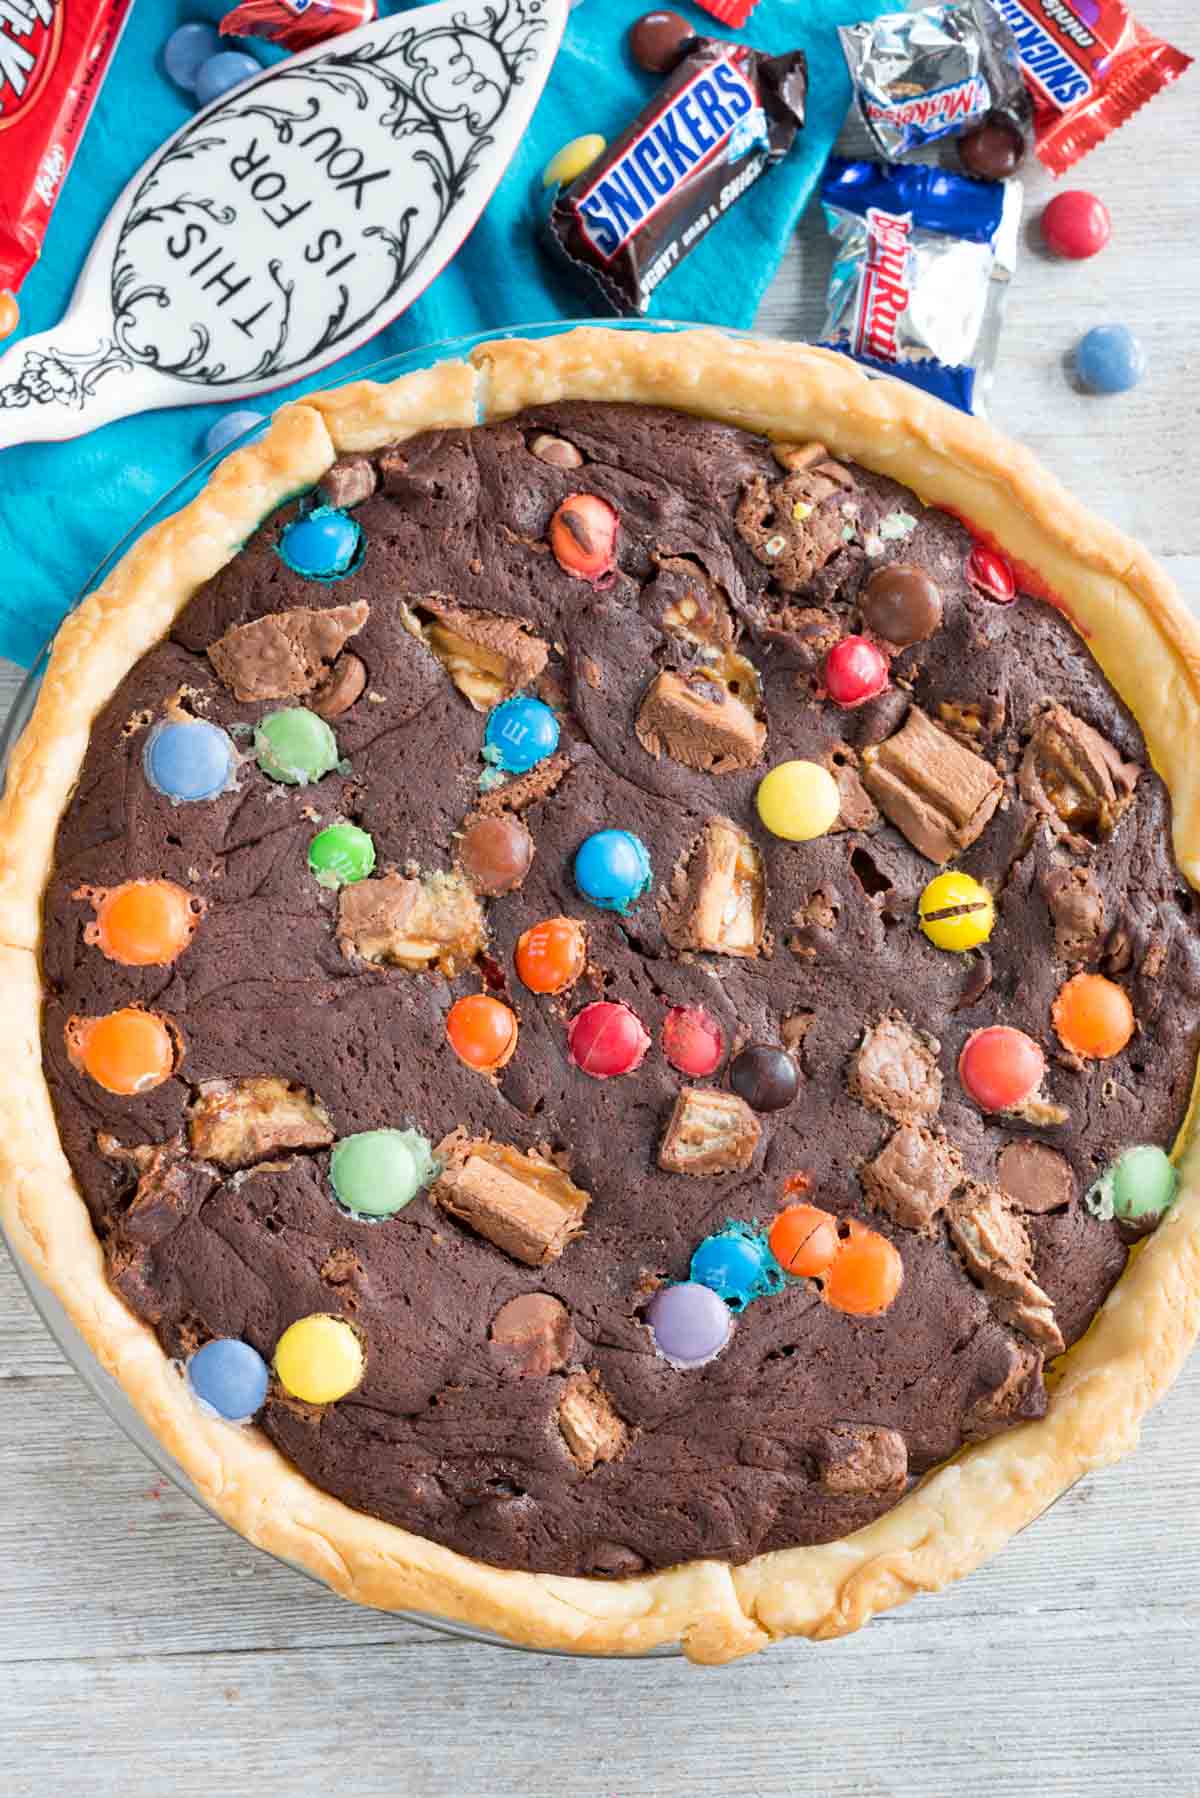
The Ultimate Candy Bar Brownie Pie
This recipe is the best for late fall because it mixes two of the biggest holidays: Halloween and Thanksgiving. We all know that trick-or-treating produces a lot of candy and then a month later–we’re making pies.
Use all your leftover Halloween candy and make this amazing fudgy brownie pie. Nonetheless these candy bar brownies can be made anytime of the year, because who doesn’t want to eat candy and brownies? Do not miss out on this pie recipe. It will have you wanting more.
Ingredients Needed
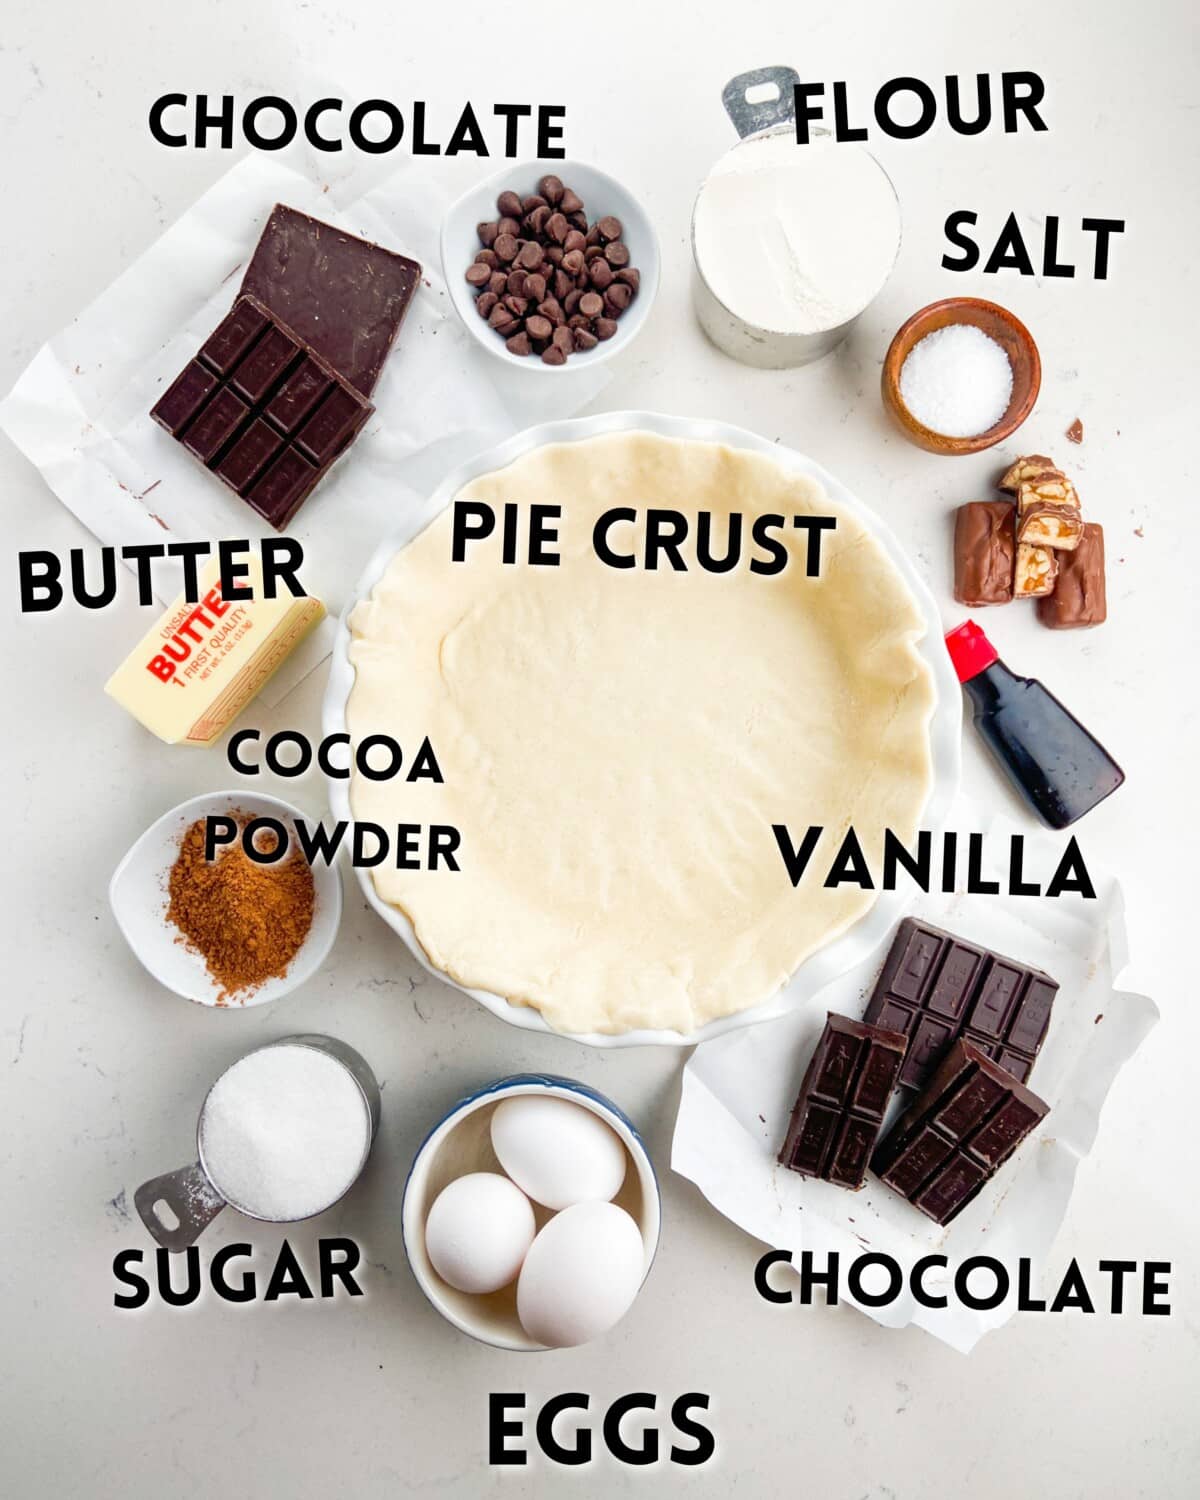
- All Butter Pie Crust: Use my homemade pie crust recipe or one from the store.
- Baking Chocolate: This uses a combination of unsweetened and semi-sweet but you can use all of one or the other.
- Unsalted butter: I prefer baking with unsalted butter, but you can substitute salted if that’s all you have.
- Eggs: Did you know that the eggs are what keeps a brownie super fudgy?
- Unsweetened Cocoa Powder: You can use regular unsweetened or Dutch Process Cocoa Powder.
- Chopped candy and/or chocolate chips: Use your favorite candy – whatever you have leftover!
How to make Candy Bar Brownie Pie
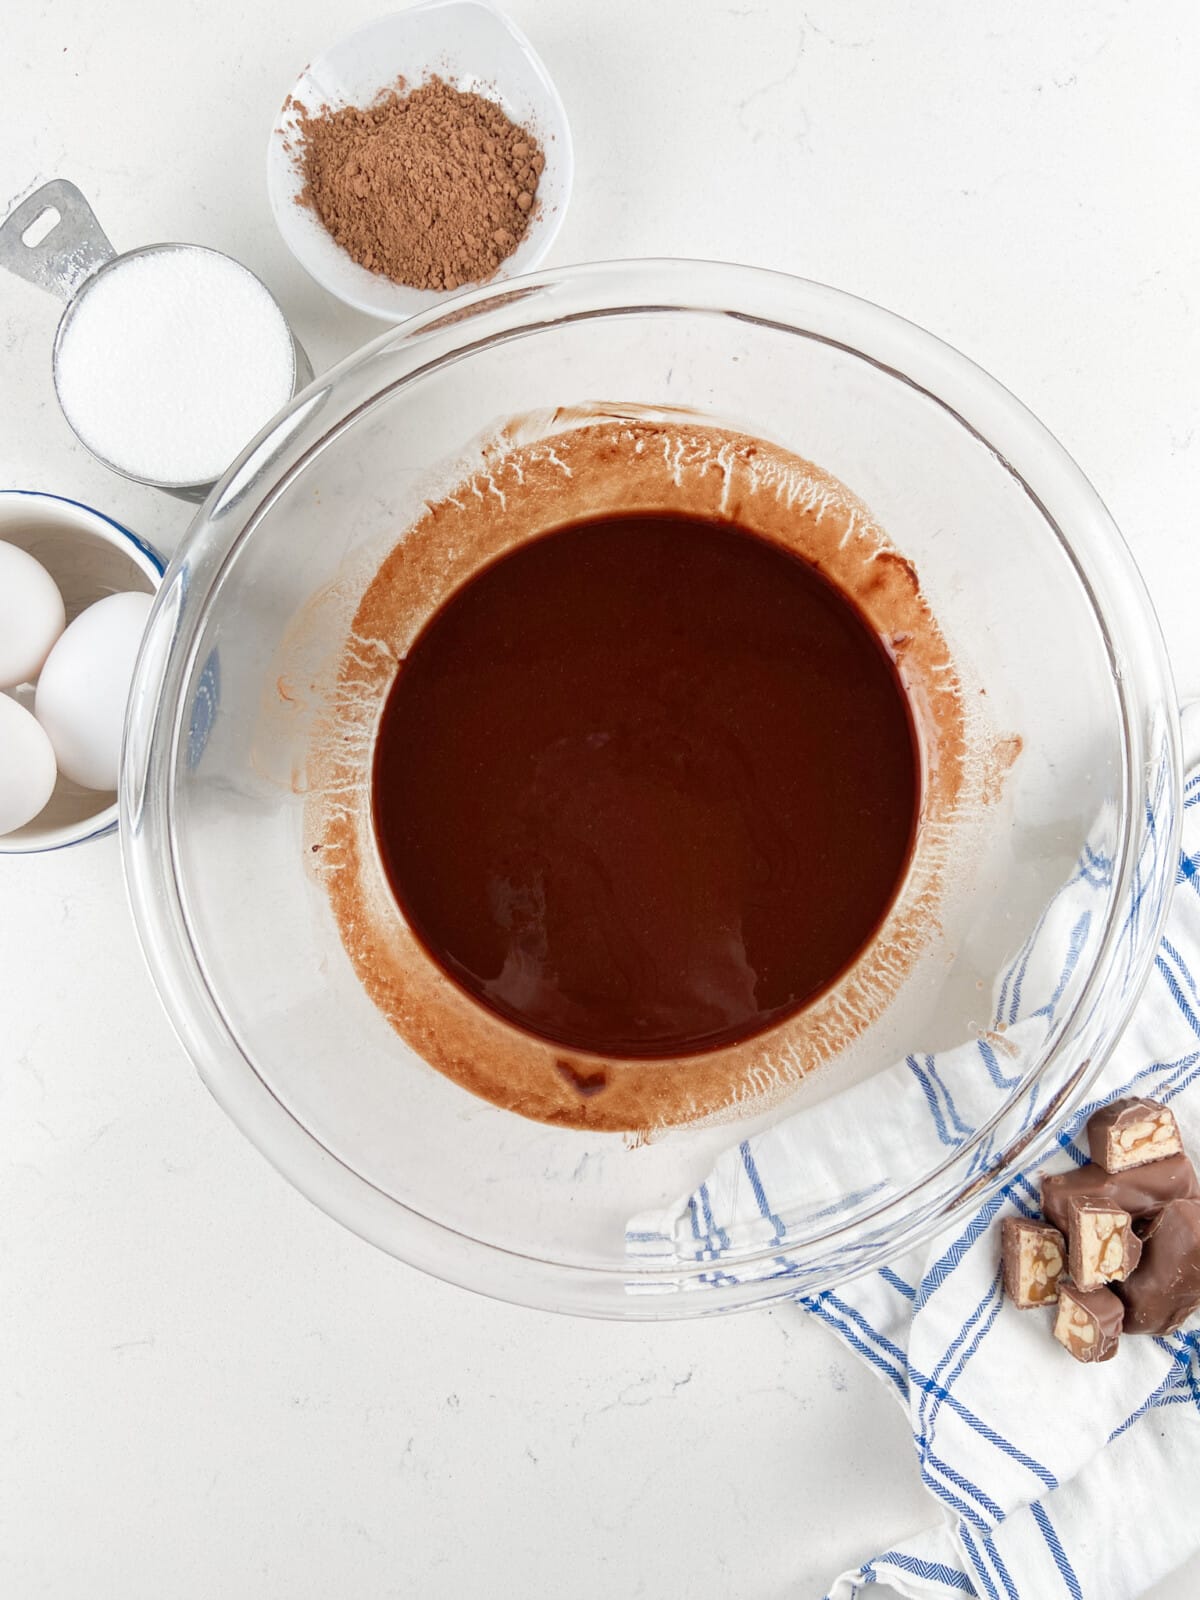
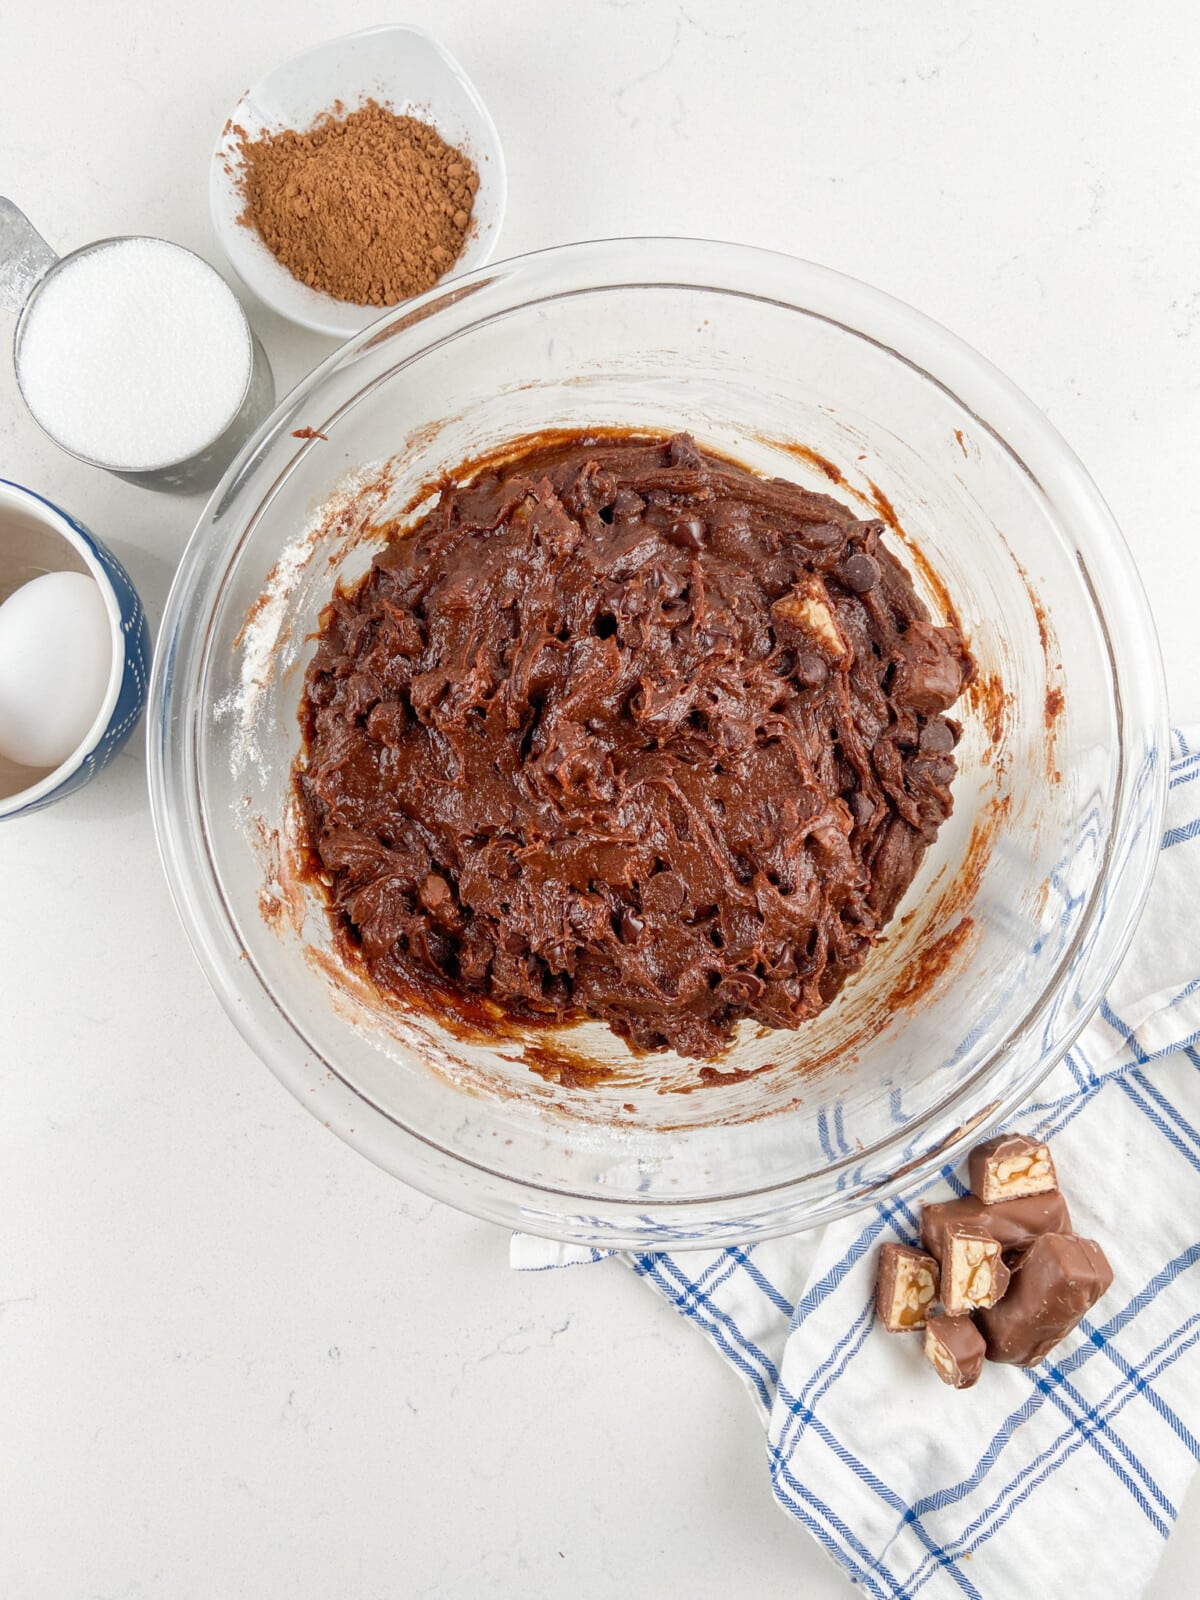
- Melt baking chocolates with butter.
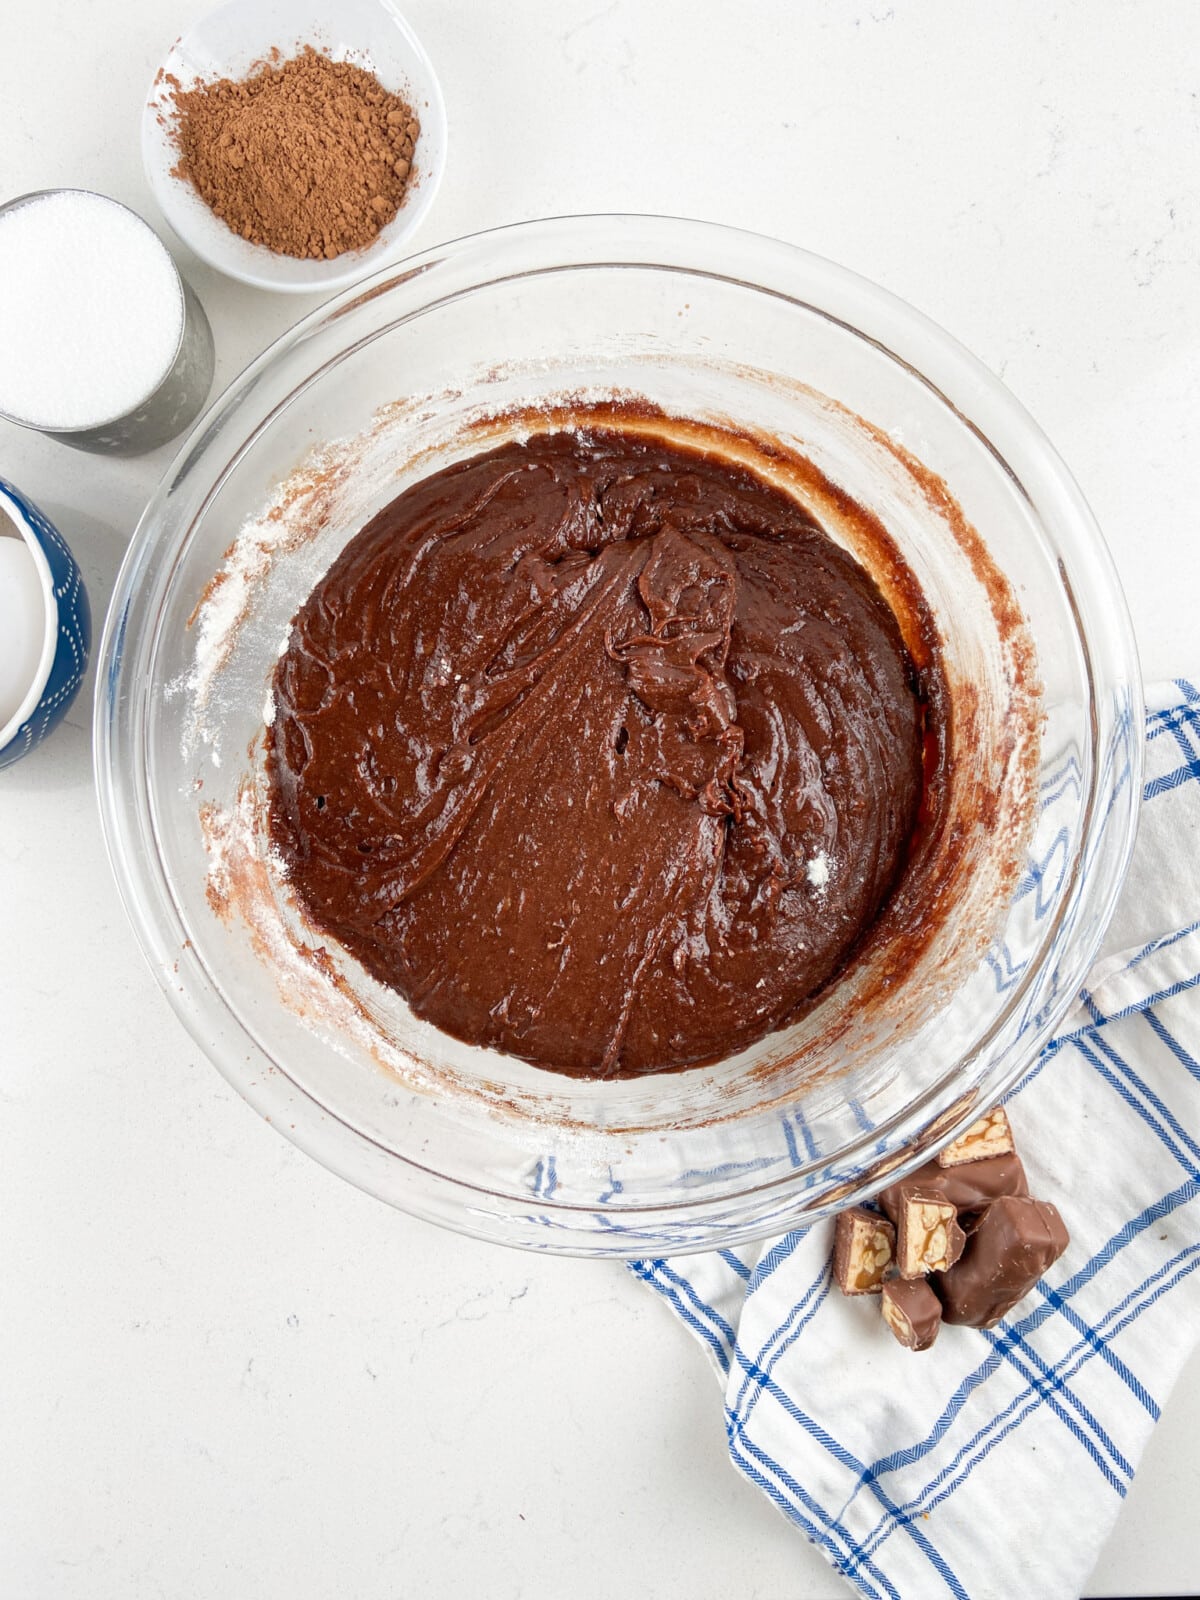
- Stir in sugar, then eggs, vanilla, salt, and cocoa powder.
- Stir in flour and then mix in chopped candy.
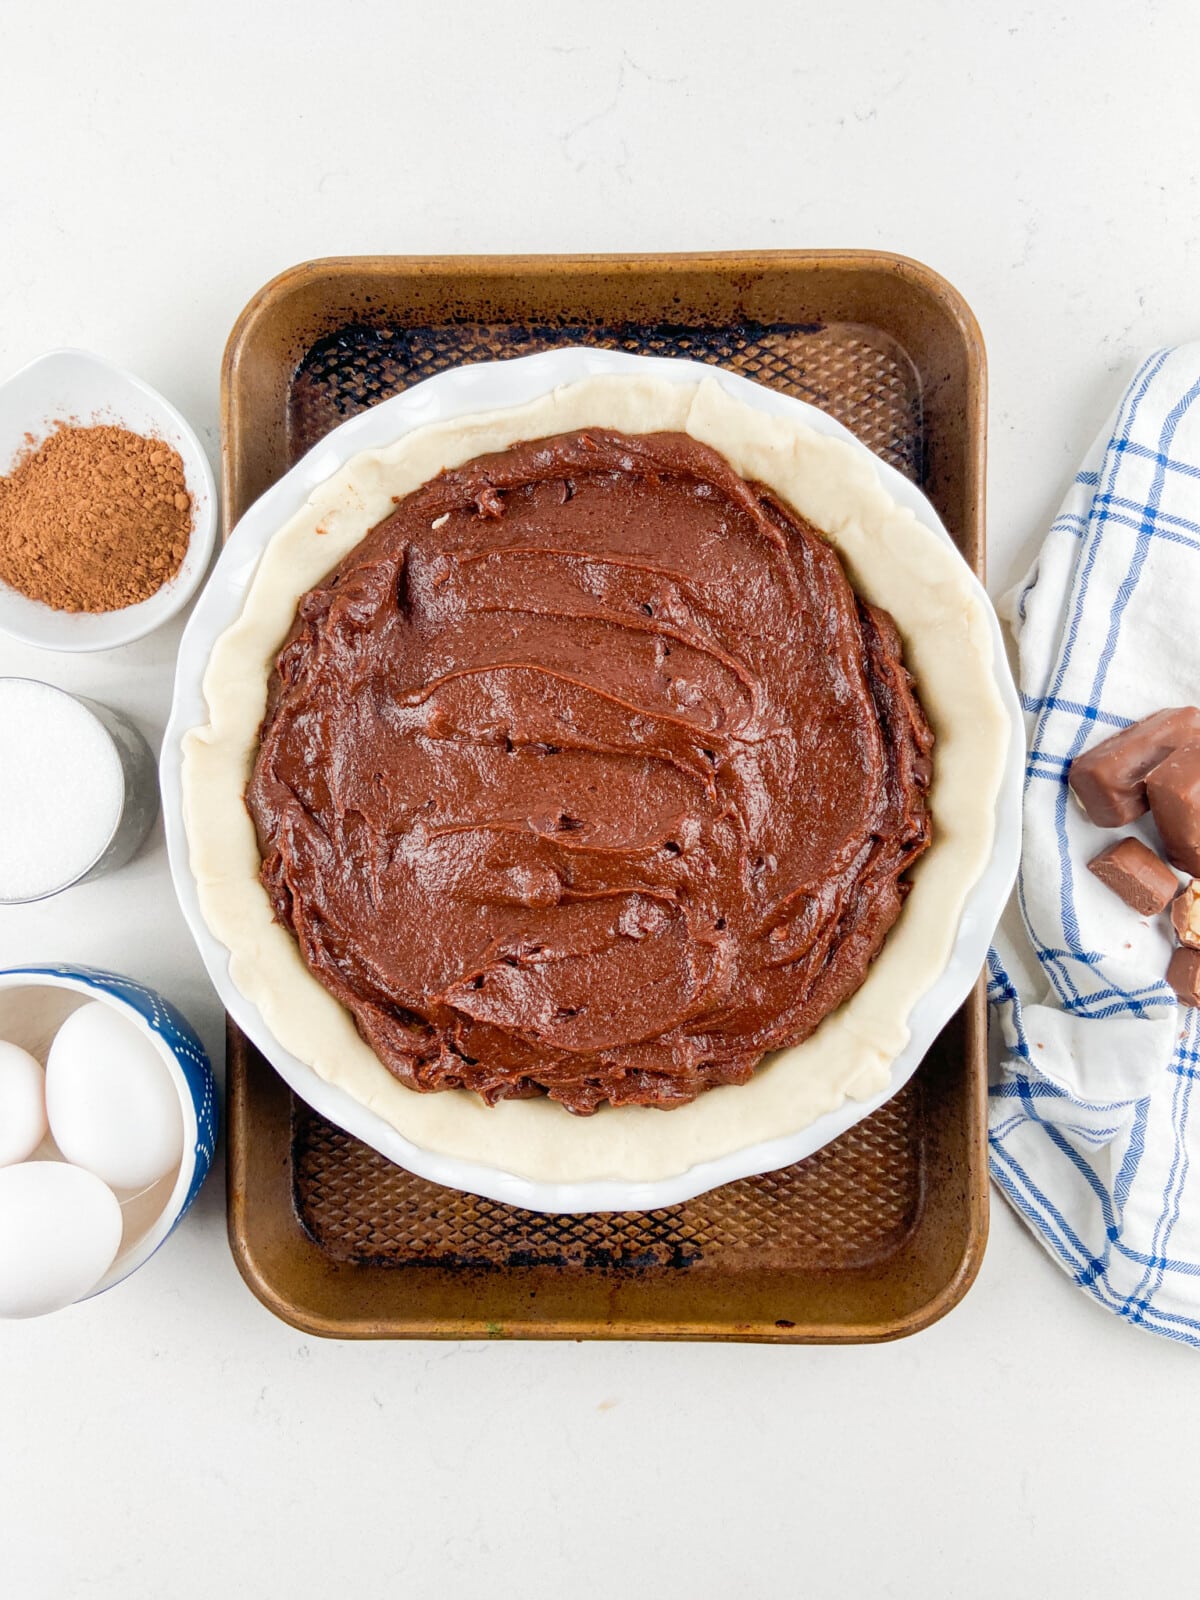
- Pour batter into a pie crust. Place pie onto a cookie sheet. Bake in a preheated oven at 350°F for 38-48 minutes, until the top is cracked.
SAVE THIS RECIPE
Expert Tips
- Use whatever crust you’d like, but if you are going to make it homemade–use my amazing homemade crust recipe!
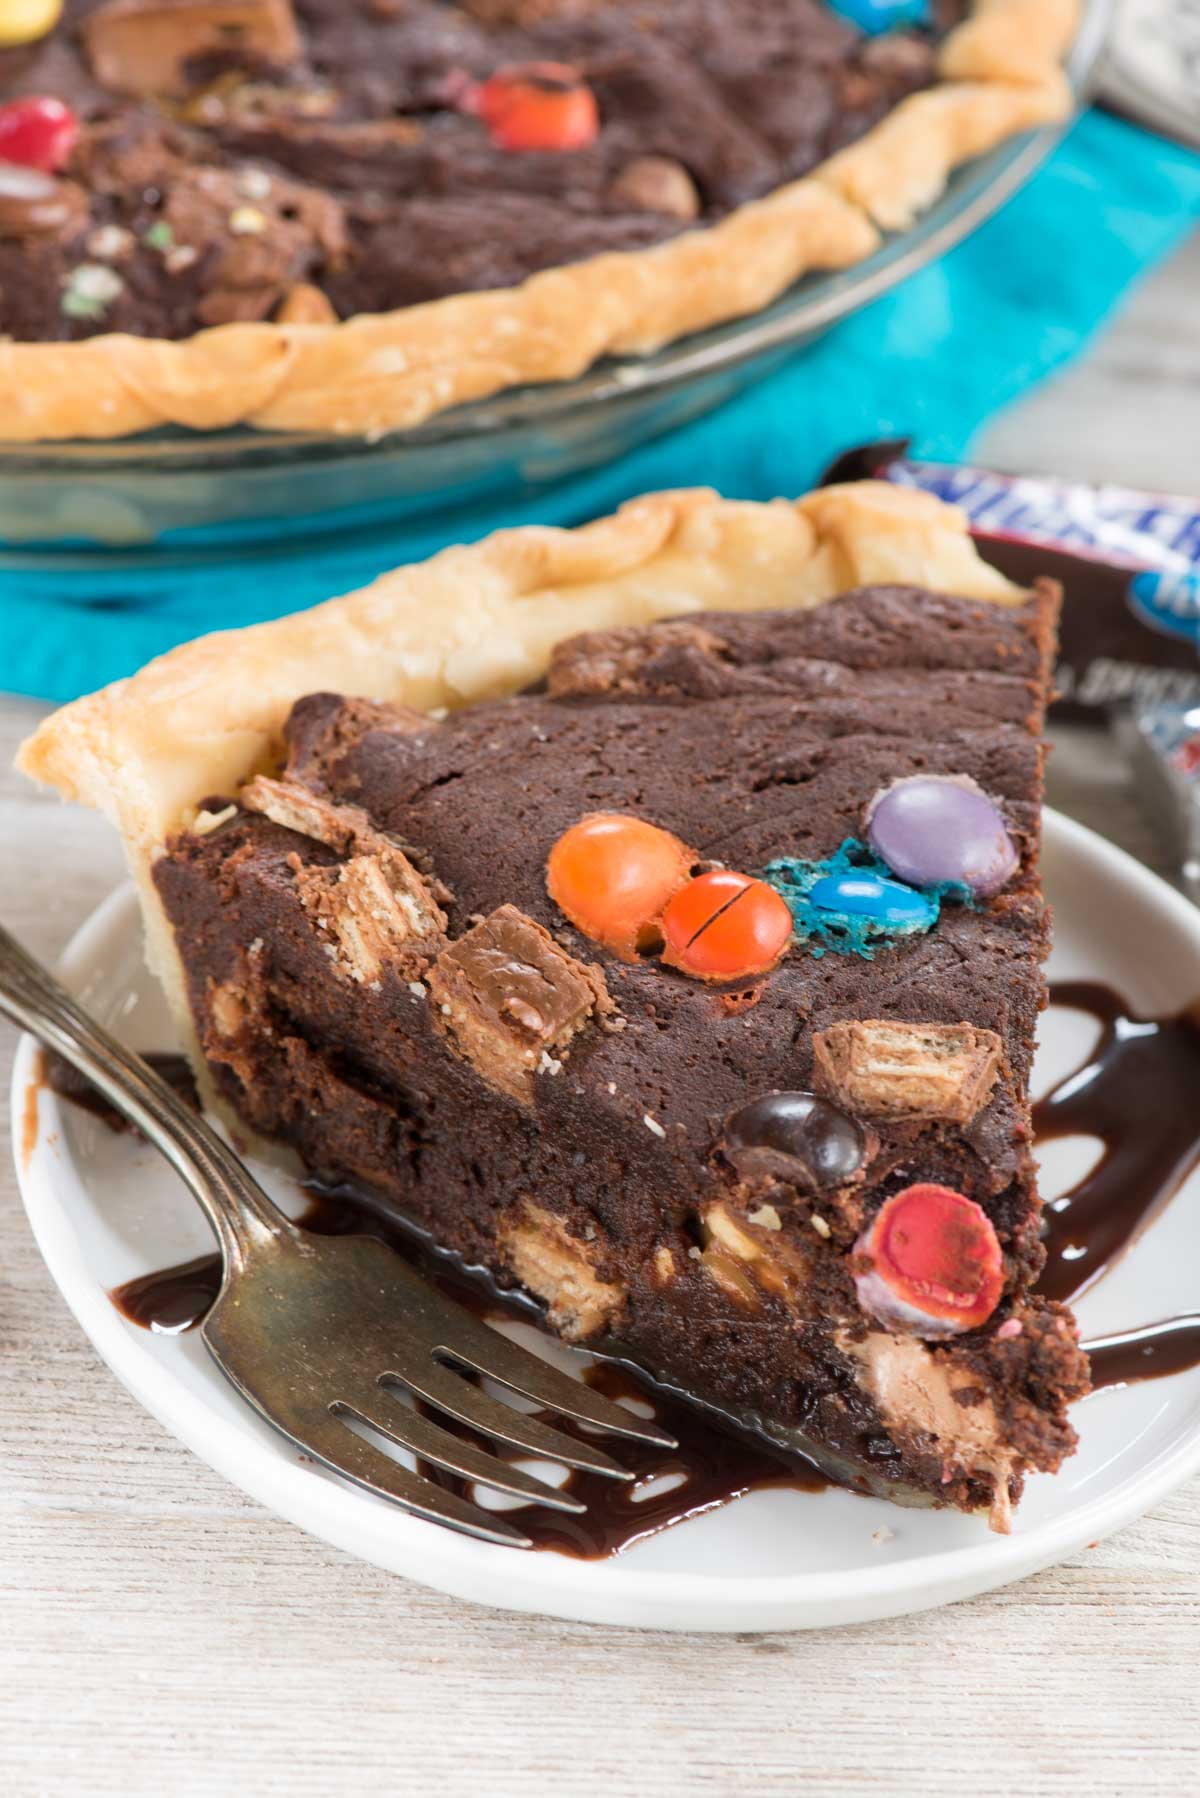
- Cool the pie completely before slicing and serving with ice cream or whipped cream. Store covered at room temperature for up to 3 days or freeze slices for up to one month.
- Store covered at room temperature for up to 3 days or freeze slices for up to one month.
FAQs
Stick a toothpick in the pie and if it comes up with no crumbs it is done. However, If you like it more fudgy you can cook it a little shorter. The center won’t turn to a crumbly brownie texture because of the crust – it’ll stay pretty fudgy, but if you like it more done, cook it longer, until less crumbs stick to the toothpick.
Candy Bar Brownie Pie Recipe
Video
Ingredients
- 1 recipe All Butter Pie Crust, (or store bought)
- 2 ounces (57g) unsweetened baking chocolate
- 2 ounces (57g) semi-sweet baking chocolate
- ¾ cup (170g) unsalted butter
- 1 ¾ cups (350g) granulated sugar
- 3 large eggs
- 1 teaspoon vanilla extract
- ½ teaspoon salt
- 2 tablespoons (10g) unsweetened cocoa powder
- 1 cup (124g) all purpose flour
- 2 cups chopped candy and/or chocolate chips, see note
Instructions
- Preheat oven to 350°F. Prepare pie crust as directed and press into a 9” pie plate. Chill until filling is ready.
- Place baking chocolates and butter in a large microwave safe bowl. Heat in 30 second increments, stirring between each, until melted and smooth (about 2 minutes depending on your microwave).
- Stir sugar into chocolate mixture, then stir in eggs until well mixed. Add the vanilla, cocoa, and salt and stir until smooth, then carefully stir in the flour. Stir in candy.
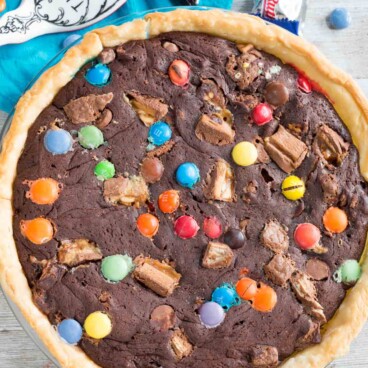
- Pour batter into the pie crust. Place pie onto a cookie sheet. Cover the pie crust with a pie crust shield or strips of foil. Bake for 38-48 minutes, until the top is cracked. The pie shown in the photos was baked for 38 minutes (a toothpick came out wet) and the center is very gooey, which is how we like it. The center won’t turn to a crumbly brownie texture because of the crust – it’ll stay pretty fudgy, but if you like it more done, cook it longer, until less wet more crumbs stick to the toothpick. Your choice! Just be sure to remove the foil strips or pie shield after about 20-25 minutes of baking so that it has time to become slightly golden brown.
- Cool the pie completely before slicing and serving with ice cream or whipped cream. Store covered at room temperature for up to 3 days or freeze slices for up to one month.
Notes
- You can use 4 ounces of unsweetened or 4 ounces of semi-sweet chocolate in place of the combination, if desired.
- Dutch process cocoa may be substituted.
- Bake the pie on a cookie sheet in case it over flows.
- Use any kind of candy – or a mixture – just not more than 2 cups.
- For a pretty presentation, press some candy in the top of the pie as soon as it comes out of the oven.
Nutrition
Nutrition information is automatically calculated, so should only be used as an approximation.
© Crazy for Crust. Content and photographs are copyrighted. Sharing this post is much appreciated, but copying and pasting full recipes without authorization is strictly prohibited.
Did you try this recipe? Click here to rate the recipe below.


Such a great idea. Love the flavors in these! My boys would devour them quickly.
Oh my! Hubby would love this! Pinning now! Thanks for sharing!!
Featured In
Rate This Recipe
Recipe Ratings without Comment