This post may contain affiliate links. For more information, read my disclosure policy.
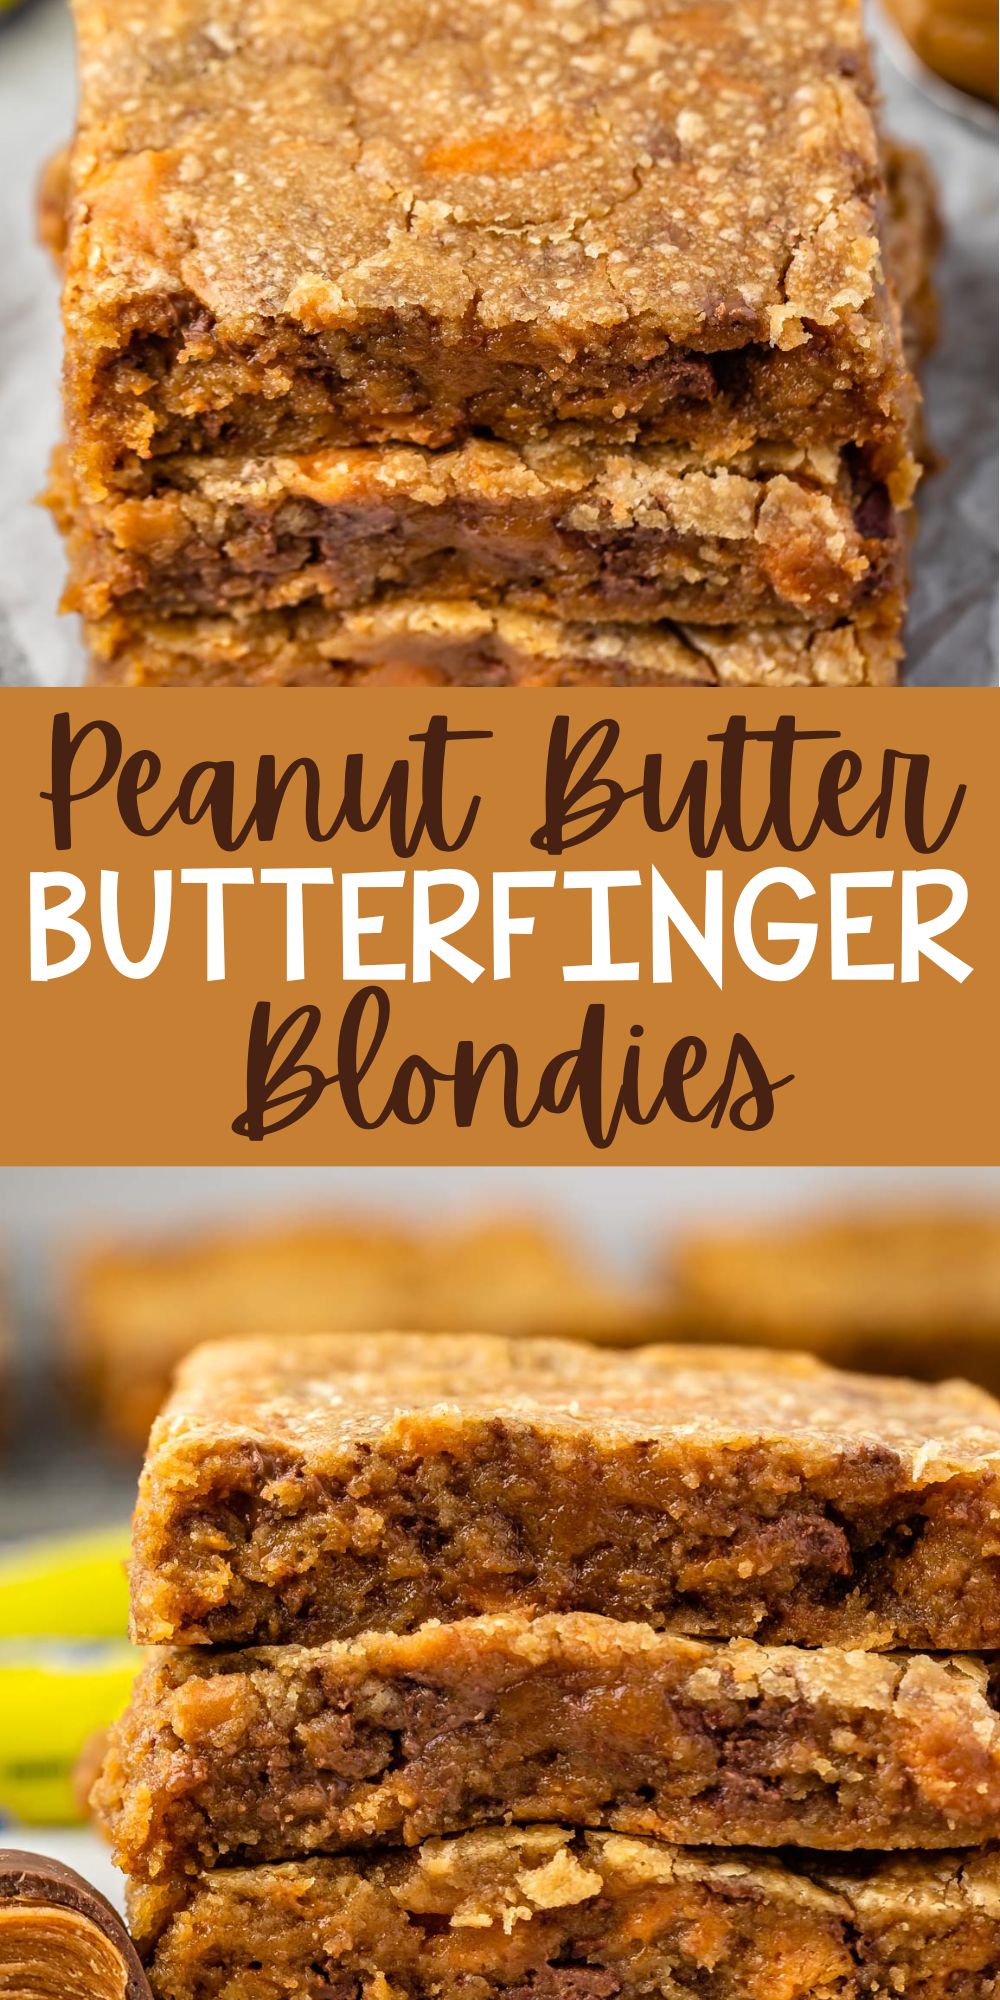
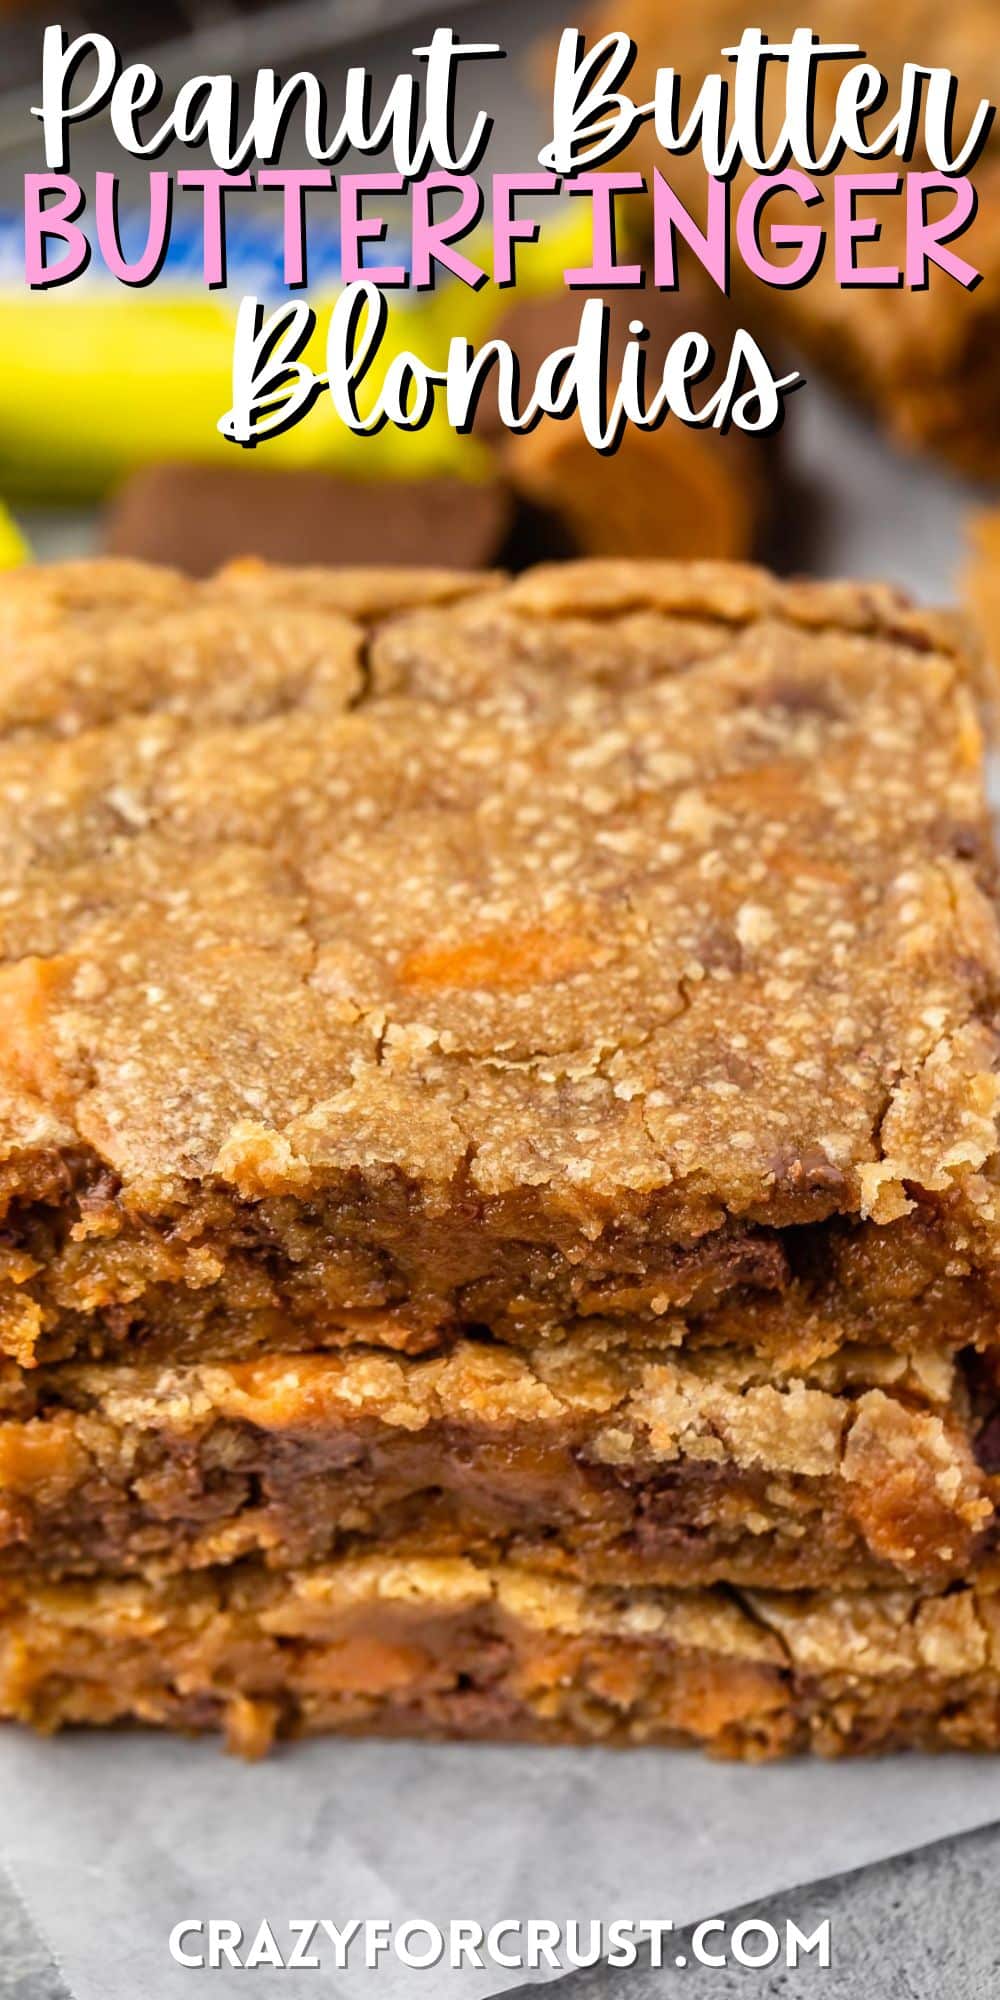
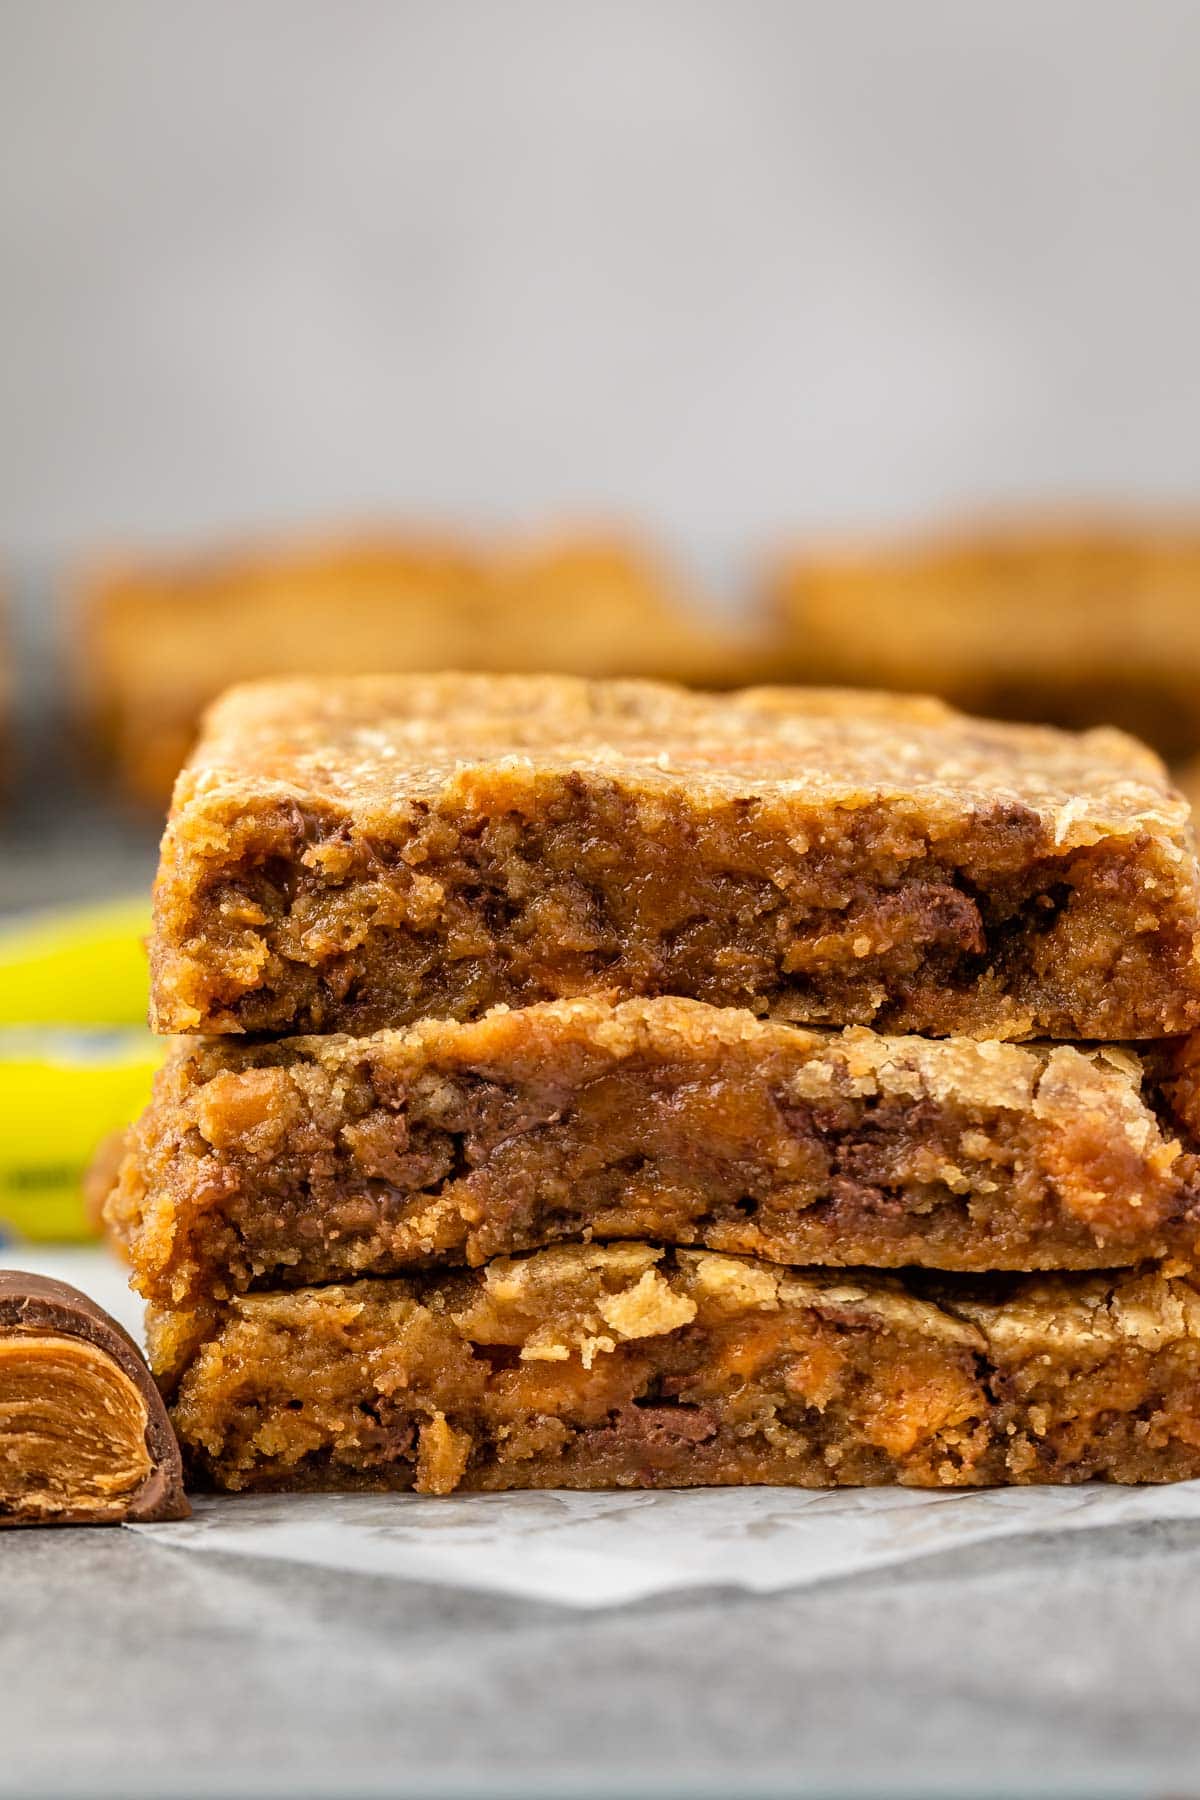
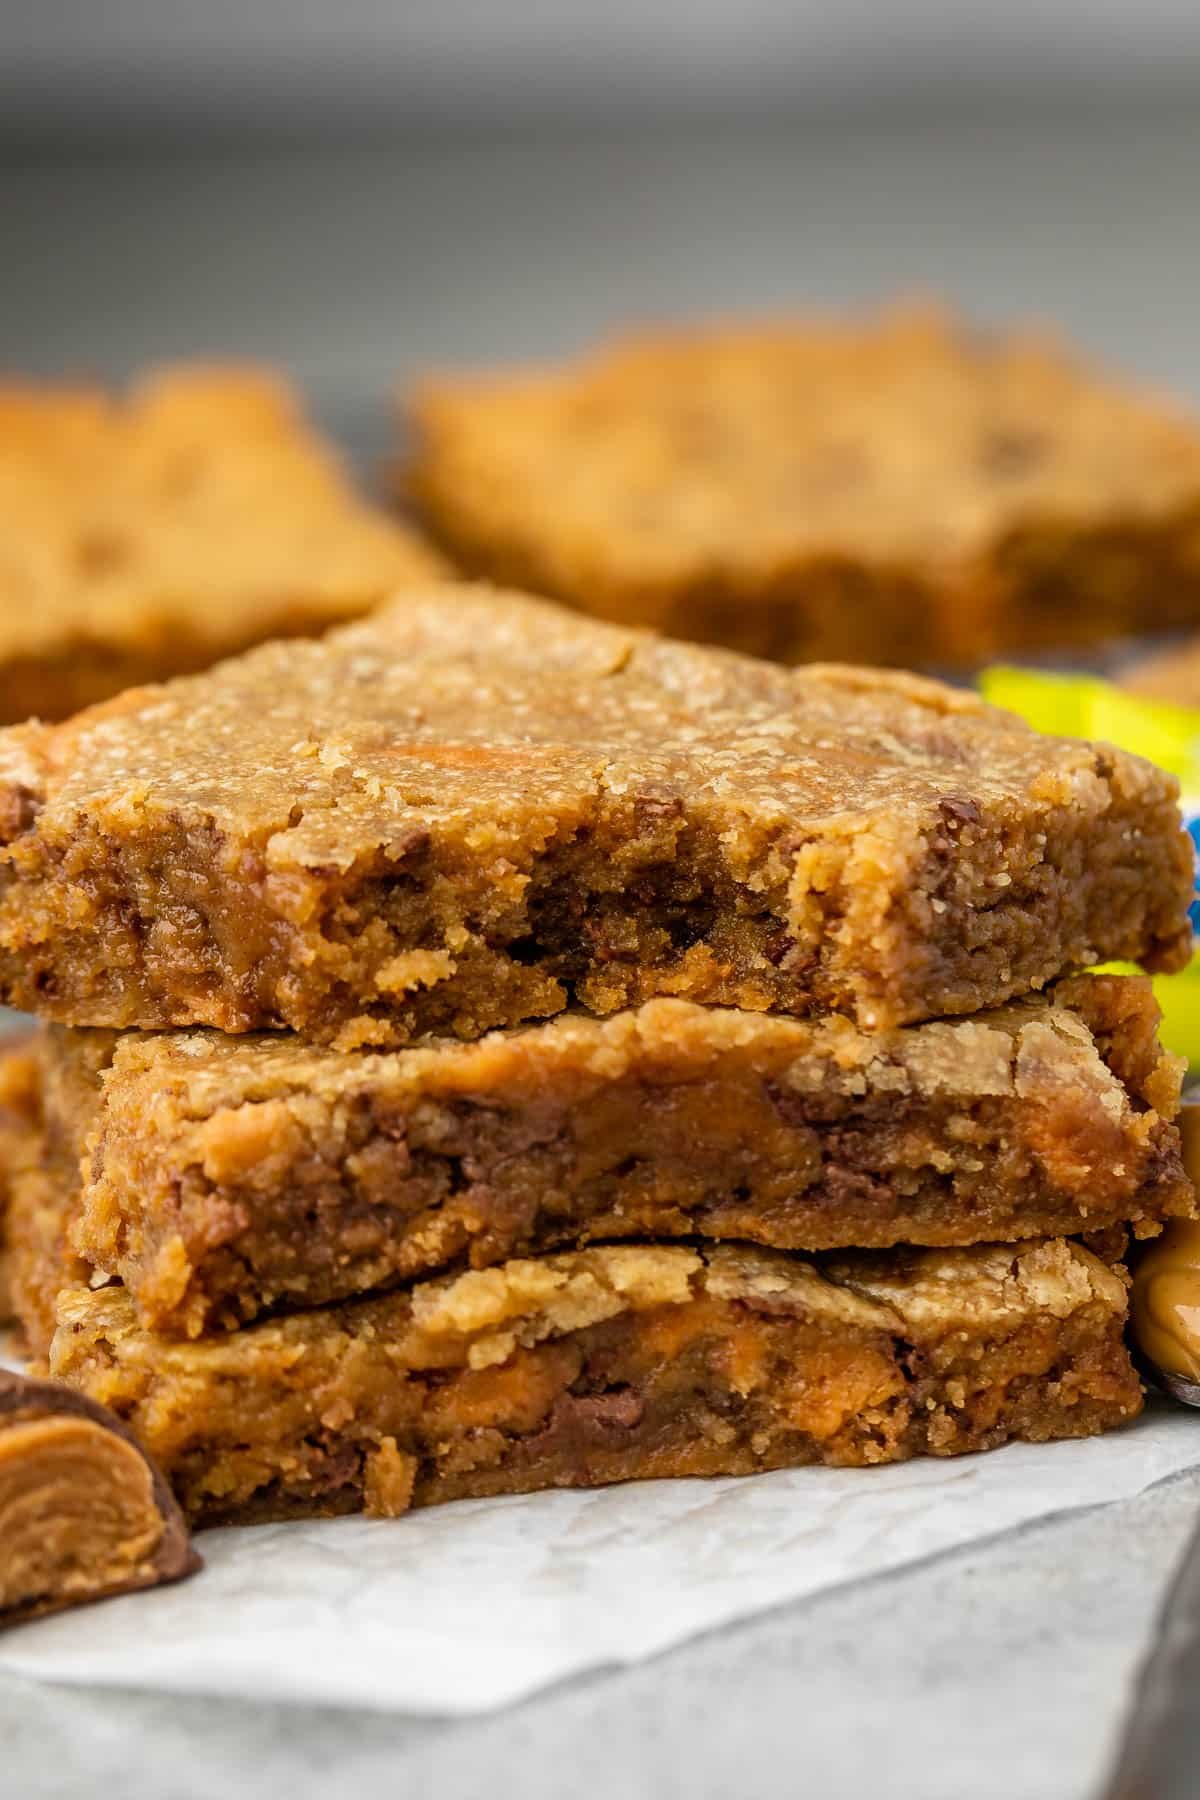
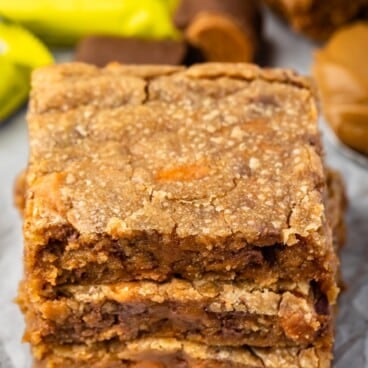
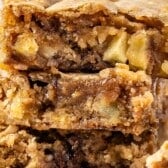
Peanut Butter Blondies are soft, chewy, and full of peanut butter flavor thanks to the double dose of peanut butter from delicious Butterfingers! Soft and chewy and crunchy – these are amazing cookie bars for peanut butter lovers!

These peanut butter blondies are so, so, so good and so easy to make! I adore making peanut butter recipes. There are so many delicious possibilities: peanut butter chips, peanut butter cookies, peanut butter cups, peanut butter bars, and the list goes on! Adding Butterfinger candy bars to the rich soft and gooey peanut butter blondies adds some crunch but you can add anything you want!
Ingredients Needed
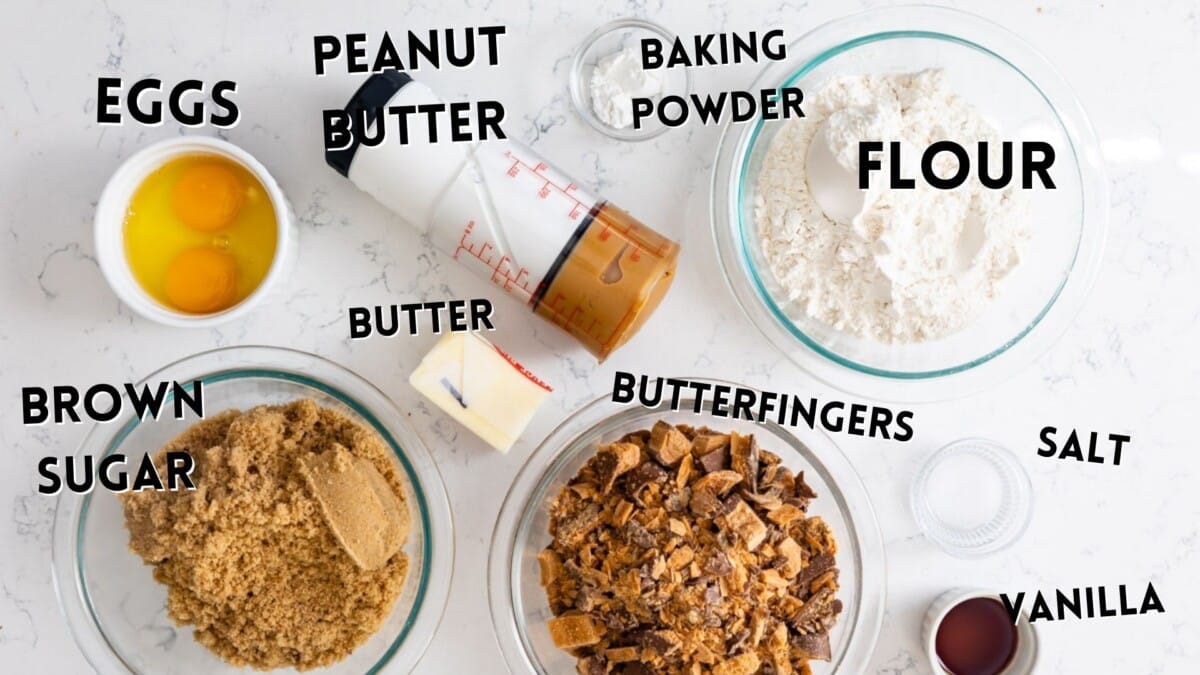
- Sugar: I’m using light brown sugar for this blondie bar recipe – and lots of it!
- Peanut butter: you can use regular peanut butter – any no stir brand (not natural), like Skippy or Jif. If I wanted even more texture to these blondies, I would use crunchy peanut butter instead.
- Baking powder: this helps with leavening – not baking soda like most cookies.
- Flour: I always use all-purpose flour for my recipes but if you want to make this recipe gluten-free, just swap this for your favorite gluten-free flour.
- Butterfingers: I chopped some sun-sized Butterfingers but you can swap this for your favorite candy, like Reese’s Pieces or anything!
Variations
- Instead of Butterfingers use your favorite chopped candy bars.
- Add some chopped peanuts, pecans, or walnuts!
- Skip the candy and use white chocolate chips or dark chocolate chips.
- Skip the additions and top with peanut butter frosting!
How to make Peanut Butter Blondies
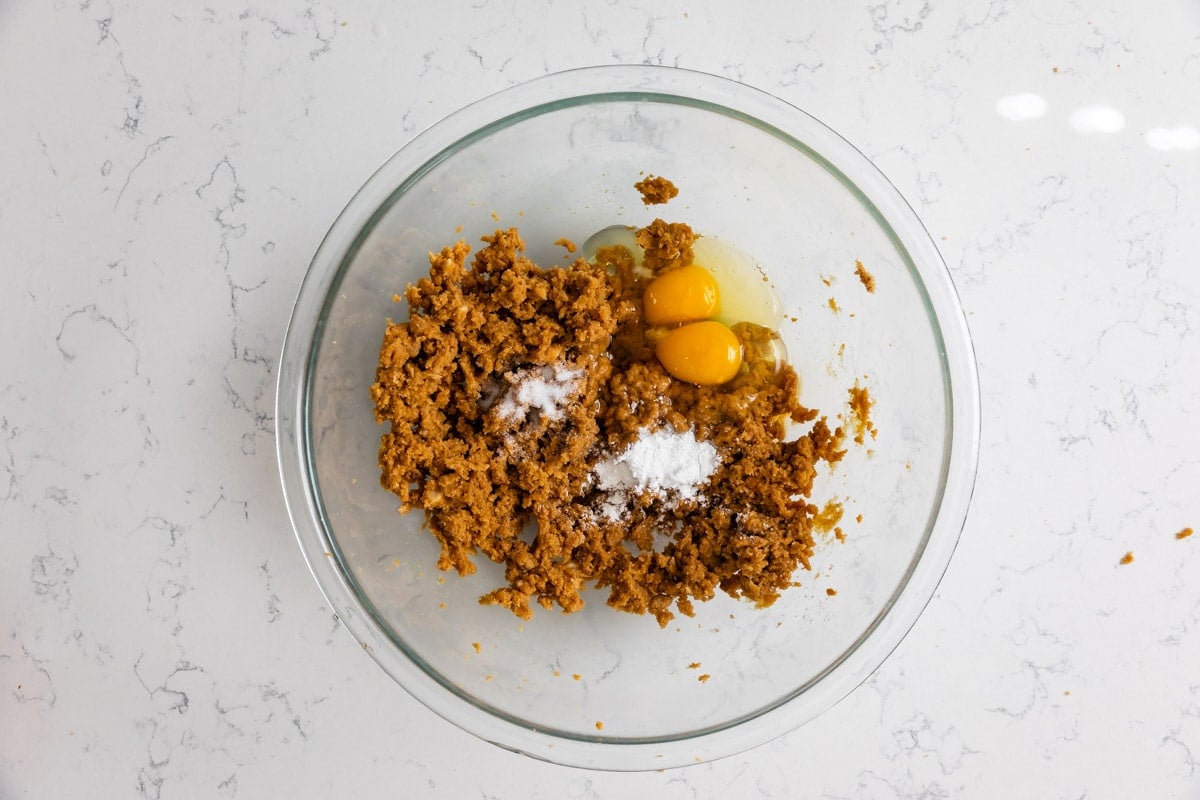
- Cream brown sugar, peanut butter, and butter in a large mixing bowl, then add eggs and vanilla and mix.
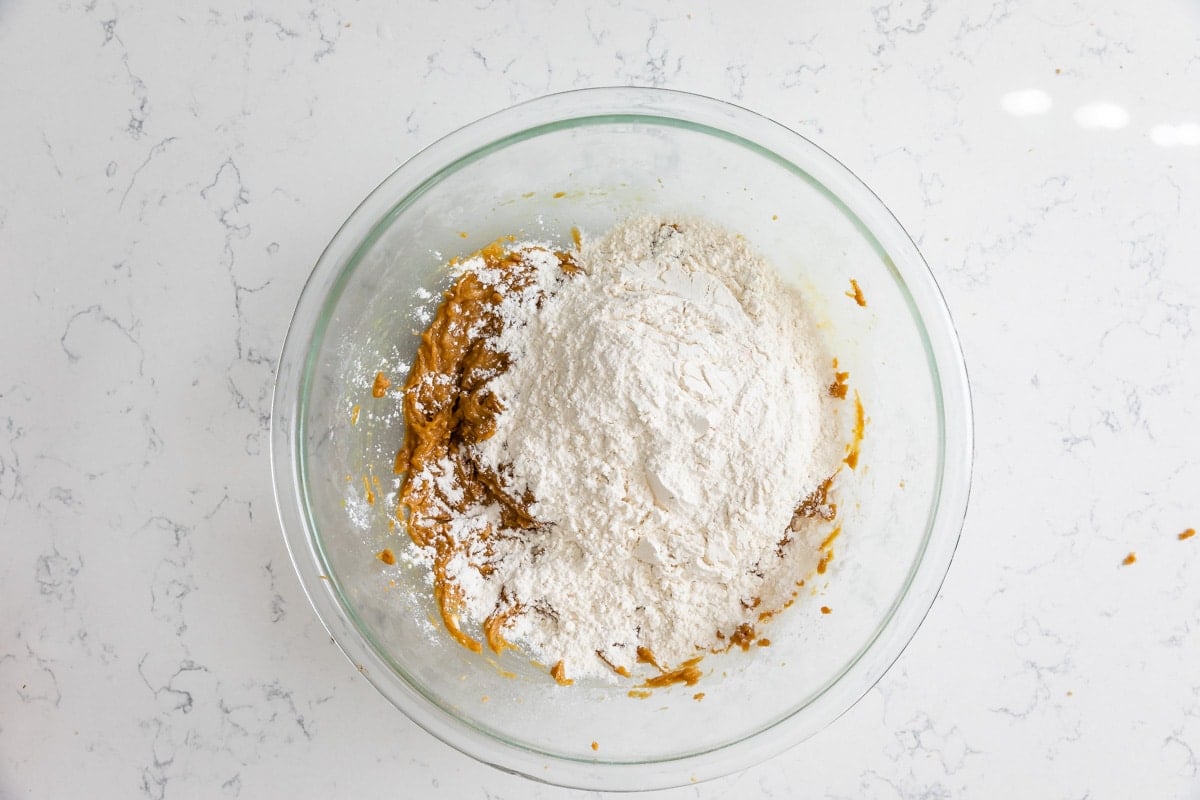
- Add the dry ingredients and mix until smooth.
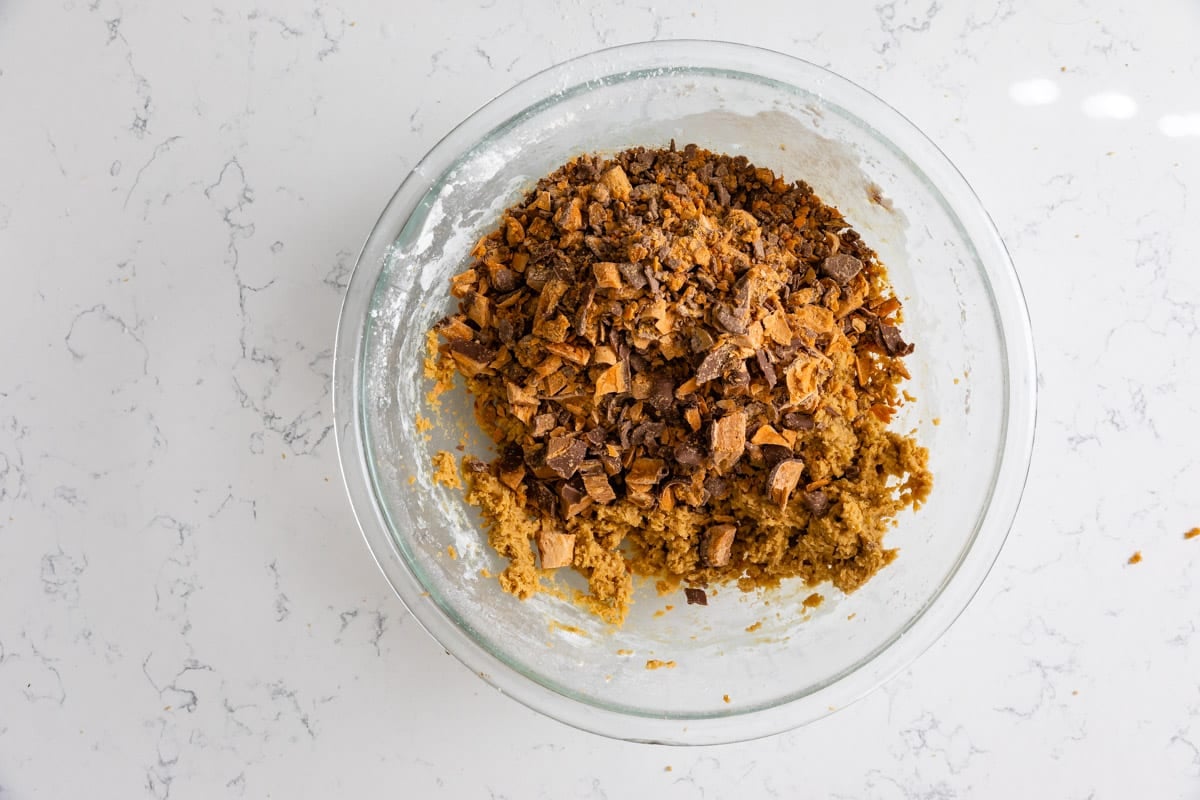
- Fold chopped Butterfingers into the peanut butter mixture.
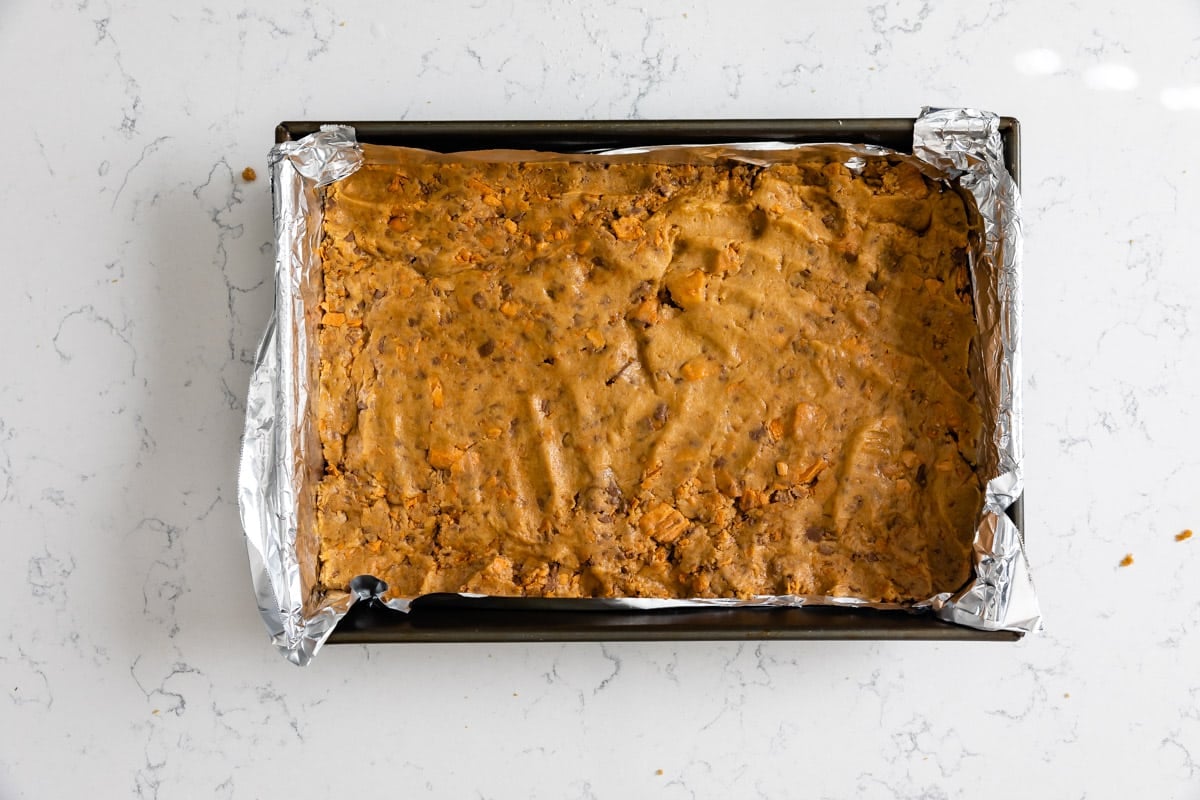
- Press batter into prepared baking dish (a 9x-13-inch pan lined with foil or parchment paper). Bake until they just lose their glossy sheen and are light golden around the edges.
SAVE THIS RECIPE
Expert Tips
- Be careful not to overcook – the center will still be jiggly when you take these out of the oven and they will finish cooking and firming up as they cool.
- ONLY use a METAL pan for baking these blondies! This will ensure they cook on the inside and on the top.
- If the dough is sticky, spray your hands with cooking spray to avoid it sticking to your hands
- Add chocolate chips instead of Butterfingers to make peanut butter chocolate chip blondies
Storing
Store blondies in an airtight container at room temperature. If you store in refrigerator they’ll last a few days longer. Regardless, they’ll stay soft for days. You can also freeze these cookie bars for a few months.
FAQs
Make sure to use a metal pan for these – that’s the best way to make sure they’re done on top and in the middle.
Peanut Butter Blondies Recipe
Video
Ingredients
- 1 ½ cups (300g) packed brown sugar
- 6 tablespoons (84g) unsalted butter, softened
- ½ cup (134g) peanut butter
- 2 large eggs
- 1 teaspoon vanilla extract
- 1 teaspoon baking powder
- ¼ teaspoon salt
- 2 cups (248g) all-purpose flour
- 3 cups (390g) chopped Butterfingers, divided (24 Fun Size)
Instructions
- Preheat oven to 350°F. Line a 9×13” pan with foil and spray with cooking spray.
- Cream brown sugar, peanut butter, and butter in the bowl of an electric mixer fitted with a paddle attachment. Add eggs and vanilla and beat until combined. Add baking powder, salt, and flour and mix.
- Stir in 2 cups of the chopped Butterfingers.
- Press into prepared pan (dough is sticky, spray your hands with cooking spray to avoid it sticking to your hands).
- Sprinkle the remaining 1 cup of chopped Butterfingers over the top and press lightly to make them stick to the surface.
- Bake for about 22-25 minutes. (Be careful not to overcook – the center will still be jiggly when you take these out of the oven and they will finish cooking and firming up as they cool.) Cool completely before slicing into squares.
Notes
- If you can find them, use Butterfinger Bits (sold in the baking aisle) so you don’t have to chop them.
- Make sure to bake these in a metal pan – metal conducts heat best and will ensure your bars bake properly.
- This recipe has only been tested with regular no-stir peanut butter (not natural).
Nutrition
Nutrition information is automatically calculated, so should only be used as an approximation.
© Crazy for Crust. Content and photographs are copyrighted. Sharing this post is much appreciated, but copying and pasting full recipes without authorization is strictly prohibited.
Did you try this recipe? Click here to rate the recipe below.
This is the first comment I have ever left on a food blog…. I made these exactly as written, and baked them in a round 12″ disposable pizza pan, on the bottom rack of my oven, fitted with a pizza stone. I used convection at 350 degrees, and put in the oven, as soon as th oven temp hit 350…. I didn’t give the stone any extra time to heat. I have never tried anything like this before on a pizza stone… they cooked perfectly, from center to edge. They were exactly the same thickness throughout, and same color and texture. And… this recipe is delicious. I have about 20 bags of butterfinger baking bits, in my freezer, and I know what I will be making often! I have a ton of Reese’s tiny bits bags, and nestle crunch bits… so, these blondes recipes feel like they were meant for me! Ha.
Look so good!! How long do you let them cool for?
You can cut them once the pan is cool enough to touch but if you want to take the whole slab out using the foil and cut it outside the pan you might want to wait a few hours. You can also refrigerate them to help them cool faster.
Featured In
Rate This Recipe
Recipe Ratings without Comment