This post may contain affiliate links. For more information, read my disclosure policy.
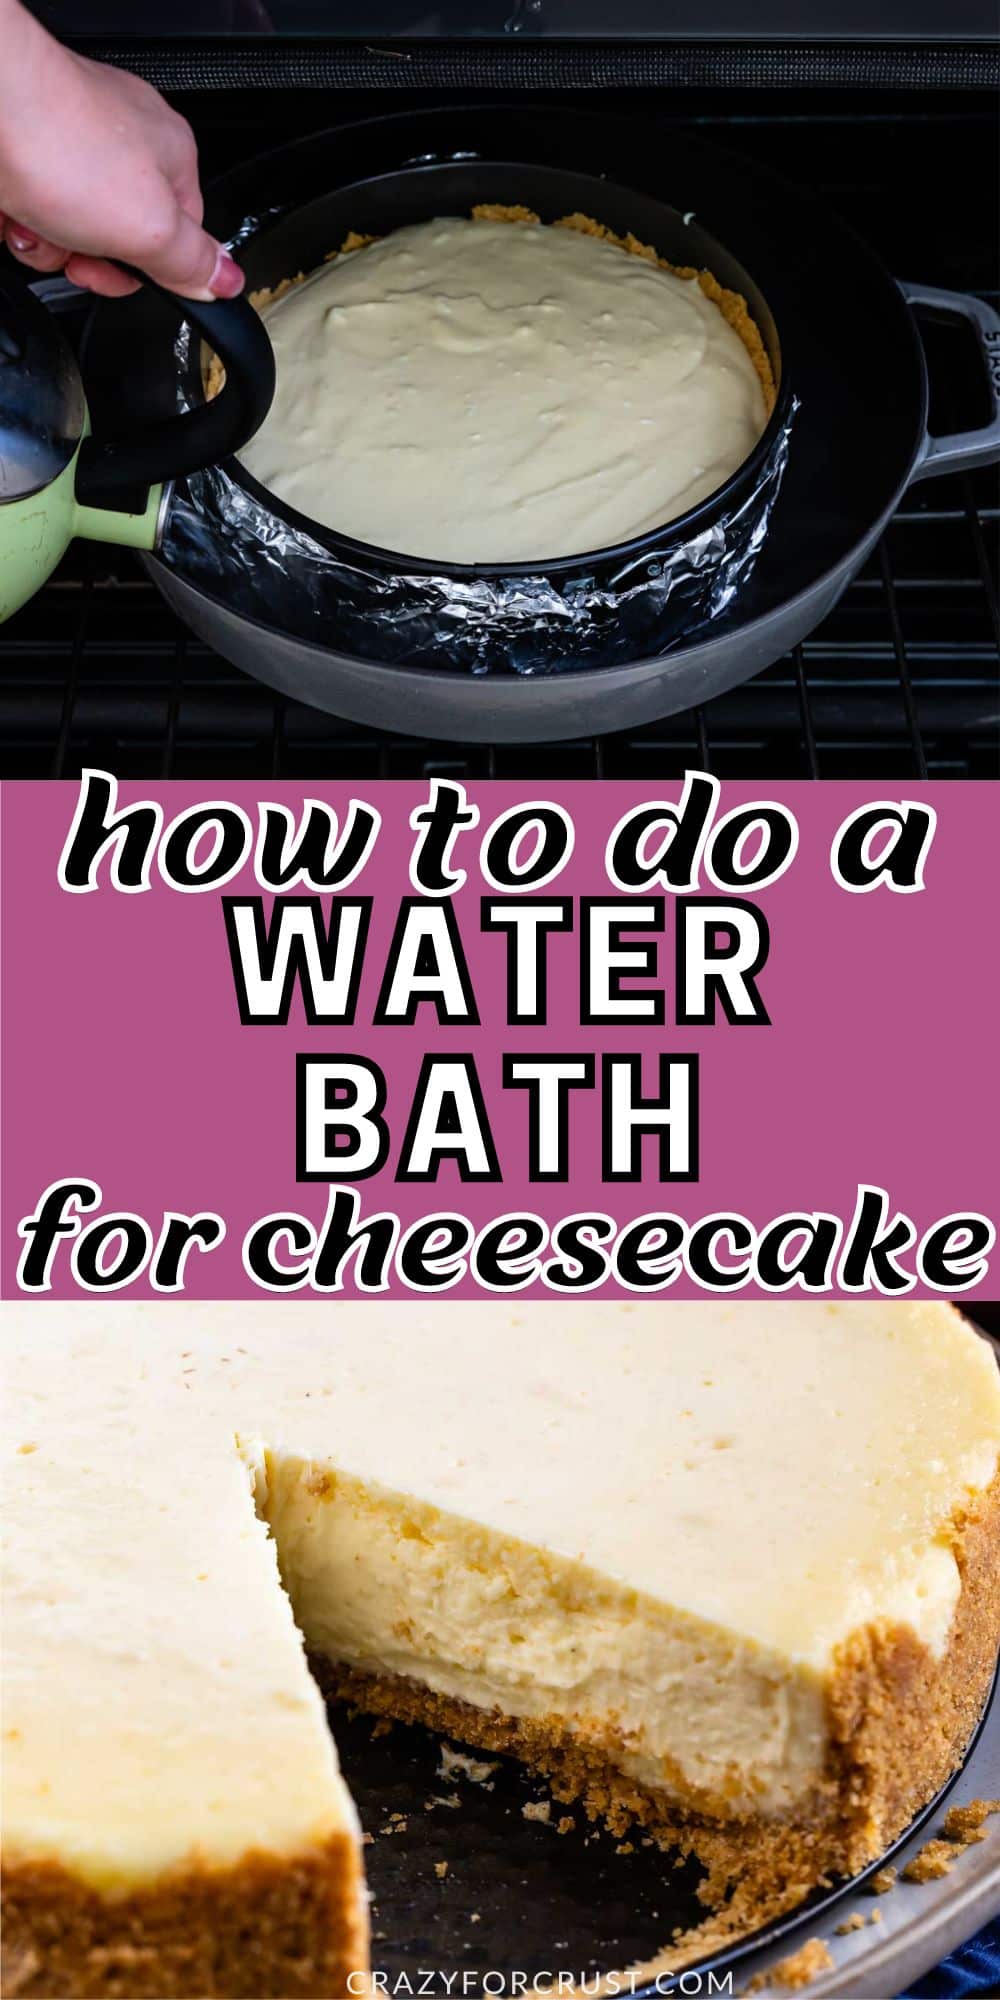
Let’s talk about how to make a cheesecake water bath! No matter what kind of baked cheesecake you’re making, using a water bath will ensure a creamy smooth cheesecake without cracks. It may seem daunting but it’s the best way to bake any cheesecake recipe!
What is a water bath?
A cheesecake water bath is when you place your cheesecake pan in a larger pan (i.e. a roasting pan) and add it to your oven, then add water to the larger pan. The water surrounds the cheesecake pan while the cheesecake is baking. Cheesecake is a custard and it can be finicky if not baked in the just right conditions – a cheesecake water bath helps get the oven conditions just right so you get a perfect result.
Why bake cheesecake in a water bath?
- Allows the cheesecake to bake with even heat: the even heat of the water helps the cheesecake cook evenly so there are no hot spots or overly done areas.
- Prevents excess browning: without a water bath the cheesecake will cook faster around the edges. This is often why cheesecakes crack.
- Texture: the steam from the water bath creates a moist environment and keeps the cheesecake nice and creamy.
Items Needed
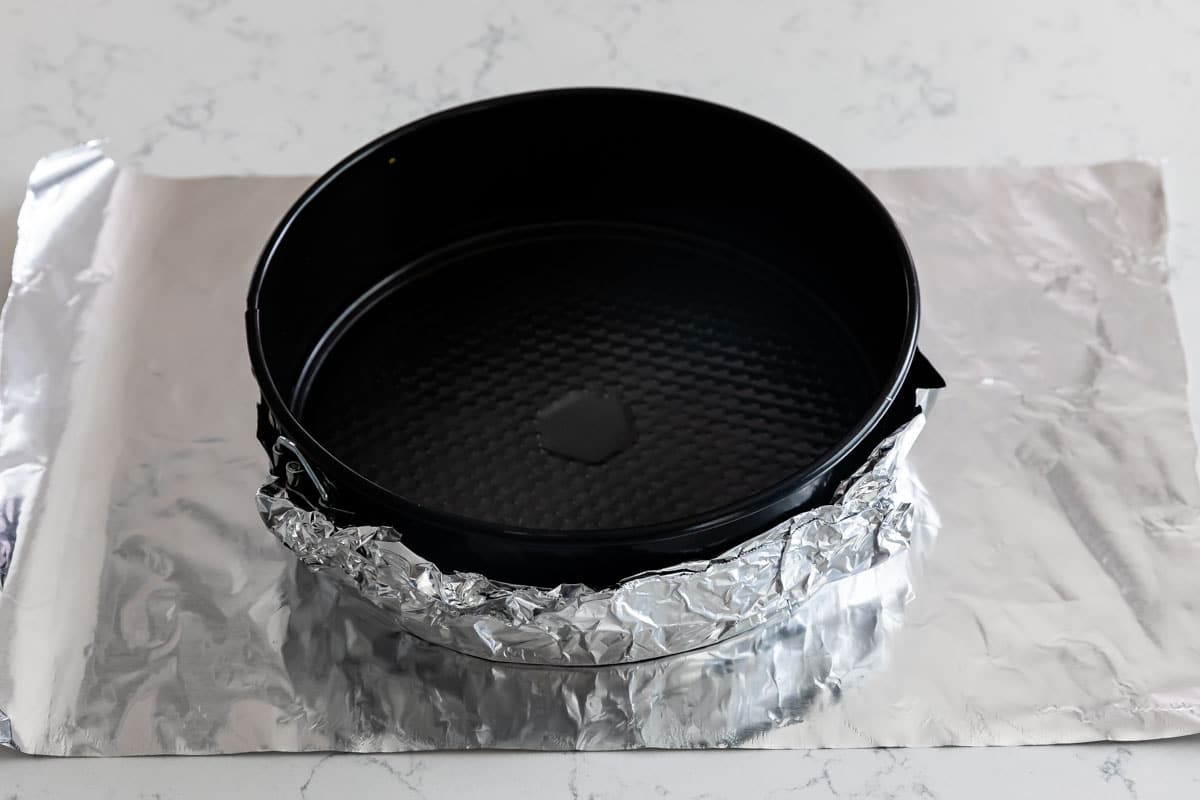
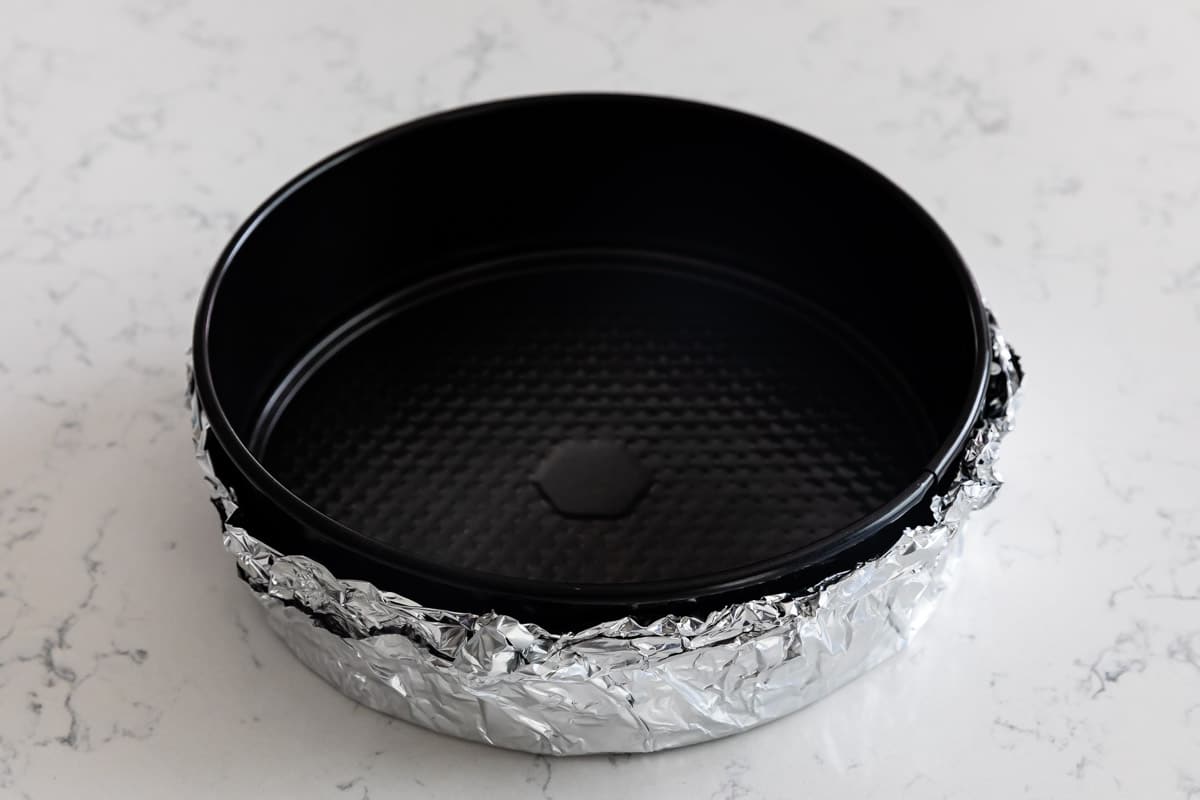
- Springform Pan: This is the pan that you bake your cheesecake in. It’s round with a removable bottom, which means the seams aren’t tight. If you don’t prepare your pan properly the water from the bath will leak into your cheesecake and ruin it. If you’re using a water bath for your cheesecake but don’t prepare your pan adequately the pan will leak, causing a soggy cheesecake.
- Aluminum Foil: I like using heavy duty foil. I use about 3-4 sheets of foil to be sure and have a barrier to block the water from getting into the seam of the pan.
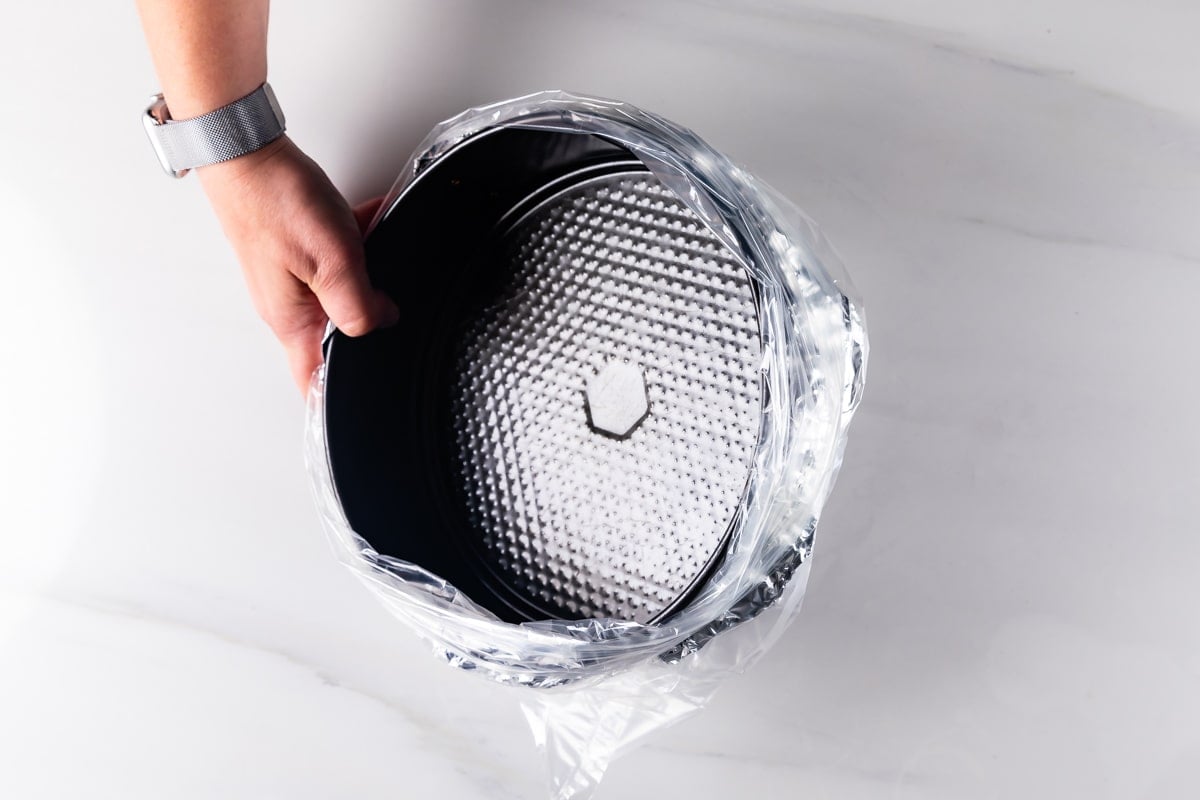
- Roasting Bag or Slow Cooker Bags: This is your insurance item – I never used to use this until I started having issues with leakage so now I always wrap the foil lined pan in an oven bag: large or turkey size is best, or you can use a slow cooker bag.
- Roasting Pan or Large Pan: It needs to fit the springform pan, with room.
- Hot Water: To fill the pan with (it needs to be hot or boiling when you add it to the pan in the oven).
How to Make a Cheesecake Water Bath
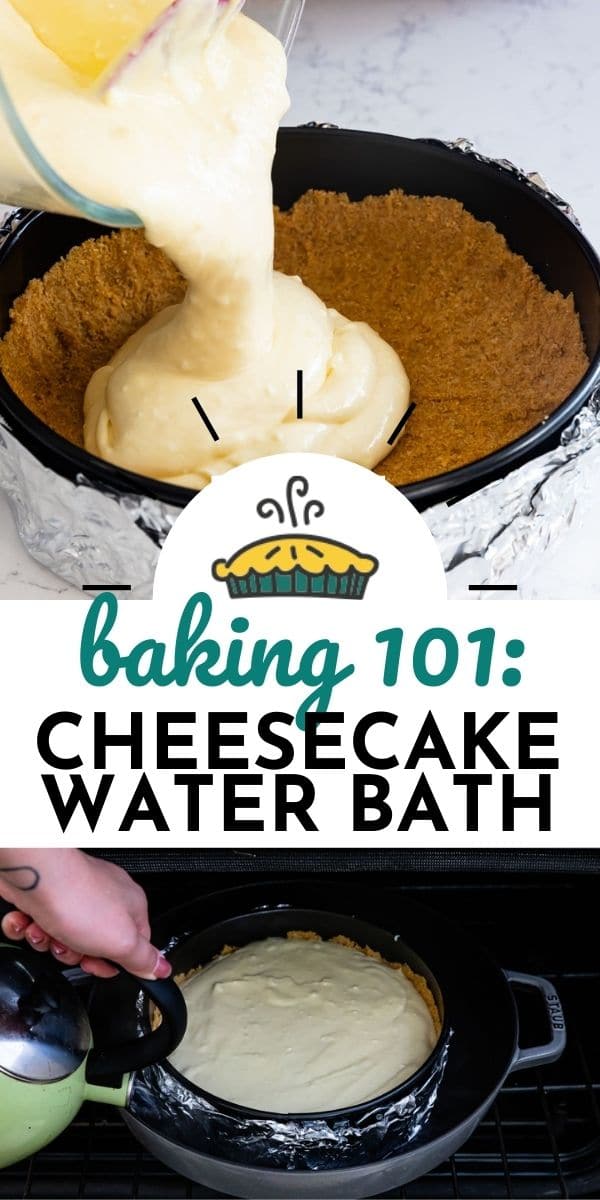
- I use 2 or 3 layers of heavy duty aluminum foil. Lay them out on your counter and place the springform pan in the center (BEFORE you add your cheesecake).
- Wrap the pan as shown, up the sides of the pan at least 2 inches. It’s very important that the foil is the same all the way around the sides – with no “low” spots – so the water doesn’t leak in.
- Place the wrapped pan in your oven bag or slow cooker bag. If there is excess bag, tie it in a knot to tighten around so it’s not loose.
How to Use a Water Bath for Cheesecake
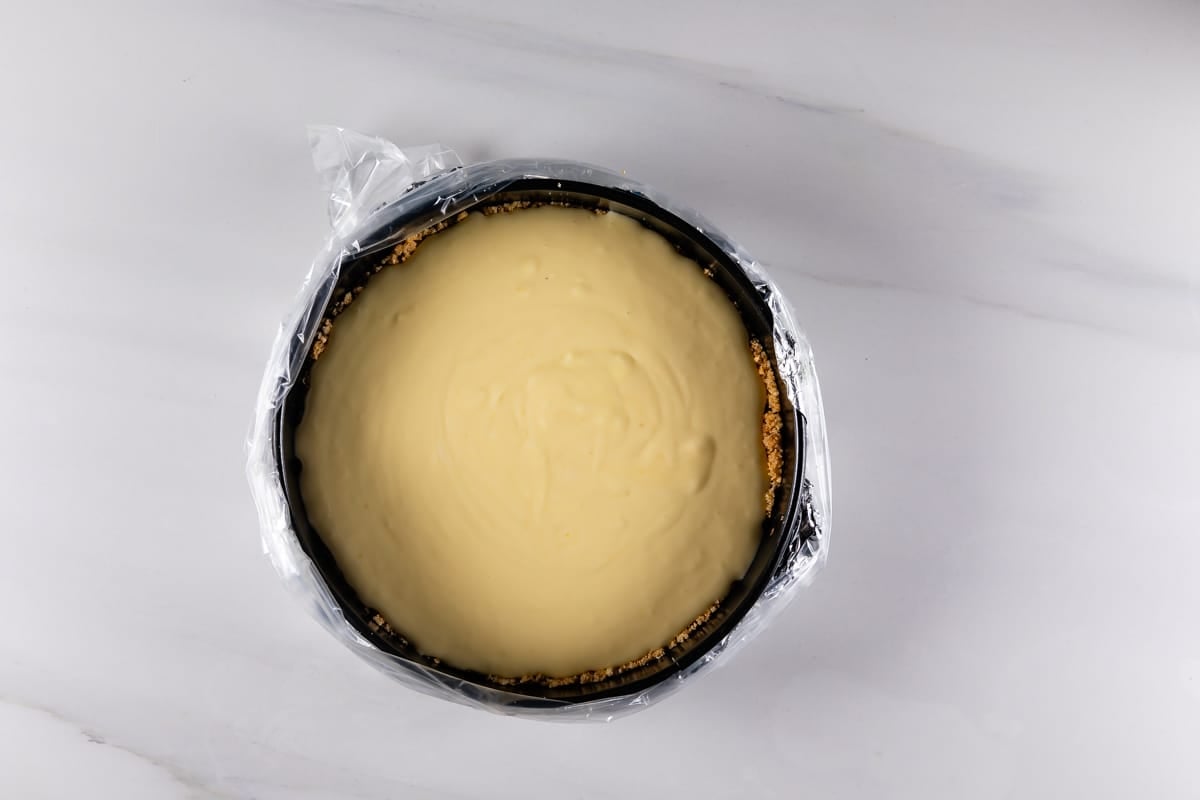
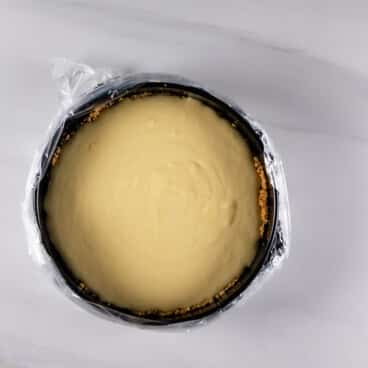
- After you’ve prepared your pan, add your crust and cheesecake batter.
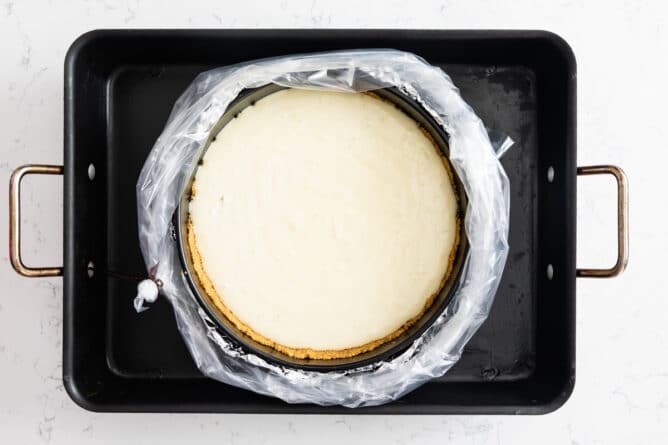
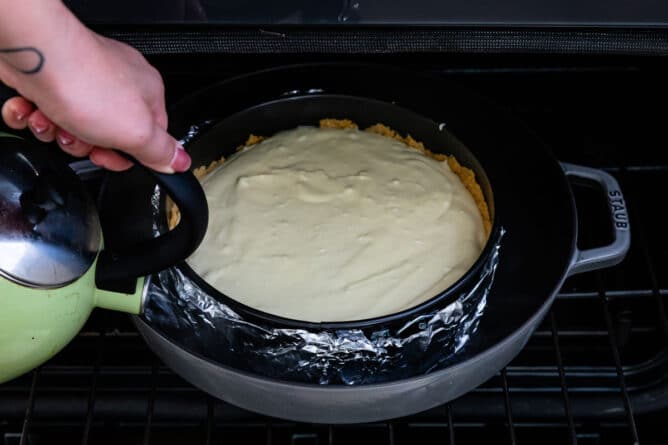
- Place the pan in the large pan or roasting pan. Meanwhile, bring water to a boil in a kettle or the microwave.
- Place the pan in the oven on a center rack. Carefully pour the hot water into the large pan being careful not to get it inside the plastic/foil or springform pan.
- Bake the cheesecake as directed.
Expert Tips
- I prefer heavy duty foil but if you’re using regular foil, you may want to use a few extra layers.
- You can use any large pan that is bigger than your springform pan (a turkey pan, large roasting pan, even a large skillet).
- Don’t pour the hot water into the roasting pan until it’s in the oven. It’s very hard (and dangerous) to carry a pan full of boiling water so don’t do that – place the pan in the oven first.
- Don’t be scared – if you follow these directions you’ll end up with the perfect cheesecake every time!
FAQs
It depends on the size of your larger pan: you want to fill it up about 1 inch around your springform pan, so I’d say at least 4 cups, probably more. Just fill up your kettle and you’ll have enough.
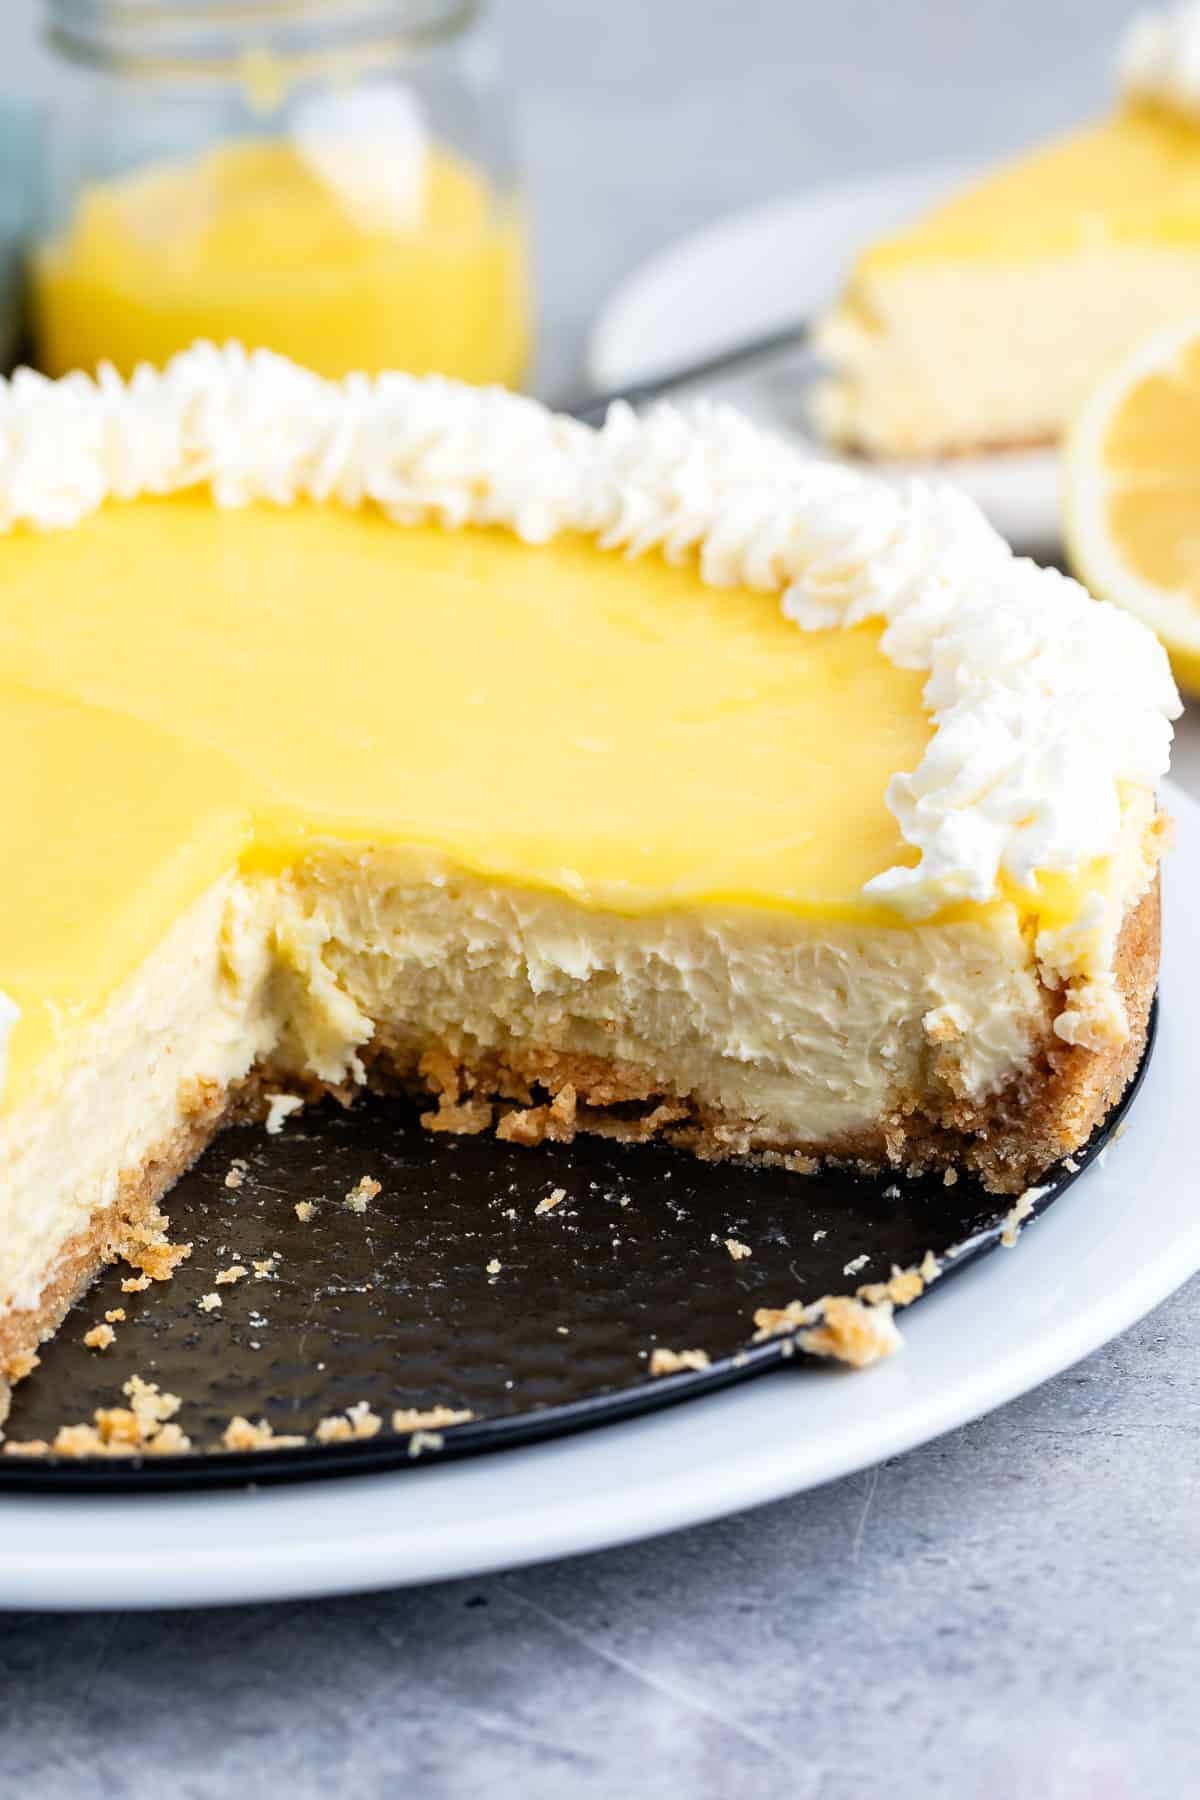
You never want to overbake your cheesecakes or it will be dry. Your cheesecake should pass the wiggle test: it should wiggle a bit in the center (like Jell-O) when it’s done. The outer part of the cheesecake won’t move – the wiggle test is just for the center. If the cheesecake ripples or wiggles entirely, then it’s not done.
Unfortunately, if you don’t prepare your pan properly, water will get into your cheesecake and ruin it. The water will soak the graham cracker crust and make it soggy. This is why it’s so important to use layers of foil and the oven bag.
How to make a Cheesecake Water Bath
Ingredients
- Cheesecake
- Hot Water
Instructions
- Lay out several strips of foil on the counter. Make sure they're larger than your springform pan.
- Wrap the foil up the sides of the pan, being sure the layers reach over halfway to the top.
- Place the foil covered pan in a large oven bag or slow cooker liner. If there is excess bag, tie it in a knot at one side, being sure the bag comes all the way to the top of the pan, covering all the foil.
- Make cheesecake as directed and add it to the prepared pan.
- Bring several cups of water to a boil in a kettle or pot or in the microwave.
- Place your cheesecake in a larger roasting pan or skillet (it needs to be larger than your springform pan).
- Place the large pan in a preheated oven.
- Carefully pour boiling water into the larger pan, being careful not to get it in the oven bag or springform pan.
- Bake cheesecake as directed.
Modify with AI
Nutrition
Nutrition information is automatically calculated, so should only be used as an approximation.
© Crazy for Crust. Content and photographs are copyrighted. Sharing this post is much appreciated, but copying and pasting full recipes without authorization is strictly prohibited.
Did you try this recipe? Click here to rate the recipe below.
Have you ever tried baking a cheesecake in a water bath and still ended up with cracks? Share your experience and tips for achieving a flawless, creamy cheesecake every time.
Hi Dorothy, I baked a cheese cake with water in my oven but just used the lower rack for the water dish and the cake came out just like the method you suggested.
Thanks for all the recipes and tips you give.
Carolyn
BAKING CHEESECAKES FOR TOO MANY YEARS, FOUND SOLUTION TO THE WATER BATH, FOIL, NONSENSE. PUT THE PAN IN A REYNOLDS LARGE TURKEY ROASTING BAG,FOLD EXCESS DOWN OR CUT OFF, PLACE PAN IN WATER, BAKE AND HOORAY NO LEAKS!
Featured In
Rate This Recipe