This post may contain affiliate links. For more information, read my disclosure policy.
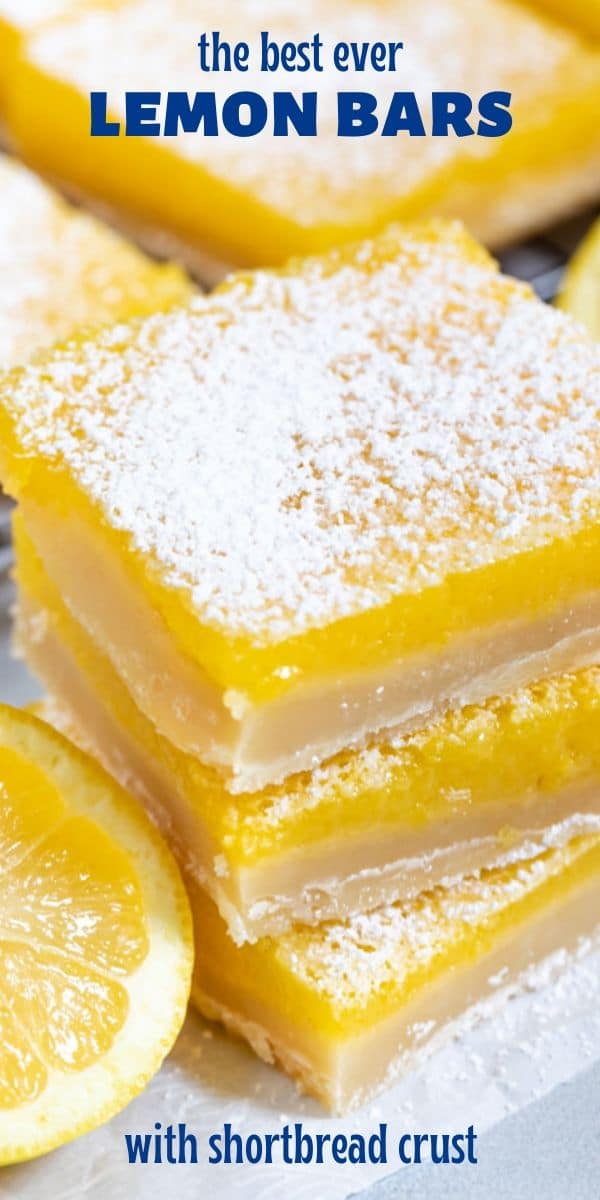
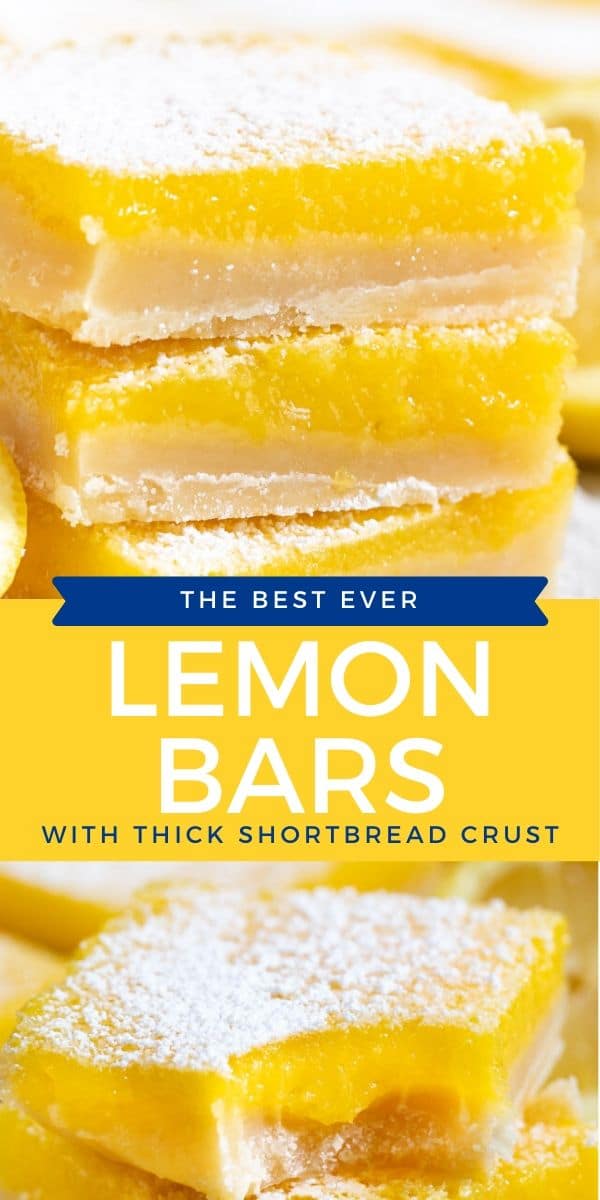
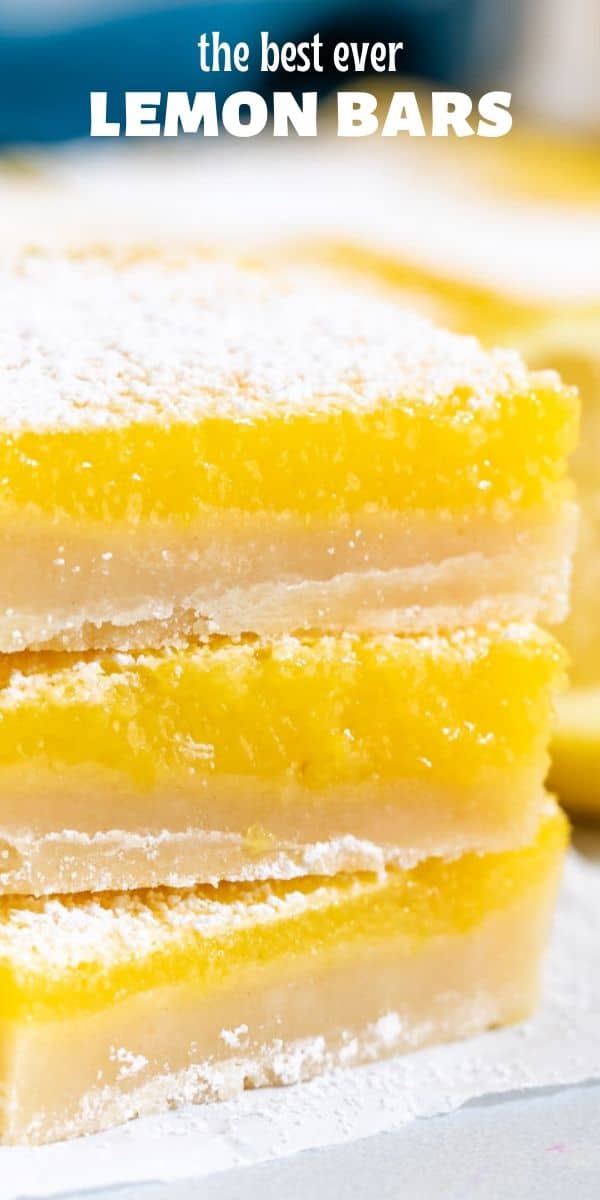
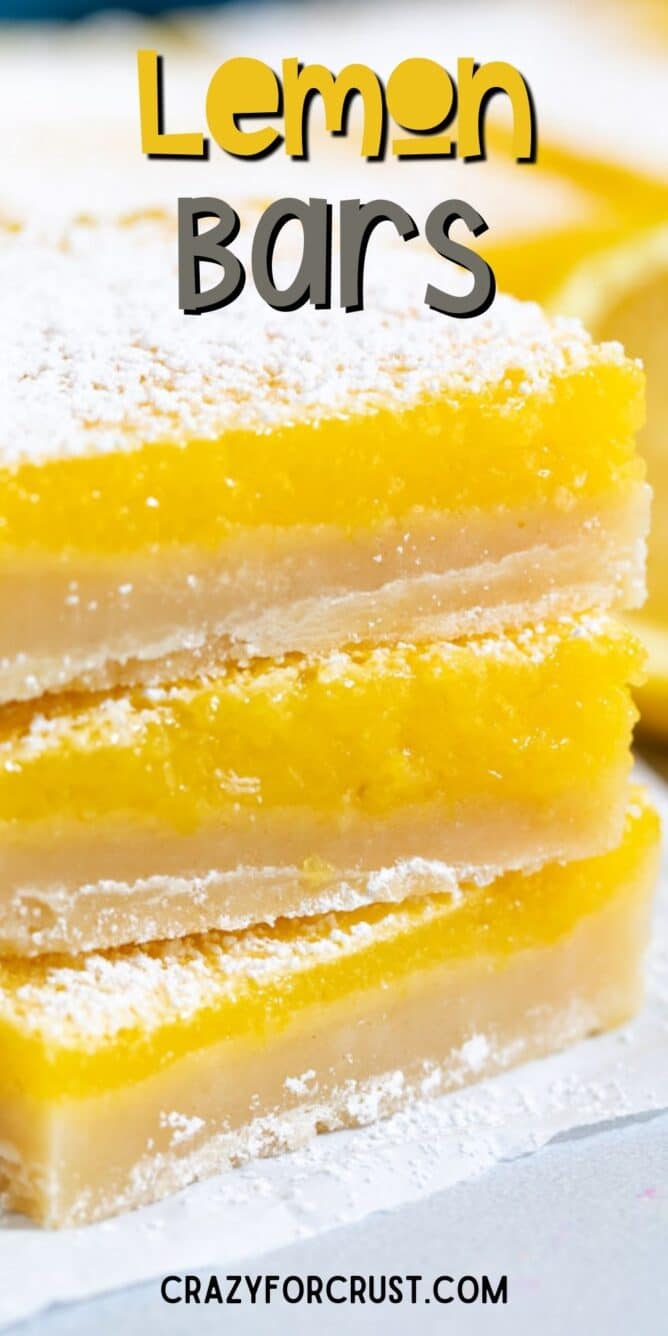
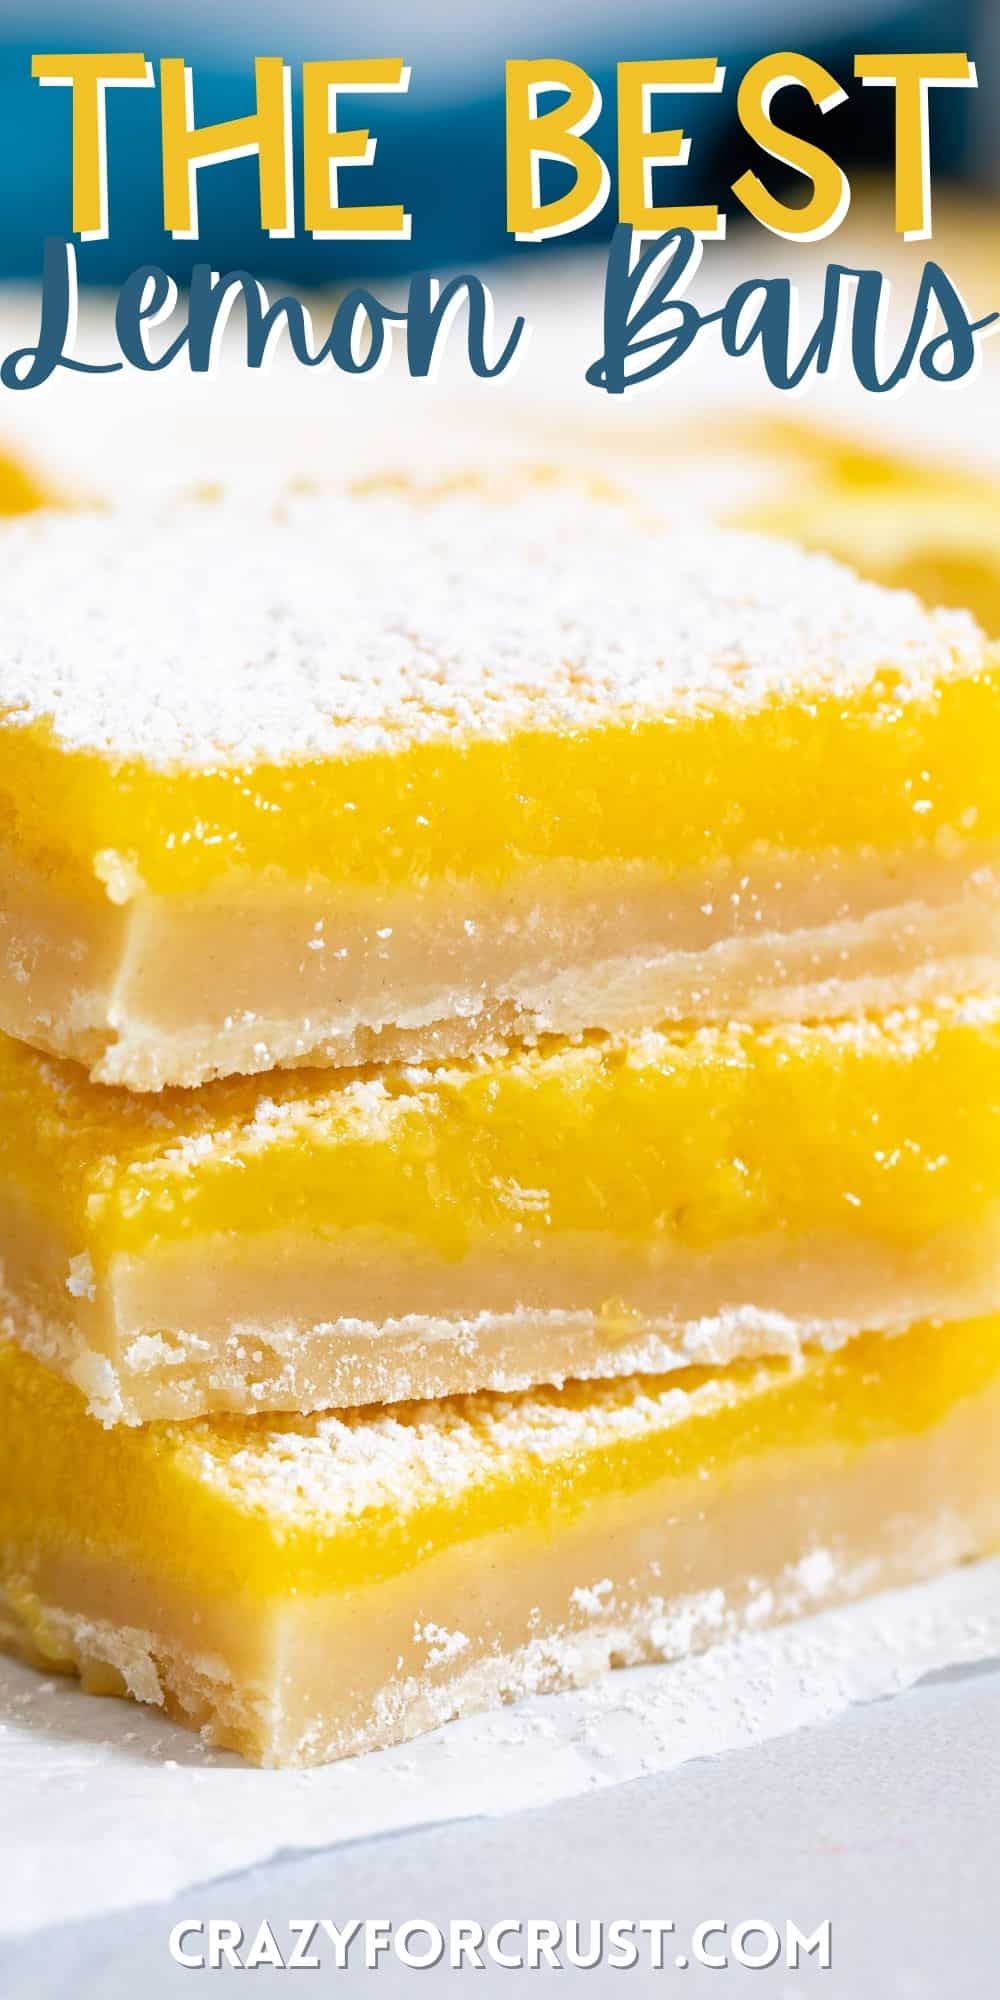

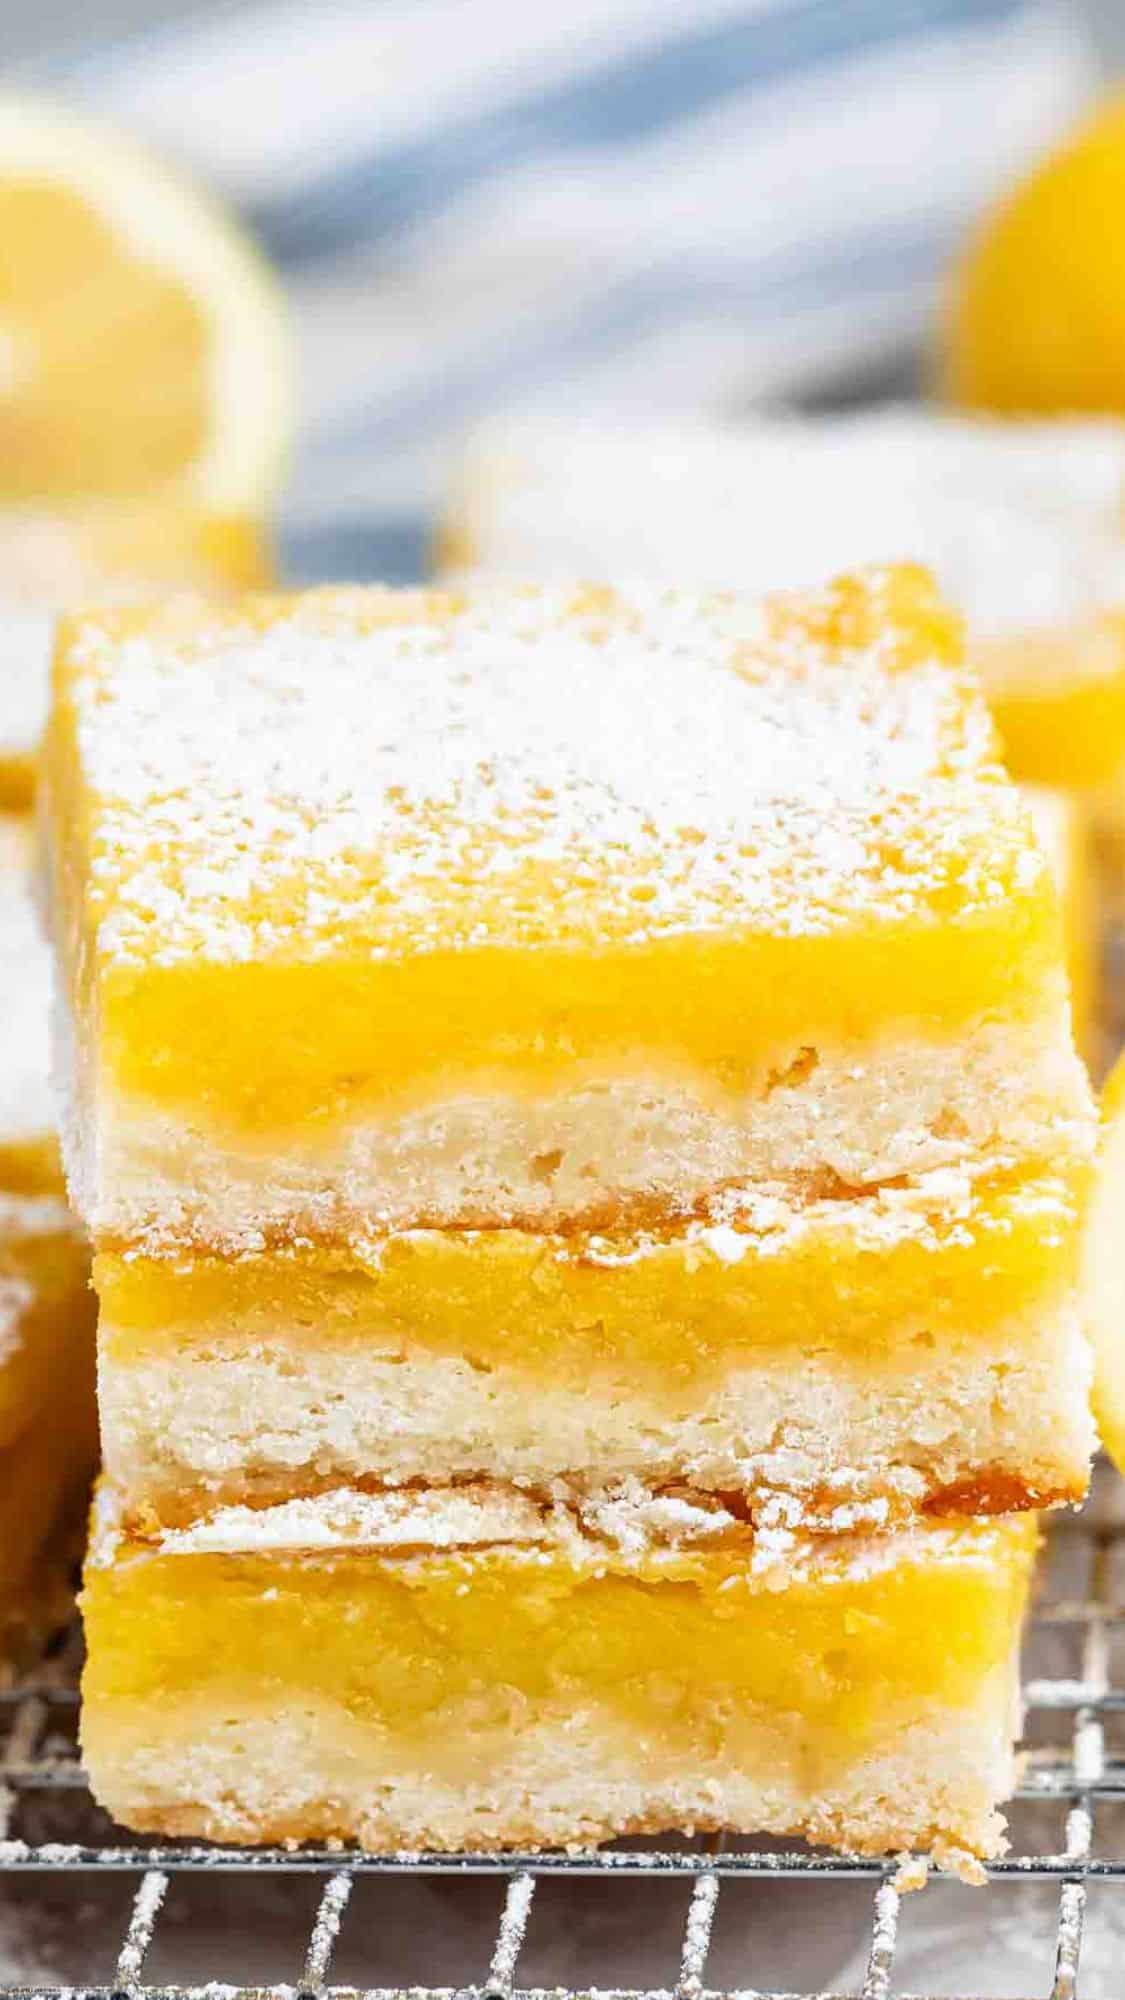
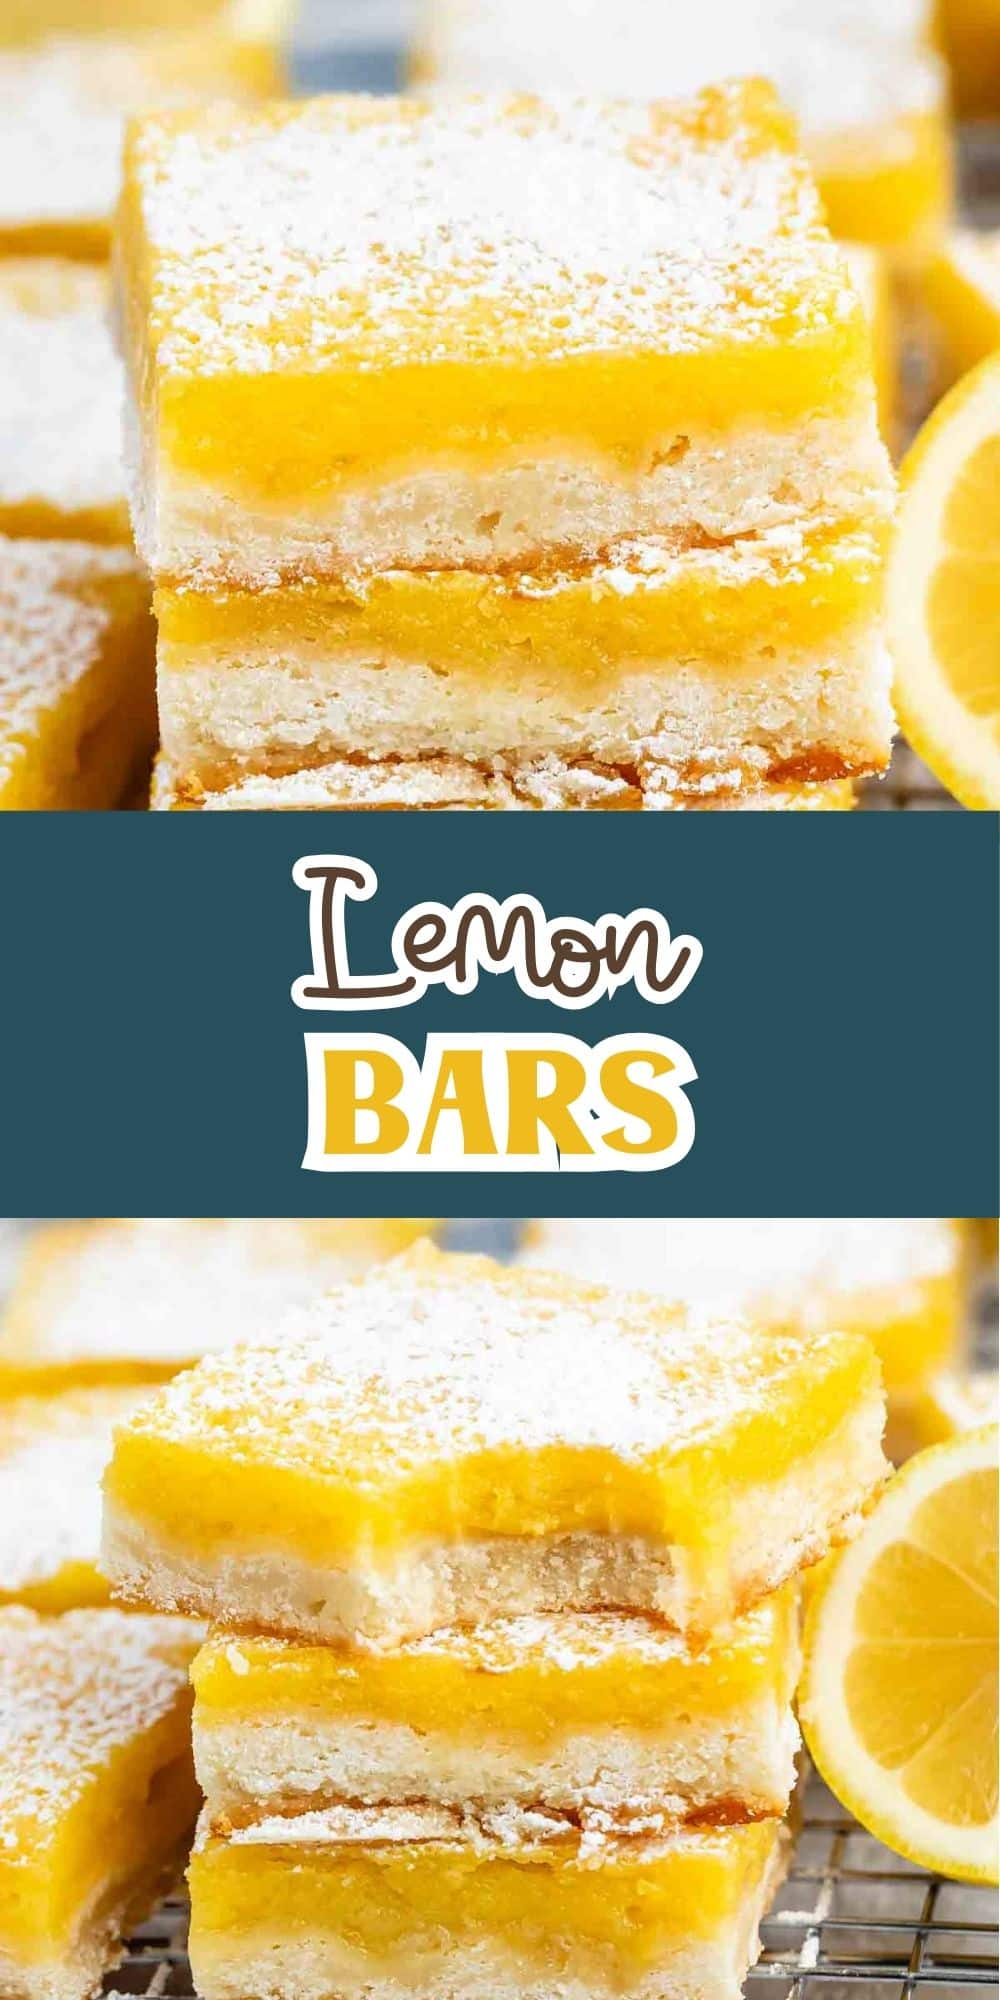
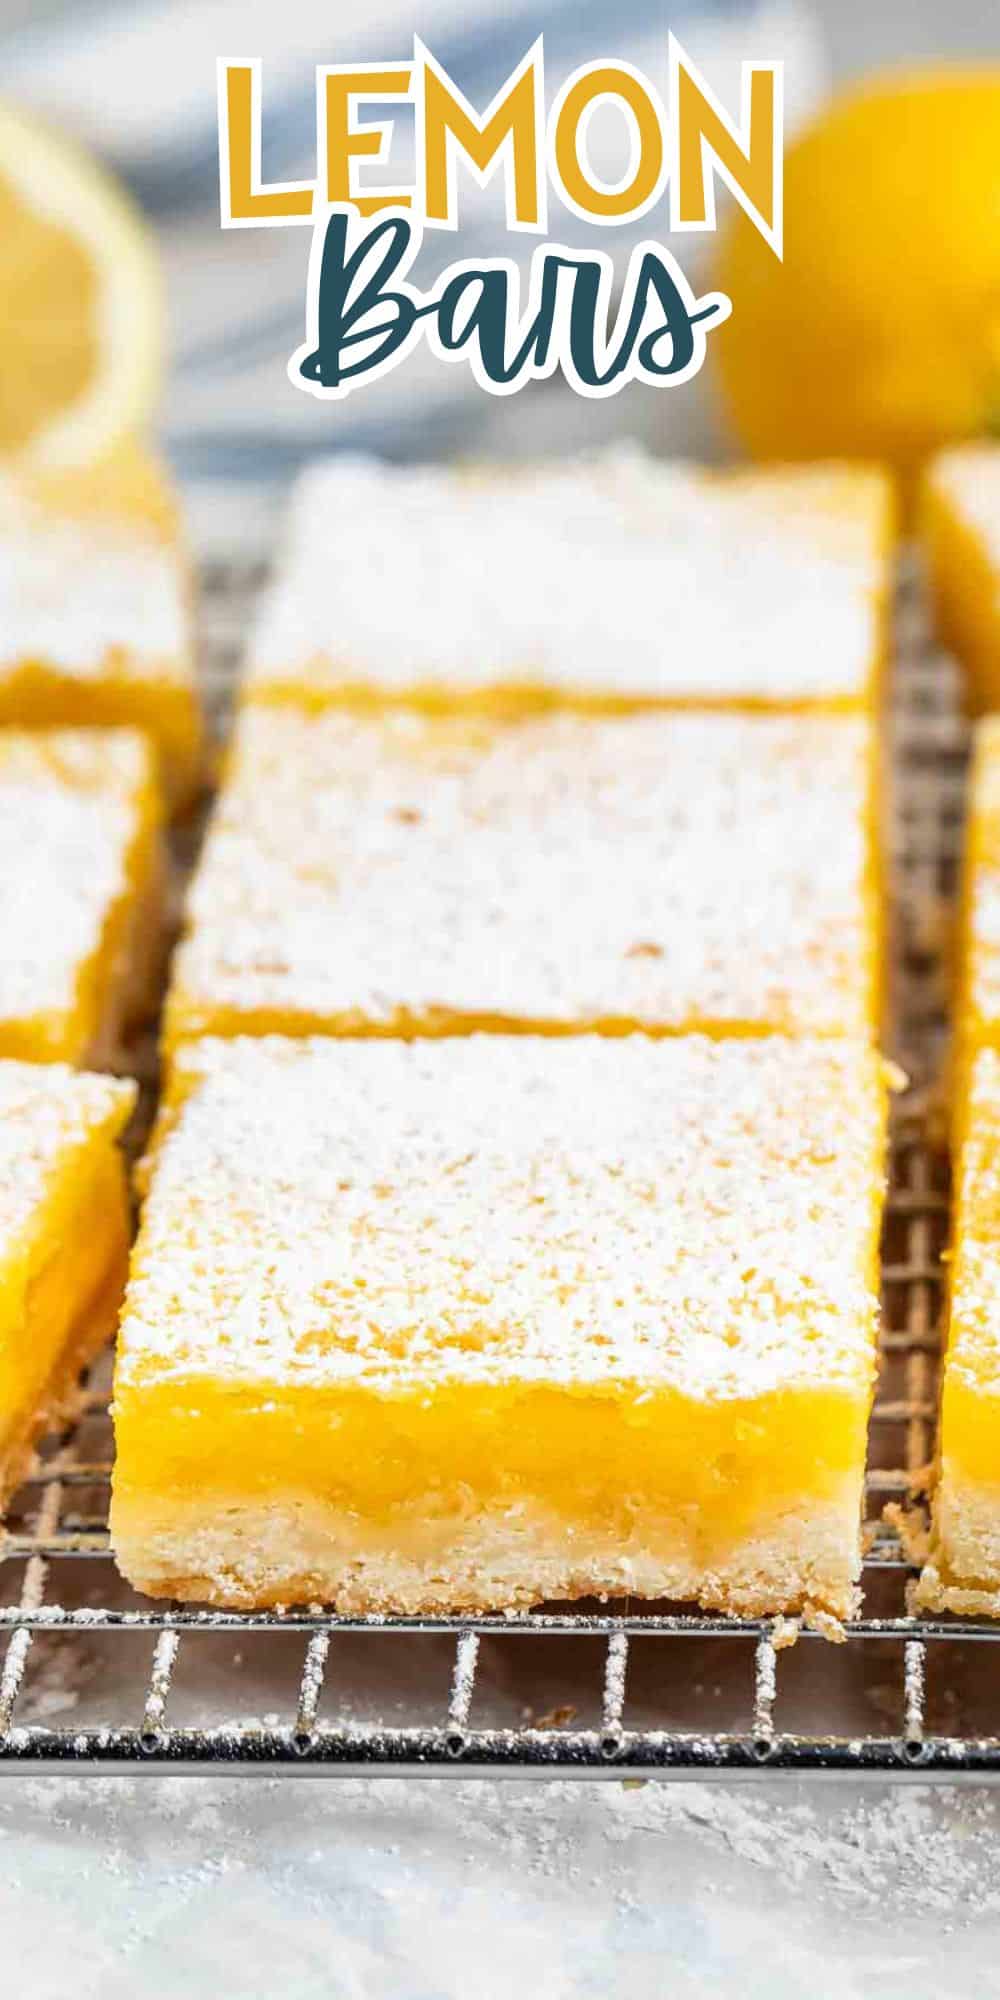

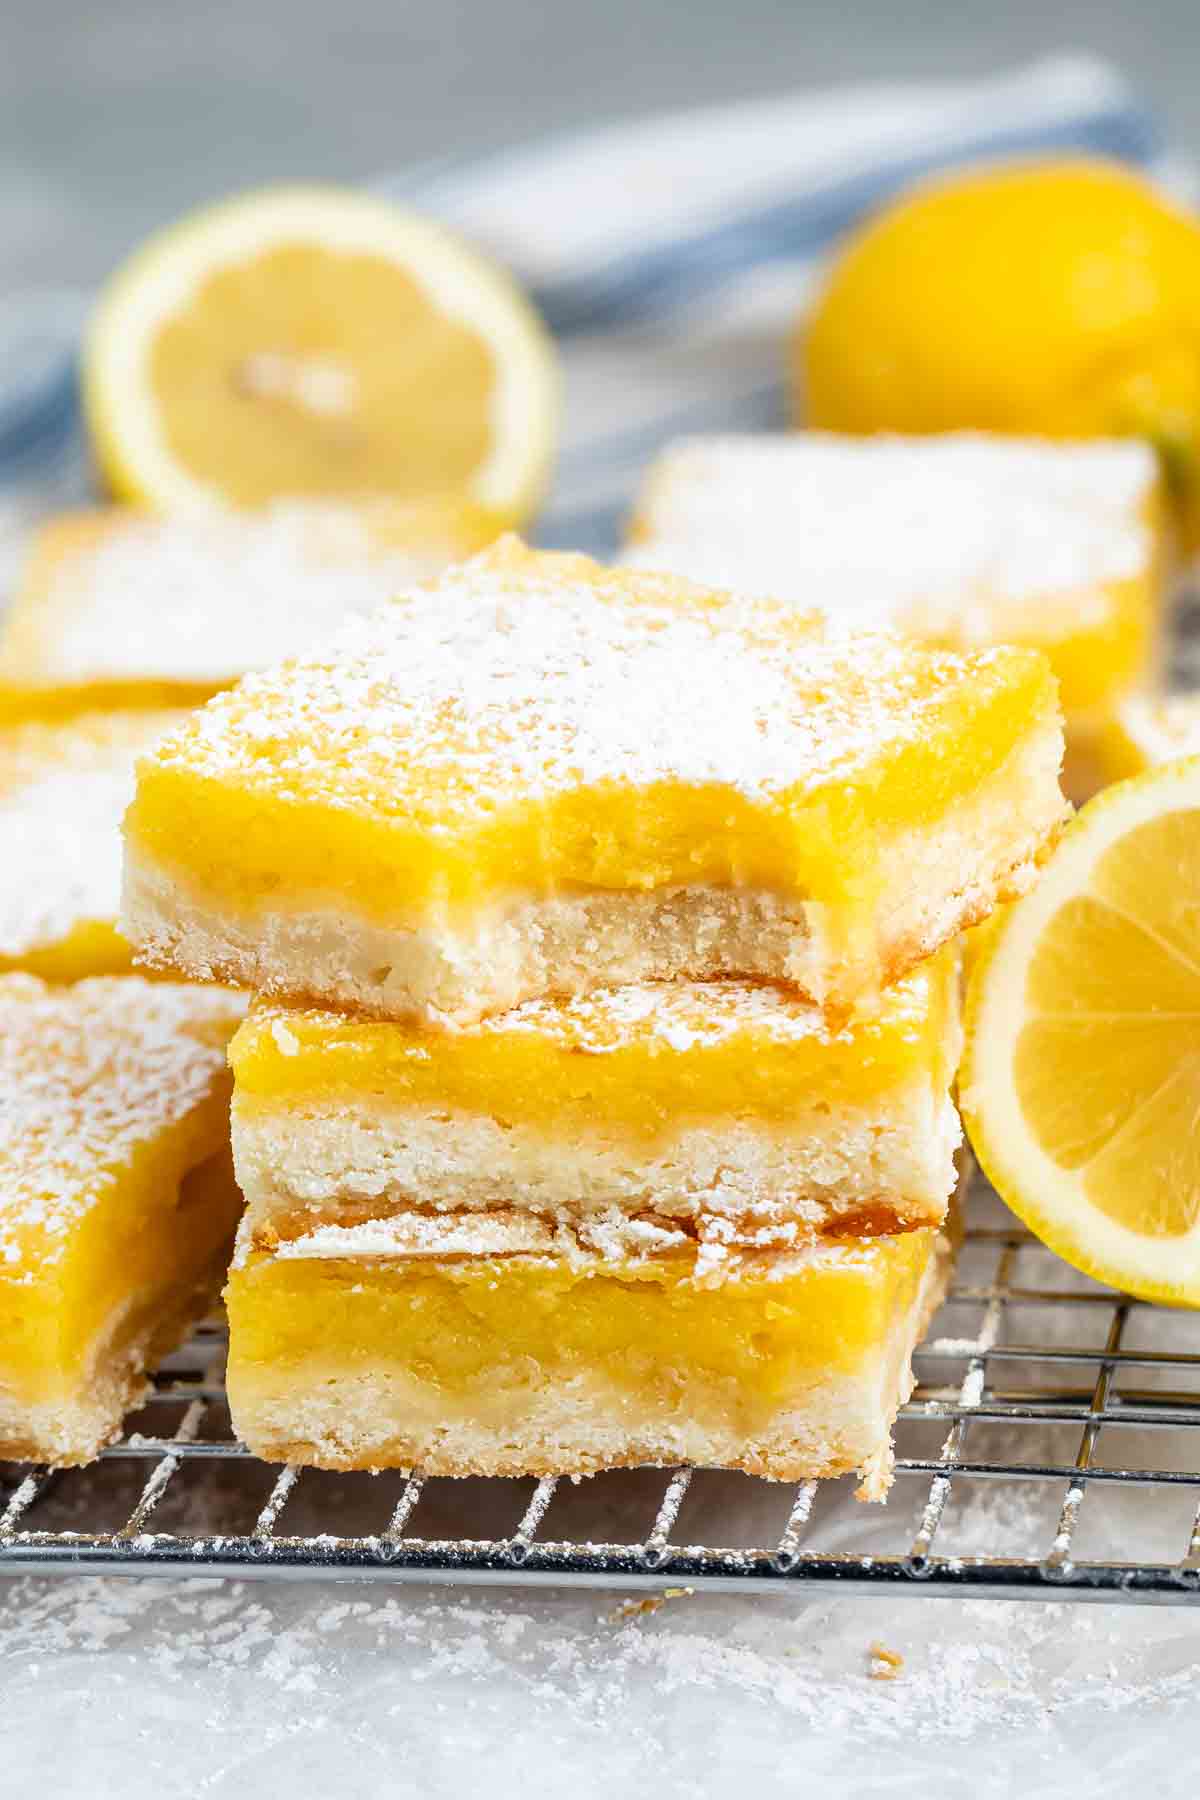
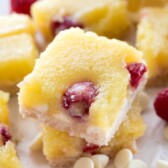
These are truly the best lemon bars you will ever make. They feature a thick, buttery shortbread crust that melts in your mouth, topped with a silky, tart lemon curd that has the perfect balance of zing and sweet. If you’ve been looking for a lemon bar recipe that packs a punch and slices into perfect, professional squares, this is the version for you!
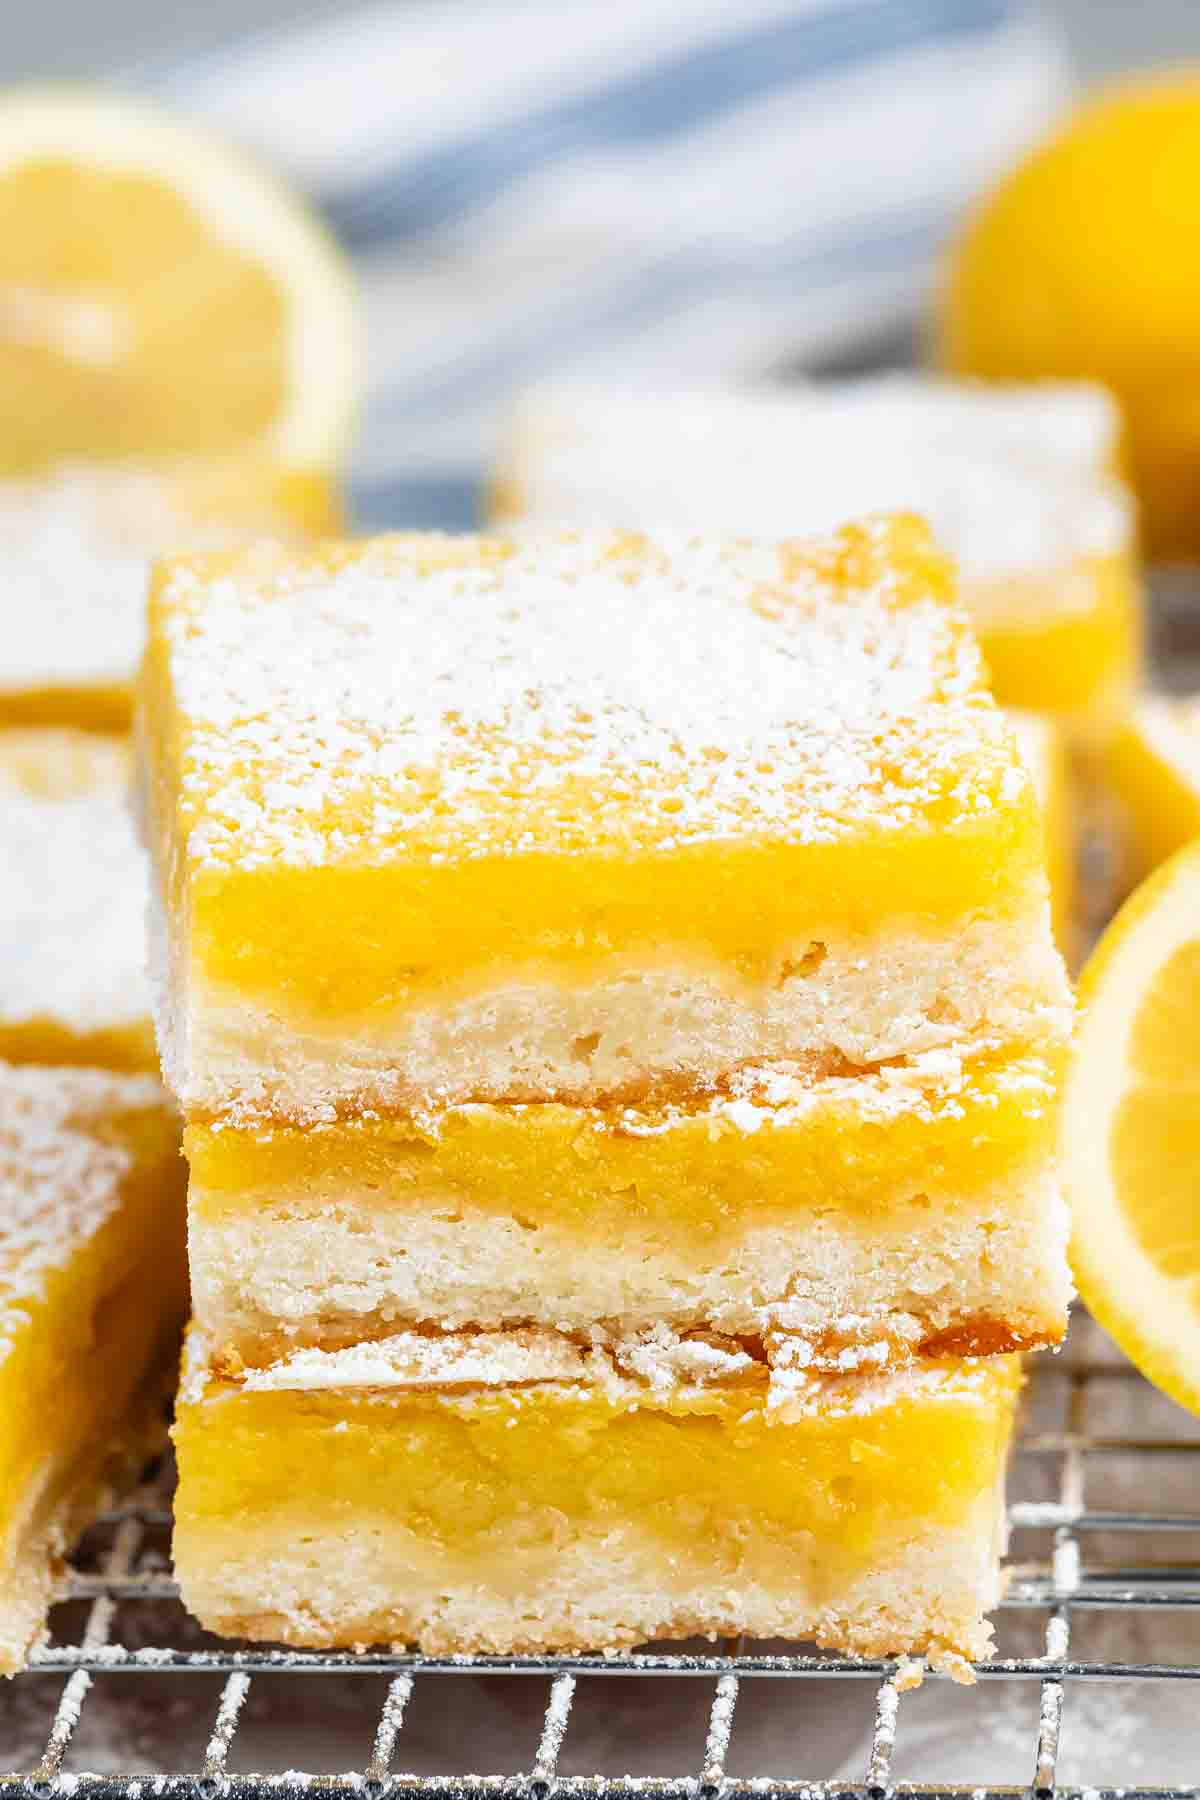
Oh, how I love a shortbread crust topped with tart lemon filling. My lemon squares recipe is one of my favorite lemon desserts! This recipe is better than Ina Garten’s lemon bars, pinky swear. My recipe is easier to make and the balance of crust to filling is perfect. The filling sets up every single time!
I remember the first time I had a lemon bar – I was an adult and my sister-in-law was making them from a box mix. I didn’t think I liked lemon desserts but one bite proved me wrong – and I’ve been making this recipe (from scratch!) ever since.
The secret to the best lemon squares lies in the ratio of fresh zest to juice. While some recipes rely on extracts, we use a generous amount of fresh lemon zest to infuse the sugar with essential oils before whisking in the juice. This creates a deep, vibrant flavor that cuts through the richness of the buttery crust. Plus, our “no-fail” baking method ensures the filling sets perfectly every time without getting rubbery or runny.
How do you make the best lemon bars from scratch? Bake a shortbread crust made of butter, flour, and powdered sugar at 350°F until lightly golden. Pour a filling of whisked eggs, sugar, fresh lemon juice, and zest over the hot crust. Bake until the filling is set but slightly jiggly in the center, then chill for at least 3 hours to ensure a firm, sliceable texture.
Ingredients for Thick Lemon Bars
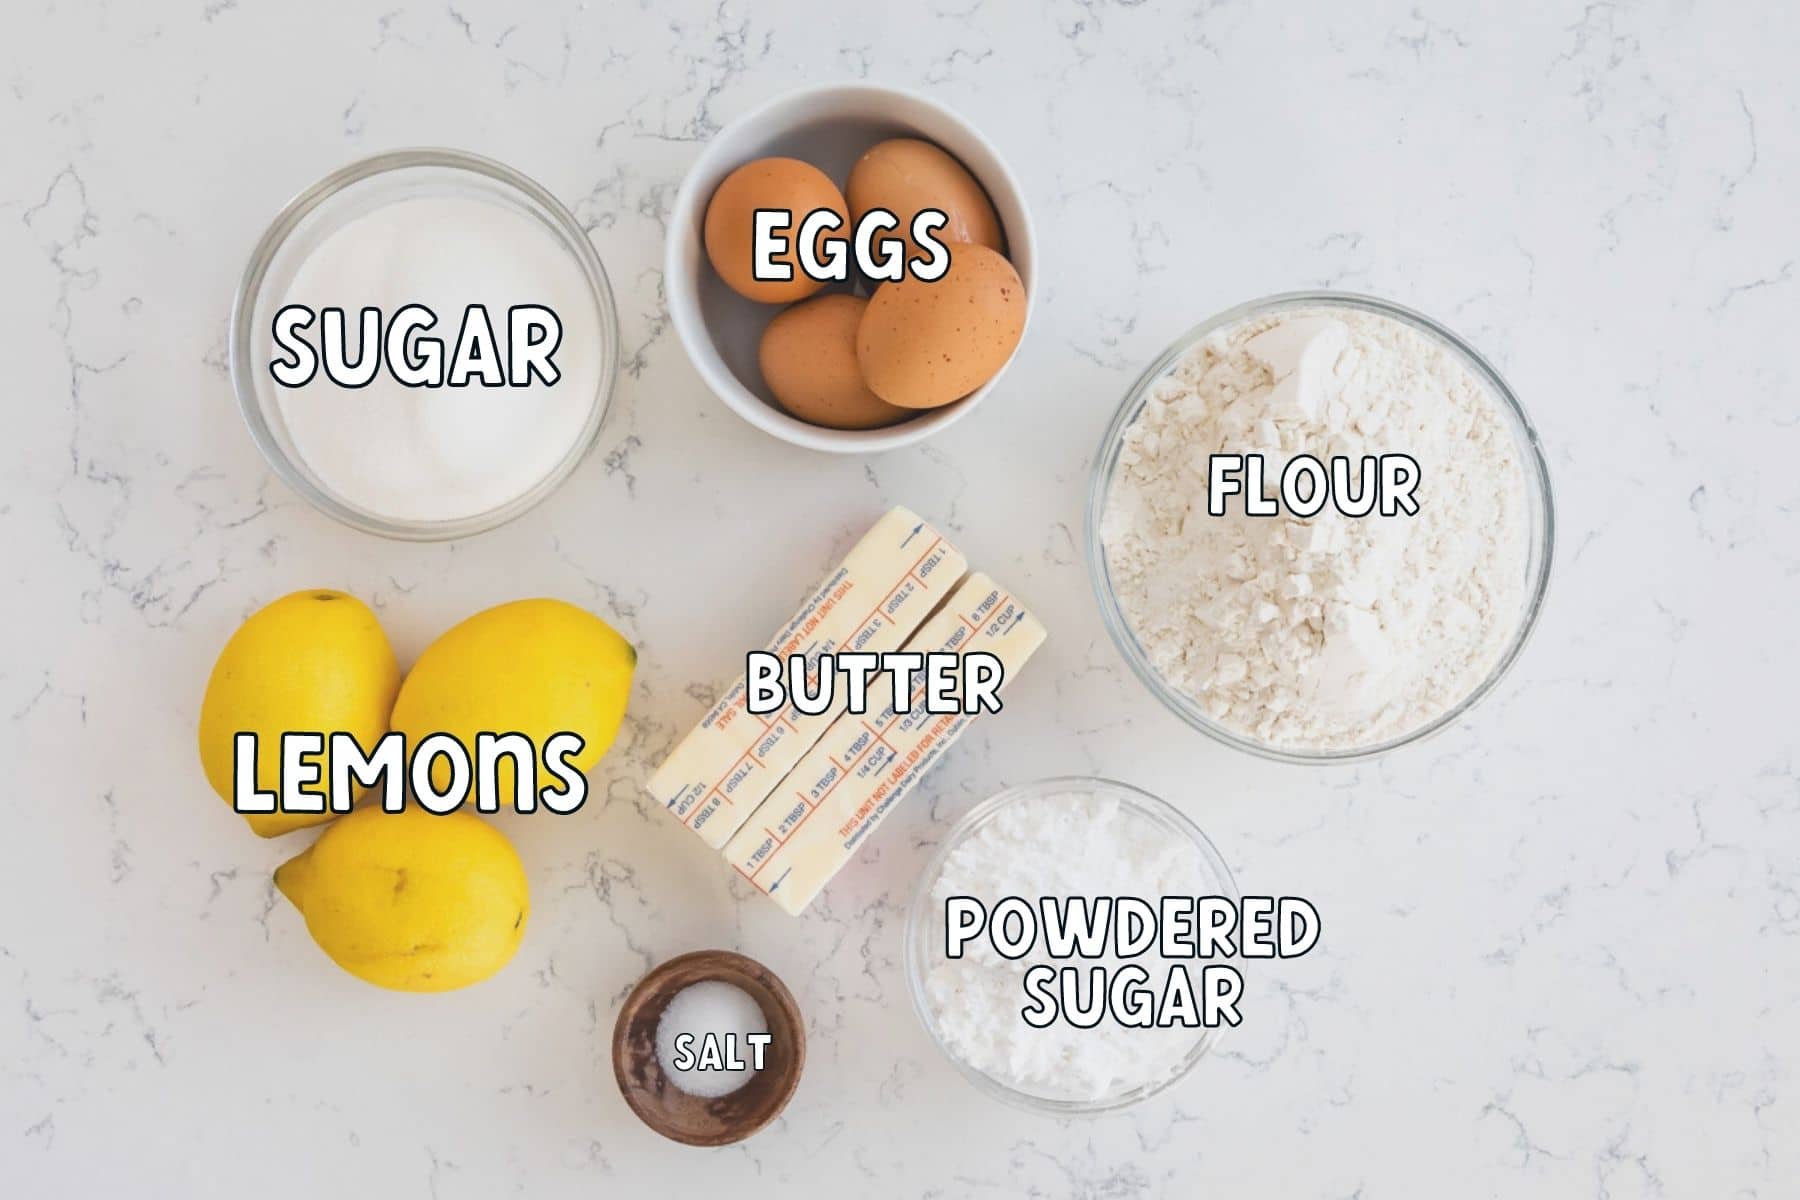
- Use unsalted butter for the crust, make sure it’s softened. You can reduce added salt if using salted butter.
- I love using powdered sugar in shortbread because the cornstarch in confectioners’ sugar makes the shortbread melt in your mouth.
- You’ll need FRESH lemon juice and lemon zest! The lemon zest is where most of that lemon flavor comes from. We’ll whisk the lemon zest with the granulated sugar to infuse the flavor (the oils in the zest meld with the sugar to create a more citrus-tasting bar).
- Pro Tip: ANY citrus works in this recipe – make lime bars (or margarita bars) or even orange squares!
Click to see the recipe card below for full ingredients & instructions. See below the recipe card for even more information: process shots, variations, FAQ and more.
SAVE THIS RECIPE
Dorothy’s Expert Tips for Clean Slices and Perfect Tops
- I recommend whisking your eggs to break up the yolks and incorporate the whites before adding the other ingredients.
- To avoid the white skin or air bubbles on top of your bars, avoid over-whisking the egg mixture. Whisk just until the eggs are combined with the sugar. If you see foam on top of your filling before baking, simply skim it off with a spoon or strain the mixture through a fine-mesh sieve for a glass-like finish.
- For the best results, use a metal baking pan lined with parchment paper (not foil). Metal conducts heat more evenly than glass, ensuring the crust is golden-brown and the lemon layer sets from the edges to the center at the same rate. Avoid unlined metal pans, as the acidity in the lemon can sometimes react with the metal and create a metallic aftertaste. Lining your pan with foil will cause the bars to brown to quickly on top, so parchment is the way to go.
- Keep an eye on the bars while they bake. You want to pull them out of the oven when they are set in the middle and just lightly golden on top.
- The best way to cut them cleanly is to remove the entire slab from the pan using the parchment. Then spray the knife with some nonstick cooking spray, and wipe it clean between cuts.
Lemon Bars Recipe

Video
Ingredients
Crust:
- 1 cup (226g) unsalted butter
- ½ cup (57g) powdered sugar
- 2 cups (248g) all purpose flour
- ¼ teaspoon salt
Filling:
- 4 large eggs
- 1 ½ cups (300g) granulated sugar
- Zest of 1 medium lemon
- Pinch of salt
- ½ cup (118ml) fresh lemon juice, from about 4 medium lemons
- Powdered sugar, for topping
Instructions
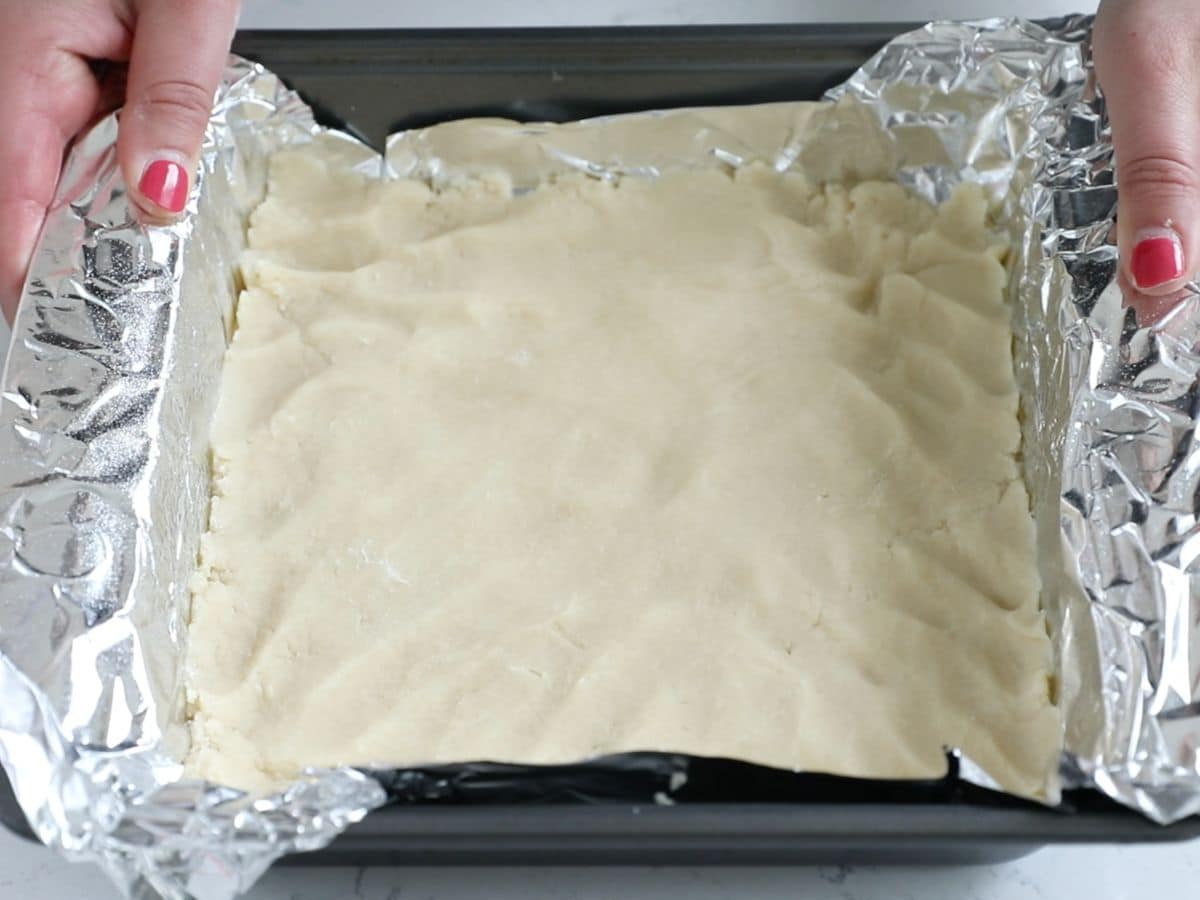
- Preheat oven to 350°F. Line a 9×9 or an 8×8 metal pan with parchment paper (not foil) and spray with nonstick cooking spray.
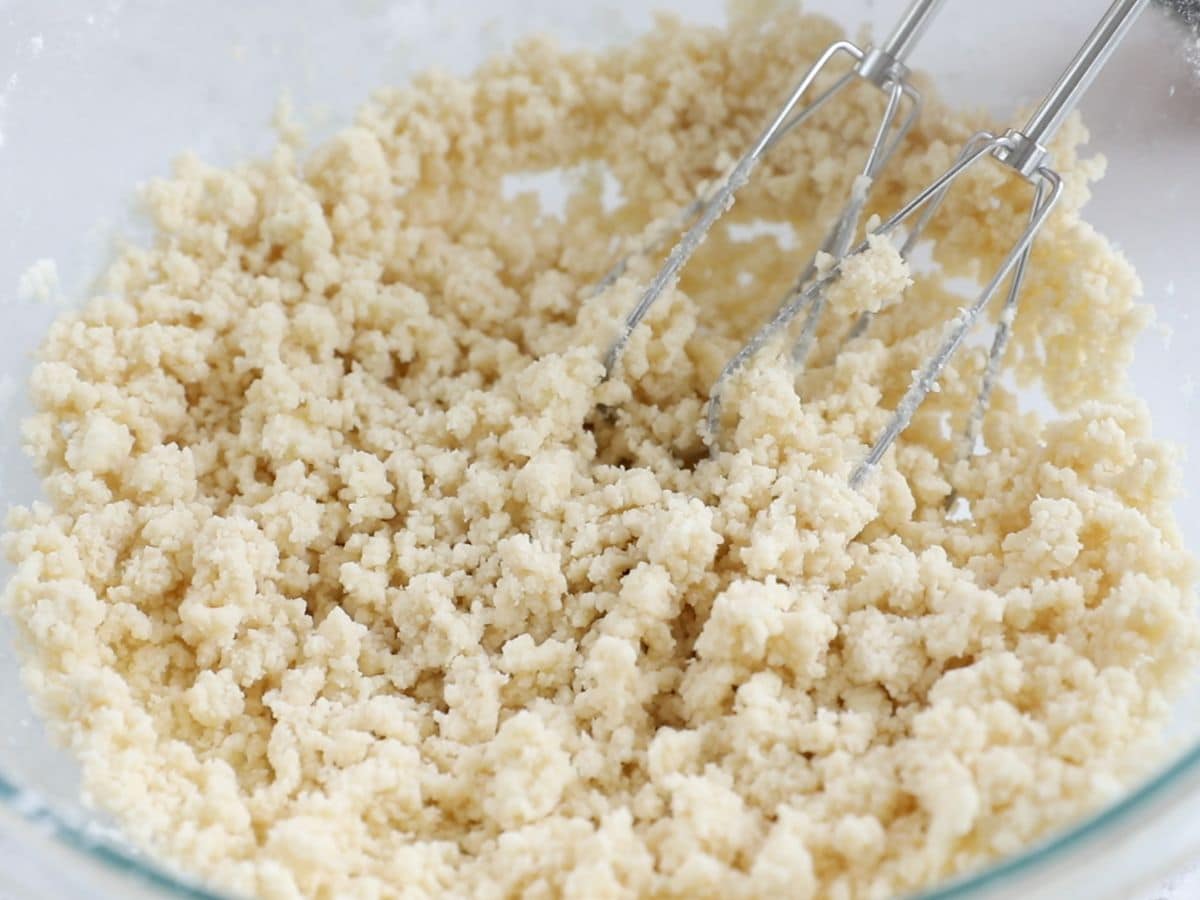
- Make the crust by creaming the butter with a hand or a stand mixer (fitted with the paddle attachment) until smooth. Add powdered sugar, flour, and salt and mix slowly until the mixture is crumbly but sticks together when you press it between your fingers. Press the crust into the bottom of the prepared pan. Bake for about 13 minutes, or until it just starts to get a light golden brown around the edges.
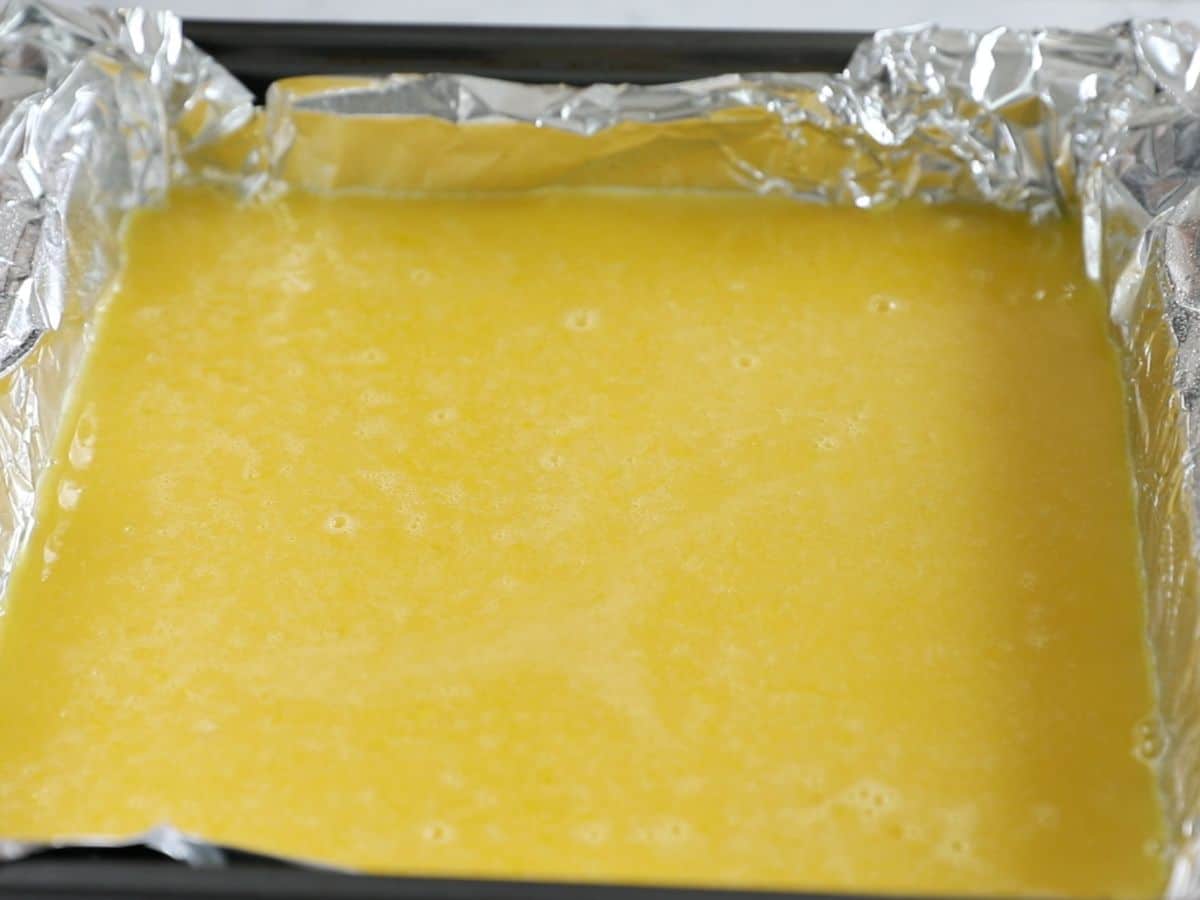
- While the crust is baking, whisk the eggs until beaten. Whisk lemon zest into the sugar, then whisk in the salt and lemon juice. Pour over hot crust, then continue to bake for 15-18 minutes, or until the mixture is no longer liquid in the center and it’s lightly golden brown on top.
- Cool completely before removing from pan. Remove foil, then dust with powdered sugar. Slice and serve, dusting with more powdered sugar as desired.
Notes
- I recommend a stand mixer for the crust if you have one, if not, a hand mixer will work but it will take a bit of time to get it mixed. Make sure the mixture sticks together when you press it into the pan – and make sure it’s pressed very well into a solid crust so there are no holes.
- If you’re worried about the white top that sometimes forms on lemon bars (which is caused by over-mixing) you can strain the mixture through a fine mesh strainer before adding to the hot crust.
- Keep an eye on the bars while they bake. You want to pull them out of the oven when they are set in the middle and just lightly golden on top.
- For clean slices, chill until set and then remove the entire slab from the pan using the parchment paper. Use a sharp knife, cleaning between cuts and spray the knife with nonstick cooking spray.
- Store them in the refrigerator for up to four days in the refrigerator or you can freeze them for up to a month.
Nutrition
Nutrition information is automatically calculated, so should only be used as an approximation.
© Crazy for Crust. Content and photographs are copyrighted. Sharing this post is much appreciated, but copying and pasting full recipes without authorization is strictly prohibited.
Did you try this recipe? Click here to rate the recipe below.

How to Make Lemon Bars Step by Step
- The first thing that sets these bars apart is the crust. It’s a simple buttery shortbread crust that is easy to make. Many recipes have you bake the crust in a large baking dish, but I prefer a smaller 9×9” square one. That way you get thick lemon bars.
- You don’t have to chill the dough – just mix it up, press it into the pan and bake it. No waiting! The crust is ready for the pan when the dough is crumbly but sticks together when you squeeze it.
- I partially bake the crust so that it’s soft and buttery and crunchy once the bars are all done.
- The filling is so easy to make by just whisking all the ingredients together.
- Lemon bars are done baking when the lemon filling is no longer liquid in the center and the bars are lightly golden on top.
- Cool the bars completely before slicing and serving. I like to dust them with powdered sugar!
FAQs
This is a thin layer of baked egg protein and air bubbles. You can prevent it by not over-whisking the filling, or simply hide it with a generous dusting of powdered sugar!
Yes. Because the filling is essentially a baked lemon custard, they must be kept in the fridge. They actually taste best and slice cleanest when served cold.
I strongly recommend fresh. Bottled juice lacks the brightness and essential oils found in fresh lemons, which is what makes these bars the best.
Chill the bars for at least 3 hours (or overnight). Lift the entire block out of the pan using a parchment paper and use a large, sharp knife, wiping it clean between every single slice and spraying it with nonstick cooking spray.


I made these bars and they taste delicious, but the crust floated to the top.
So that usually only happens with graham cracker or cookie crusts (because they’re hard to get solid). It happens when you don’t push the crust together enough and there are holes – then the liquid inverts. So be sure that your crust is really shoved together and solid!
I had the exact same thing happen to me!
My lemon bars literally came out upside down is that supposed to happen if not why did this happen I’m so confused
That happens when there is a hole somewhere in the crust. Usually with shortbread crust I don’t have that problem because it’s thick and presses together easily (it’s more likely to happen with a graham cracker crust because it’s not solid). So if you make them again just make sure that your crust is fully compact.
I haven’t made lemon bars in years and have tried three recipes that just weren’t what I thought were any good until I tried your lemon bar recipe and made them twice in a week and I’m here to tell you and everyone out there that these are the absolute best! I refrigerate mine also.
I’m so glad you enjoyed them!
These were too heavy for me
These are seriously so good, thanks for the recipe! I halved the amount of crust, and it was perfect to my taste. Even better once refrigerated. Like the essence of lemonade – bright and beautiful. Will definitely be making these again in the near future.
Featured In
Rate This Recipe
Recipe Ratings without Comment