This post may contain affiliate links. For more information, read my disclosure policy.
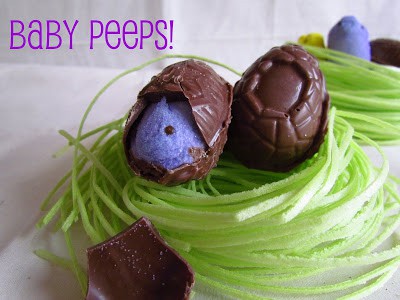
Baby Peeps – A hollow chocolate egg filled with a PEEP! Baby Peeps will cause lots of smiles this Easter!
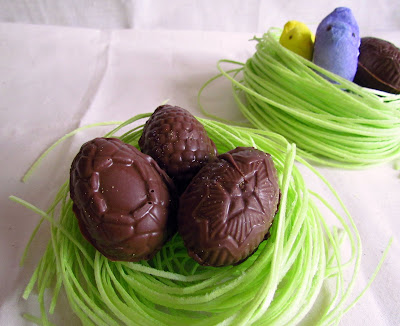
Oh look, some cute little chocolate eggs!
Oh look! One’s hatching! What could it be?
It’s a baby Peep!
Baby Peeps
While looking for ideas for my daughters’ Easter basket, I thought about all the chocolate eggs and bunnies you can buy in the store. I got to thinking, why don’t I just get a mold and make some eggs? I can make how many I want, control the ingredients, and I won’t have a whole bag of leftover candy that I she will devour after the fact. I’ve been seeing all sorts of Peeps goodies lately so the idea for these popped inside my head.
I got my egg-shaped mold at An Occasional Chocolate. I get a lot of my chocolate crafting supplies from them. I also got a large bunny shape (more to come from that next week!) Usually when working with chocolate, I prefer to use Guittards Melt ‘n Molds, but I didn’t have any and forgot to order some when ordering the molds. So I used Wilton Light Cocoa Melts, and they actually tasted pretty good.
Here is the mold I used. Pretty cute!
I used the same method to make these eggs that you would if you were using a truffle mold.
First, fill your eggs with chocolate. (Make sure to use ones with matching designs!) The entire mold needs to be filled so all the sides are covered with chocolate up to the top. Then pour your chocolate back into your bowl. Use a spatula or knife to scrape all the chocolate. (I work on my Griddler set at 200 degrees and covered with a kitchen towel. My chocolate bowl and squeeze bottle stay on the warm grill to keep the chocolate melted.) After you dump out the chocolate you are left with hollow chocolate eggs. Freeze these for a few minutes until hardened. Then pop out the shells and you have two sides of a hollow chocolate egg!
Now you need to prepare your Peeps. My molds weren’t quite big enough for the entire Peep, so surgery had to be done.
I cut off the front and back “wings” with kitchen scissors. Then he fit right into the egg.
To seal the egg, pipe melted chocolate from your squeeze bottle around the edge. Press the two halves together and hold. Wipe off any excess chocolate spillage. I held each egg in the freezer for about 30 seconds, then left it in the freezer for a few minutes to harden.
Jordan and my mother- and sister-in-law really enjoyed “cracking” open the eggs. I gave them each a butter knife and had them hammer the shells open. So fun to watch Jordan’s face when she saw the baby Peep.
What’s great about these baby peeps is that you can make as many (or few) that you want. One bag of Wilton’s Melts will make about ten eggs. The nests are made out of edible Easter grass I found at Joann Fabrics. Neat, huh? No more nasty plastic stringy grass that gets everywhere!
Enjoy hatching some baby Peeps!
Baby Peeps
by Crazy for Crust
by Crazy for Crust
Baby Peeps

Ingredients
- 1 bag Wilton's Light Cocoa Melts
- About 10 Peeps
Instructions
- Melt your cocoa melts using the microwave directions on the back of the bag. Heat an electric griddle to 200 degrees and cover with a kitchen towel. Place the bowl with your melted chocolate on the griddle to keep it warm.
- Add chocolate to the egg molds, filling them to the top. Pour the excess chocolate back in the bowl, scraping the top of the mold with a butter knife or spatula. Freeze molds for a few minutes until chocolate is hardened. Pop out.
- To prepare your Peeps, cut off the tail around the bottom of the body. Place a Peep in half of each pair of eggs.
- Transfer some chocolate to a squeeze bottle. Pipe the chocolate all the way around the egg and place the top half on. Press and hold to seal. Hold the egg in the freezer for 30 seconds, then leave in freezer for a few minutes to harden. **Do not seal more than one egg at a time. Unless you have 6 hands!**
Nutrition
Calories: 1kcal | Carbohydrates: 0.1g | Protein: 0.1g | Fat: 0.04g | Saturated Fat: 0.02g | Monounsaturated Fat: 0.01g | Sodium: 0.1mg | Potassium: 4mg | Fiber: 0.1g | Sugar: 0.01g | Calcium: 0.3mg | Iron: 0.04mg
Nutrition information is automatically calculated, so should only be used as an approximation.
© Crazy for Crust. Content and photographs are copyrighted. Sharing this post is much appreciated, but copying and pasting full recipes without authorization is strictly prohibited.
SAVE THIS RECIPE
Did you try this recipe? Click here to rate the recipe below.
Ahh – you did Peeps in yours! Haven’t seen these ones yet – only the pink ones with the little yellow chicks..super cute!