This post may contain affiliate links. For more information, read my disclosure policy.
A Butter Shortening Pie Crust is the happy medium between an all butter pie crust and an all shortening crust. It has the flakiness of shortening and the flavor of butter, making it a perfect pie crust recipe.

There is an age old debate about using butter or shortening in a pie crust. Which is better? Which is flakier?
Honestly, it’s just about taste. I didn’t find that an all shortening crust was any flakier than an all butter crust. Maybe it was marginally, but the shortening crust lacks flavor. I often wonder if the people who say they hate pie crust are eating shortening crusts – they’re boring and one dimensional.
While all butter pie crusts are my preference, I will sometimes try to satisfy family members who swear by shortening crust. To do this I made a half and half recipe out of my favorite butter crust. The result is something that’s (a teeny bit) flakier but has the delicious, rich, and multi-dimensional flavor of butter in the crust. While I still prefer all butter, this is a nice medium between the two.
SAVE THIS RECIPE
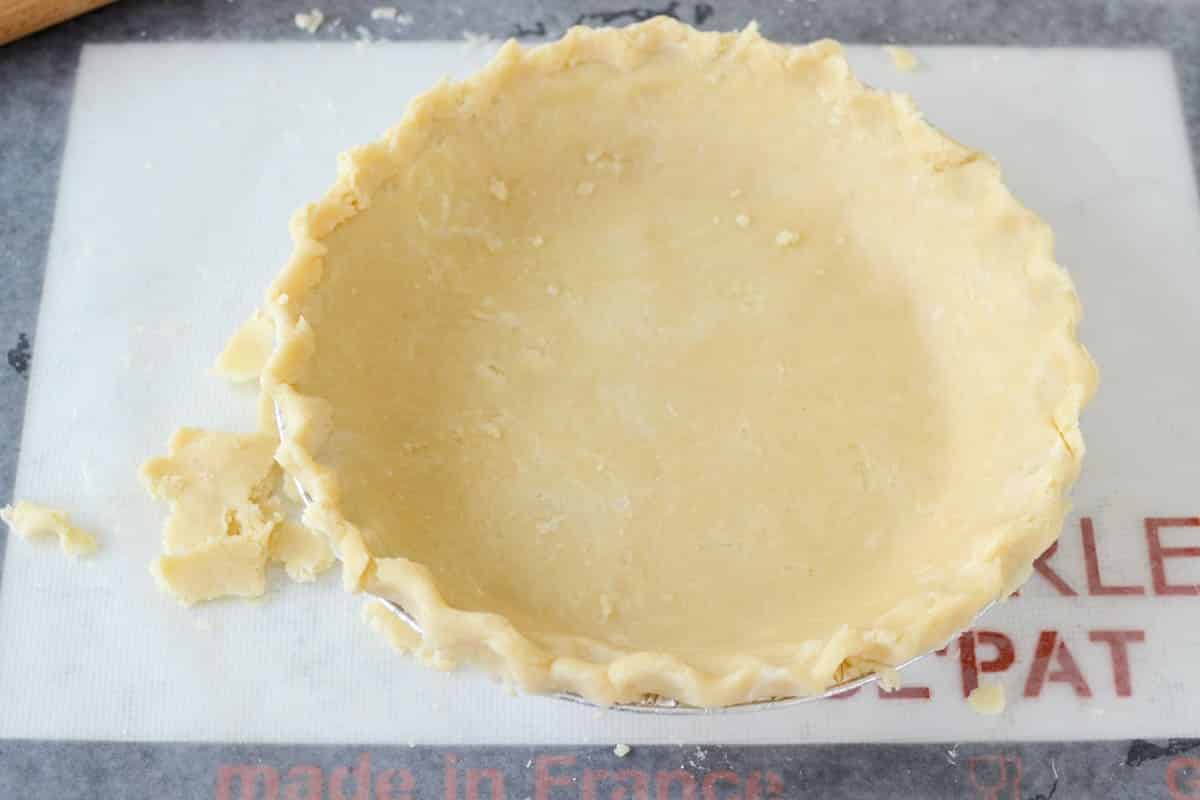
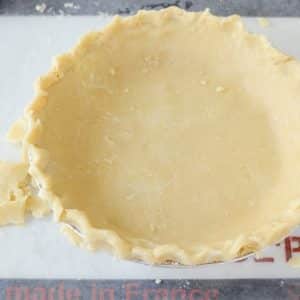
Butter Shortening Pie Crusts are the happy medium between an all butter and all shortening crust.
Read all about the secret to making the perfect pie crusts here.
Ingredients:
- Cold Butter – make sure your butter is rock solid cold, and use real butter (not margarine or low-fat).
- Shortening – you can use Crisco or lard if you want
- Ice Water – keep it cold!
- Flour – I always use all purpose flour for my pie crusts.
Method:
- You can do this by hand, with a pastry cutter. That’s the old school way.
- I love using a food processor because it’s easy!
- Don’t forget to chill it! You have to chill a crust with shortening for a long time because it’s not 100% solid at room temperature.
- I like to roll out my crust between two sheets of wax paper and put it in the pie plate, then chill it.
Special Equipment:
- 9” pie plates
- Rolling Pin
- Pastry Cutter
- Roul’Pat or other silicone surface for rolling
- Food Processor if you want to go that route.
- Wax Paper to make it easier to roll out your crust without chilling first.
- Foil or Pie Crust Shield for protecting the edges of your crust during baking.
Butter Shortening Pie Crust
Ingredients
- 1 1/4 cups all-purpose flour
- 1/4 teaspoon salt
- 1/4 cup cold unsalted butter, diced
- 1/4 cup cold vegetable shortening
- 1-3 tablespoons ice water
Instructions
Food Processor Directions:
- Place flour and salt in the bowl of a food processor. Pulse once to combine.
- Add the butter and shortening and pulse a few times to work them throughout the flour.
- Add 1 tablespoon of water and run the food processor until the dough comes together, adding more water as needed. (I always use 2 tablespoons.)
- Turn out dough onto a sheet of wax paper and form it into a disk. Top with another sheet of wax paper and roll into a circle that’s about 12” diameter and 1/4” thick. Lift wax paper from the top to loosen, then replace and carefully flip the crust and do the same with the bottom wax paper.
- Carefully transfer the crust to your pie plate and crimp edges as desired. Chill until ready to use.
By Hand Directions:
- Place flour and salt in a large bowl, whisk to combine.
- Add the butter and shortening and work it into the flour using a pastry cutter or two forks until the mixture resembles small peas.
- Add 1 tablespoon of water and continue working the dough until it comes together, adding more water as needed.
- Turn out dough onto a sheet of wax paper and form it into a disk. Top with another sheet of wax paper and roll into a circle that’s about 12” diameter and 1/4” thick. Lift wax paper from the top to loosen, then replace and carefully flip the crust and do the same with the bottom wax paper.
- Carefully transfer the crust to your pie plate and crimp edges as desired. Chill until ready to use.
- For a baked pie: fill according to pie directions and bake as directed.
- For a filled pie: poke the bottom and sides of very cold crust with the tines of a fork several times. Bake at 400°F for 11-14 minutes until cooked through and slightly golden brown.
- For a double crust or lattice pie: double the recipe, splitting the dough ball in two before rolling it out. Chill the top layer for about 10-15 minutes or until it’s firm but still workable before adding it to the top of the pie.
Modify with AI
Nutrition
Nutrition information is automatically calculated, so should only be used as an approximation.
© Crazy for Crust. Content and photographs are copyrighted. Sharing this post is much appreciated, but copying and pasting full recipes without authorization is strictly prohibited.
Did you try this recipe? Click here to rate the recipe below.
I haven’t tried your recipe yet but I am planning on making pie crusts for individual Chicken Pot Pies tomorrow. I want to make a top and bottom crust. I’ll need several double pie crust recipes. Can I just double or triple your recipe or should I do the mixing several times? The most I’ve ever done was make a double pie crust recipe. Thanks for your reply.
Chris
You can double or triple it – it just depends on how big your food processor is. I have a 12-cup and I’ve tripled it in that, but any smaller and I’d say double.
Thank you for such an easy recipe. I especially liked your easy explanation of the recipe. Any recipe of yours has turned out great. Will definitely be enjoying more of them.Your fan in Àrnold, Missouri!
Featured In
Rate This Recipe
Recipe Ratings without Comment